
Subscribe to Our Youtube Channel
Related Manuals for Svan SVK5502EVB


Summary of Contents for Svan SVK5502EVB
- Page 1 FREE STANDING OVEN 50x55 / 50x60 / 60x60 Electrical oven Forno elétrico USER MANUAL MANUAL DO UTILIZADOR...
- Page 2 Dear User, Our objective is to make this product provide you with the best output which is manufactured in our modern facilities in a careful working environment, in compliance with total quality concept. Therefore, we suggest you to read the user manual carefully before using the product and, keep it permanently at your disposal.
-
Page 3: Table Of Contents
Contents Important warnings Methods for protecting ceramic glass cooking surface Electrical connection Introduction of the appliance Accessories Technical features of your oven Installation of your oven Chain lashing illustration Control panel Using oven section Using the grill Using the chicken roasting Using cooker section Program types Cooking time table... -
Page 4: Important Warnings
IMPORTANT WARNINGS 1. Installation and repair should always be performed by “AUTHORIZED SERVICE”. Manufacturer shall not be held responsible for operations performed by unauthorized persons. 2. Please read this operating instructions carefully. Only by this way you can use the appliance safely and in a correct manner. - Page 5 12. Ensure that the oven door is completely closed after putting food inside the oven. 13. NEVER try to put out the fire with water. Only shut down the device circuit and then cover the flame with a cover or a fire blanket. 14.
- Page 6 22. Keep the ventilation channels open. 23. The appliance is not suitable for use with an external timer or a separate remote control system. 24. Do not heat closed cans and glass jars. The pressure may lead jars to explode. 25.
- Page 7 34. Do not put objects that children may reach on the appliance. 35. It is important to place the wire grill and tray properly on the wire racks and/or correctly place the tray on the rack. Place the grill or tray between two rails and make sure it is balanced before putting food on it.
- Page 8 42. User should not handle the oven by himself. 43. Food can spill when foot of oven is dismantled or gets broken, be careful. It may cause personal injuries. 44. During usage, the internal and external surfaces of the oven get hot. As you open the oven door, step back to avoid the hot vapour coming out from the interior.
- Page 9 52To prevent overheating, the appliance should not be installed behind of a decorative cover. 53. Turn off the appliance before removing the safeguards. After cleaning, install the safeguards according to instructions. 54. Cable fixing point shall be protected. 55. Please don’t cook the food directly on the tray / grid.
- Page 10 Electrical Safety 1. Have an authorized electrician set grounding equipment. Our company shall not be responsible for the damages that shall be incurred due to using the product without grounding according to local regulations. 2. The circuit breaker switches of the oven shall be placed so that end user can reach them when the oven is installed.
- Page 11 10. The rear surface of the oven also heats up when the oven is operated. Electrical connections shall not touch the rear surface, otherwise the connections may be damaged. 11. Do not tighten the connecting cables to the oven door and do not run them over hot surfaces. If the cord melts, this may cause the oven to short circuit and even a fire.
- Page 12 Intended Use 1. This product has been designed for domestic use. Commercial use is not permitted. 2. This appliance may only be used for cooking purposes. It shall not be used for other purposes like heating a room. 3. This appliance shall not be used to heat plates under the grill, drying clothes or towels by hanging them on the handle or for heating purposes.
-
Page 13: Methods For Protecting Ceramic Glass Cooking Surface
Methods for Protecting Ceramic Glass Cooking Surface Ceramic glass surface is unbreakable and scratch resistant to a certain degree. However, to avoid any damage, please do the following: 1. Never pour cold water on hot cookers. 2. Do not stand on a ceramic glass plate. 3. -
Page 14: Electrical Connection
Electrical Connection 1. Your oven requires 40 Amp fuse for mono phase or 3x16 Amp fuse for 3 phase supply according to electrical power for cooker section has 4 ceramic heater and oven section has electric models. Installation by a qualified electrician is mandatory. -
Page 15: Introduction Of The Appliance
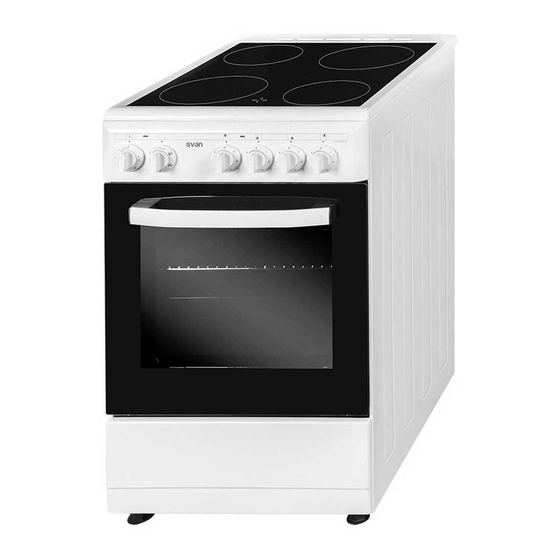
INTRODUCTION OF THE APPLIANCE 1. Glass top plate 8.1. Drawer 2. Thermostat knob 8.2. Flap door 3. Command knob for oven 9. Lamp 4. Regulators for vitroceramic hobs 10. Grill 5. Oven door 11. Ceramic heater (140 mm / 250 mm) 6. -
Page 16: Accessories
Accesories Deep tray * Used for pastry, big roasts, watery foods. It can also be used as oil collecting container if you roast directly on grill with cake, frozen foods and meat dishes. Tray / Glass tray * Used for pastry (cookie, biscuit etc.), frozen foods. Circular tray * Used for pastry frozen foods. -
Page 17: Technical Features Of Your Oven
Technical features of your oven Specifications 50x55 50x60 60x60 Outer width 500 mm 500 mm 600 mm Outer depth 565 mm 630 mm 630 mm Outer height 855 mm 855 mm 855 mm Lamp power 15-25 W Bottom heating element 1000 W 1000 W 1200 W... -
Page 18: Installation Of Your Oven
INSTALLATION OF YOUR OVEN Check if the electrical installation is proper to bring the appliance in operating condition. If electricity installation is not suitable, call an electrician and plumber to arrange the utilities as necessary. Manufacturer shall not be held responsible for damages caused by operations performed by unauthorized persons. - Page 19 65 mm min. 65 mm min. WARNING: The kitchen furniture near the appliance must be heat resistant. WARNING: Do not install the appliance beside refrigerators or coolers. Heat radiated by the appliance increases the energy consumption of cooling devices. WARNING: Do not use the door and/or handle to carry or move the appliance.
-
Page 20: Chain Lashing Illustration
Chain lashing illustration Before using the appliance, in order to ensure safe use, be sure to fix the appliance to the wall using thechain and hooked screw supplied. Ensure that the hook is screwed into the wall securely. CONTROL PANEL 1. -
Page 21: Using Oven Section
Mechanical timer*: Used for determining the period for cooking in the oven. When adjusted time is expired, power to heaters is turned off and an audible warnig signal is emitted. Mechanical timer can be adjusted to desired period between 0-90 minutes. For cooking periods, see cooking tables. -
Page 22: Using The Grill
Using The Grill 1. When you place the grill on the top rack, the food on the grill shall not touch the grill. 2. You can preheat for 5 minutes while grilling. If necessary, you may turn the food upside down. 3. -
Page 23: Using Cooker Section
Using Cooker Section Using And Description Of Hob Section For Vitroceramic Level Level Level Level Level Level Level Level Level Max. 140 mm 1200 Commutator 180 mm 1230 1700 Commutator 180 mm 1800 1800 1800 1800 1800 1800 1800 1800 1800 Regulator 1000... - Page 24 Using Hot Plates Level 1 Level 2 Level 3 Level 4 Level 5 Level 6 80 mm 200 W 250 W 450 W 145 mm 250 W 750 W 1000 W 180 mm 500 W 750 W 1500 W 145 mm rapid 500 W 1000 W 1500 W...
-
Page 25: Program Types
PROGRAM TYPES Function Button: Used for determining the heaters to be used for cooking the dish to be cooked in the oven. Heater program types in this button and their functions are described below. All heater types and program types consisting of these heaters may not be available at all models. -
Page 26: Cooking Time Table
COOKING TIME TABLE WARNING: Oven must be preheated for 10 minutes before placing the food in it. Cooking Temperature Rack Cooking Foods Function (°C) Position Duration (min.) Cake (Tray / Mold) Static / Static+fan 170-180 35-45 Small cakes Static / Turbo+fan 170-180 25-30 Patty... -
Page 27: Maintenance And Cleaning
MAINTENANCE AND CLEANING 1. While oven is operating or shortly after it starts operating, it is extremely hot. You must avoid touching from heating elements. 2. Never clean the interior part, panel, lid, trays and all other parts of the oven by the tools like hard brush, cleaning mesh or knife. Do not use abrasive, scratching agents and detergents. -
Page 28: Installation Of The Oven Door
Installation Of The Oven Door Figure 2 Figure 3 Figure 2.1 Figure 2.2 Figure 3.1 Figure 3.2 Completely open Bring the hinge Afterwards, close To remove the the oven door by lock to the widest the oven door as to oven door, pull it pulling it to your- angle as shown in... -
Page 29: Cleaning And Maintenance Of The Oven's Front Door Glass
Cleaning And Maintenance Of The Oven’s Front Door Glass Remove the profile by pressing the plastic latches on both left and right sides as shown in figure 4 and pulling the profile towards yourself as shown in figure 5. Then remove the inner-glass as shown in figure 6. If required, middle glass can be removed in the same way. -
Page 30: Changing The Oven Lamp
Rack Positions It is important to place the wire grill into the oven properly. Do not allow wire rack to Rack 4 touch rear wall of the oven. Rack positions Rack 3 are shown in the next figure. You may place Rack 2 a deep tray or a standard tray in the lower Rack 1... -
Page 31: Using The Grill Deflector Sheet
Using The Grill Deflector Sheet * 1. A safety panel is designed to protect control panel and the buttons when the oven is in grill mode. (figure 10) 2. Please use this safety panel in order to avoid the heat to damage control panel and the buttons when the oven is grill mode. -
Page 32: Troubleshooting
TROUBLESHOOTING You may solve the problems you may encounter with your product by checking the following points before calling the technical service. Check Points In case you experience a problem about the oven, first check the table below and try out the suggestions. Problem Possible Cause What to Do... - Page 33 Problem Possible Cause What to Do Plastic or other not heat resistant When operating the oven burnt or At high temperatures, use suitable accessories are being used inside plastic odour coming out. glassware accessories. the oven. Oven door is open. Close the door and restart.
-
Page 34: Handling Rules
HANDLING RULES 1. Do not use the door and/or handle to carry or move the appliance. 2. Carry out the movement and transportation in the original packaging. 3. Pay maximum attention to the appliance while loading/unloading and handling. 4. Make sure that the packaging is securely closed during handling and transportation. -
Page 35: Environmentally-Friendly Disposal
ENVIRONMENTALLY-FRIENDLY DISPOSAL Dispose of packaging in an environmentally-friendly manner. This appliance is labelled in accordance with European Directive 2012/19/EU concerning used electrical and electronic appliances (waste electrical and electronic equipment - WEEE). The guideline determines the frame work for the return and recycling of used appliances as applicable throughout to the EU. - Page 36 Caro Utilizador, O nosso objetivo é fazer com que este produto lhe forneça o melhor do que é fabricado nas nossas modernas instalações num ambiente de trabalho minucioso, em conformidade com o conceito de qualidade total. Portanto, sugerimos que antes de usar o produto leia o manual do utilizador com atenção e que o mantenha permanentemente à...
- Page 37 Conteúdo Advertências importantes Métodos para proteção da superfície de cozedura em vidro cerâmico Ligação elétrica Apresentação do aparelho Acessórios Funções técnicas do seu forno Instalação do seu forno Ilustração da fixação da corrente Painel de controlo Usar a secção do forno Usar o grelhador Usar o assador de frango Usar a secção do fogão...
-
Page 38: Advertências Importantes
ADVERTÊNCIAS IMPORTANTES 1. A instalação e reparação devem ser sempre realizadas por “ASSISTÊNCIA AUTORIZADA”. O fabricante não será responsável pelas operações realizadas por pessoas não autorizadas. 2. Deve ler cuidadosamente estas instruções de funcionamento. Apenas desta forma pode usar o aparelho em segurança e de forma correta. - Page 39 11. Não usar aparelhos de limpeza a vapor para limpar o aparelho. 12. Assegurar que a porta do forno está completamente fechada depois de colocar os alimentos dentro do forno. 13. NUNCA tentar apagar o fogo com água. Desligar apenas o circuito do dispositivo e cobrir a chama com uma cobertura ou uma manta corta-fogo.
- Page 40 21. Colocar as cortinas, tules, papel ou qualquer material inflamável (comburente) longe do aparelho antes de começar a usar o aparelho. Não colocar materiais comburentes ou inflamáveis sobre ou no interior do aparelho. 22. Manter os canais de ventilação abertos. 23.
- Page 41 31. Se o aparelho estiver defeituoso ou apresentar danos visíveis, não utilizar o aparelho. 32. Não usar o aparelho com o vidro da porta da frente retirado ou partido. 33. Colocar o papel vegetal junto com o alimento num forno pré-aquecido, colocando-o dentro de uma panela ou num acessório de forno (tabuleiro, grelha de arame, etc.).
- Page 42 39. Os materiais de embalagem são perigosos para as crianças. Manter o material de embalagem afastado do alcance das crianças. 40. Não usar produtos de limpeza abrasivos ou raspadores metálicos afiados para limpar o vidro, pois os arranhões que podem ocorrer na superfície do vidro da porta podem provocar a quebra do vidro.
- Page 43 48. O utilizador não deve deslocar a resistência durante a limpeza. Isso pode provocar um choque elétrico. 49. Não retirar os interruptores de ignição do aparelho. Caso contrário, pode haver acesso a cabos elétricos ao vivo. Isso pode provocar um choque elétrico. 50.
- Page 44 Segurança elétrica 1. Pedir a um eletricista autorizado o equipamento de ligação à terra. A nossa empresa não será responsável pelos danos que serão incorridos devido ao uso do produto sem ligação à terra de acordo com os regulamentos locais. 2.
- Page 45 10. A superfície traseira do forno também aquece quando o forno está a funcionar. As ligações elétricas não devem tocar na superfície traseira, caso contrário as ligações podem ficar danificadas. 11. Não apertar os cabos de ligação à porta do forno e não os colocar sobre superfícies quentes.
- Page 46 Utilização prevista 1. Este produto é concebido para utilização doméstica. Não é permitido o uso comercial do aparelho. 2. Este aparelho apenas deve ser usado para fins culinários. Não deve ser usado para outros fins como para aquecer uma sala. 3.
-
Page 47: Métodos Para Proteção Da Superfície De Cozedura Em Vidro Cerâmico
Métodos para proteção da superfície de cozedura em vidro cerâmico A superfície de vidro cerâmico é inquebrável e em certa medida resistente aos riscos. No entanto, para evitar quaisquer danos, deve fazer o seguinte: 1. Nunca verter água fria sobre os queimadores quentes. 2. -
Page 48: Ligação Elétrica
Ligação Elétrica 1. O seu forno necessita de 40 amperes de acordo com a potência do aparelho. Se necessário, é recomendada a instalação por um eletricista qualificado. 2. O seu forno está ajustado de acordo com a alimentação elétrica de 220-240V CA/380-415V CA 50/60Hz. -
Page 49: Apresentação Do Aparelho
APRESENTAÇÃO DO APARELHO 1. Placa de topo em vidro 8.2. Porta basculante 2. Botão do termostato 9. Lâmpada 3. Botão de comando para o forno 10. Grelhador 4. Reguladores para as placas vitrocerâmicas 11. Queimador cerâmico (140 mm / 250 mm) 5. -
Page 50: Acessórios
Acessórios Tabuleiro fundo * Utilizado para produtos de pastelaria, grandes assados, alimentos cozidos com água. Também pode ser utilizado como recipiente de recolha de óleo se assar diretamente no grelhador bolos, alimentos congelados e pratos de carne. Tabuleiro / Tabuleiro vidro * Utilizado para produtos de pastelaria (bolachas, biscoitos, etc), alimentos congelados. -
Page 51: Funções Técnicas Do Seu Forno
Funções Técnicas Do Seu Forno Especificações 50x55 50x60 60x60 Largura exterior 500 mm 500 mm 600 mm Profundidade exterior 565 mm 630 mm 630 mm Altura exterior 855 mm 855 mm 855 mm Potência da lâmpada 15-25 W Elemento de aquecimento inferior 1000 W 1000 W 1200 W... -
Page 52: Instalação Do Seu Forno
INSTALAÇÃO DO SEU FORNO Verificar se a instalação elétrica é adequada para colocar o aparelho em condições de funcionamento. Se a instalação elétrica não for adequada, contactar um eletricista e um canalizador para fazer as adequações necessárias. O fabricante não será responsável por danos caudados por operações realizadas por pessoas não autorizadas. - Page 53 65 mm mín. 65 mm mín. ADVERTÊNCIA: O mobiliário de cozinha perto do aparelho deve ser resistente ao calor. ADVERTÊNCIA: Não instale o aparelho ao lado de frigoríficos ou refrigeradores. O calor irradiado pelo aparelho aumenta o consumo de energia dos dispositivos de refrigeração.
-
Page 54: Ilustração Da Fixação Da Corrente
Ilustração Da Fixação Da Corrente Antes de utilizar o aparelho, a fim de garantir uma utilização segura, certifique-se deque fixou o aparelho à parede usando a corrente e o parafuso em gancho que são fornecidos. Certifique-se de que o gancho é aparafusado à... -
Page 55: Usar A Secção Do Forno
Temporizador mecânico*: Usado para determinar o período para cozinhar no forno. Quando o tempo ajustado terminar, a energia dos aquecedores é desligada e é emitido um sinal sonoro de aviso. O temporizador mecânico pode ser ajustado para o período pretendido entre 0-90 minutos. Para os períodos de cozedura, consultar as tabelas de cozedura. -
Page 56: Usar O Grelhador
Usar O Grelhador 1. Quando colocar a grelha na prateleira superior, os alimentos na grelha não devem tocar na grelha. 2. Pode pré-aquecer durante 5 minutos enquanto grelhar. Se necessário, pode voltar os alimentos ao contrário. 3. Os alimentos devem estar no centro da grelha para fornecerem um fluxo máximo de ar através do forno. -
Page 57: Usar A Secção Do Fogão
Usar A Secção Do Fogão Usando e descrição de seção job for vitrocerâmica Nível Nível Nível Nível Nível Nível Nível Nível Nível Max. 140 mm 1200 Comutador 180 mm 1230 1700 Comutador 180 mm 1800 1800 1800 1800 1800 1800 1800 1800 1800... - Page 58 Usar Placas De Aquecimento Nível 1 Nível 2 Nível 3 Nível 4 Nível 5 Nível 6 80 mm 200 W 250 W 450 W 145 mm 250 W 750 W 1000 W 180 mm 500 W 750 W 1500 W 145 mm rápido 500 W 1000 W...
-
Page 59: Tipos De Programa
TIPOS DE PROGRAMA Botão de função: Usado para determinar os aquecedores que serão usados para cozinhar o prato a ser cozinhado no forno. Os tipos de programa do aquecedor neste botão e as suas funções são descritos abaixo. Todos os tipos de aquecedores e tipos de programa compostos por esses aquecedores podem não estar disponíveis em todos os modelos. -
Page 60: Tabela De Tempo De Cozedura
TABELA DE TEMPO DE COZEDURA AVISO: O forno deve ser pré-aquecido por 10 minutos antes de se introduzir o alimento. Função De Temperatura Posição Da Tempo Refeições Cozedura (°C) Prateleira (Min.) Bolo Estático / Estático+Ventilador 170-180 35-45 Pequenos bolos Estático/ Turbo+Ventilador 170-180 25-30 Empada... -
Page 61: Manutenção E Limpeza
MANUTENÇÃO E LIMPEZA 1. Enquanto o forno estiver a funcionar ou pouco depois de começar a funcionar, fica extremamente quente. Deve evitar tocar nos elementos de aquecimento. 2. Nunca limpar a parte interior, o painel, a tampa, os tabuleiros e todas as outras partes do forno com ferramentas como escova dura, malha de limpeza ou faca. -
Page 62: Montagem Da Porta Do Forno
Montagem Da Porta Do Forno Figura 2 Figura 3 Figura 2.1 Figura 2.2 Figura 3.1 Figura 3.2 Puxe a porta do Rode a fechadura em Em seguida, feche Para remover a porta forno para si e abra dobradiça para o seu a porta do forno do forno, puxe a porta a completamente. -
Page 63: Limpeza E Manutenção Da Porta De Vidro Na
Limpeza E Manutenção Da Porta De Vidro Na Frente Do Forno Remova o perfil pressionando as patilhas de plástico dos lados esquerdo e direito,como mostra a figura 4 e puxando o perfil para si, como pode ver na figura 5. Em seguida,retire o vidro interior conforme se vê na figura 6. Se necessário, o vidro do meiopode ser removido da mesma forma. -
Page 64: Posições Da Grelha
Posições Da Grelha É importante colocar corretamente a gre- lha de arame no forno. Não permitir que a grelha entre em contacto com a parede Prateleira 4 traseira do forno. As posições da grelha são Prateleira 3 mostradas na figura seguinte. Pode colocar Prateleira 2 um tabuleiro fundo ou um tabuleiro normal Prateleira 1... -
Page 65: Usar A Chapa Defletora Do Grelhador
Usar A Chapa Defletora Do Grelhador * 1. Um painel de segurança é projetado para proteger o painel de controlo e os botões quando o forno estiver no modo de grelhador. (figura 10) 2. Deve usar este painel de segurança para evitar que o calor danifique o painel de controlo e os botões quando o forno estiver no modo de grelhador. -
Page 66: Resolução De Problemas
RESOLUÇÃO DE PROBLEMAS Pode resolver os problemas que pode encontrar no seu produto verificando os seguintes pontos antes de chamar a assistência técnica. Pontos de verificação Caso tenha algum problema com o forno, verificar primeiro a tabela abaixo e experimentar as sugestões. Problema Causa Possível O que fazer... - Page 67 Problema Causa Possível O que fazer Quando o forno está em funciona- Estão a ser usados dentro do forno Com temperaturas elevadas, uti- mento sai cheiro a queimado ou a acessórios de plástico ou outros lizar os acessórios em vidro ade- plástico não resistentes ao calor.
-
Page 68: Regras De Manuseamento
REGRAS DE MANUSEAMENTO 1. Não usar a porta e/ou a pega para transportar ou mover o aparelho. 2. Realizar a movimentação e transporte na embalagem original. 3. Prestar muita atenção ao aparelho durante o carregamento/ descarregamento e manuseio. 4. Assegurar que a embalagem está firmemente fechada durante o manuseio e transporte. -
Page 69: Eliminação Amiga Do Ambiente
ELIMINAÇÃO AMIGA DO AMBIENTE Elimine a embalagem em condições amigas do ambiente Este aparelho está etiquetado de acordo com a Diretiva Europeia 2012/19/UE relativa a aparelhos elétricos e eletrónicos usados (Resíduos de Equipamentos Elétricos e eletrónicos REEE). As orientações determinam o enquadramento para a devolução e reciclagem de apa- relhos elétricos aplicável em toda a UE.
Need help?
Do you have a question about the SVK5502EVB and is the answer not in the manual?
Questions and answers