
Subscribe to Our Youtube Channel
Related Manuals for Svan SVK5502EVB


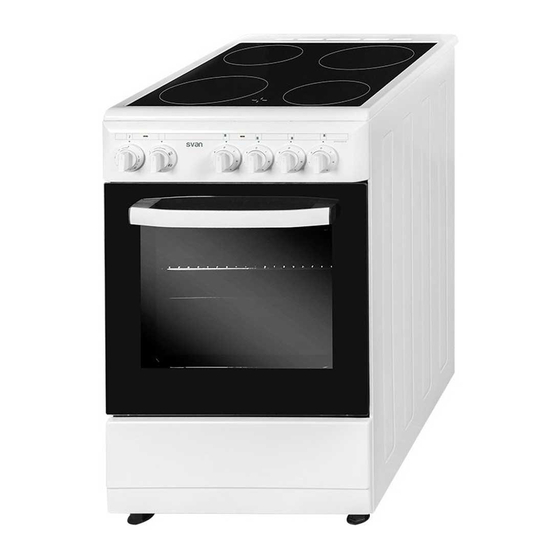
Summary of Contents for Svan SVK5502EVB
- Page 1 FREE STANDING OVEN 50x55 / 50x60 / 60x60 Electrical oven Hornos eléctricos USER MANUAL MANUAL DEL USUARIO...
- Page 2 Dear User, Our objective is to make this product provide you with the best output which is manufactured in our modern facilities in a careful working environment, in compliance with total quality concept. Therefore, we suggest you to read the user manual carefully before using the product and, keep it permanently at your disposal.
-
Page 3: Table Of Contents
Contents Important warnings Methods for protecting ceramic glass cooking surface Electrical connection Introduction of the appliance Accessories Technical features of your oven Installation of your oven Chain lashing illustration Control panel Using oven section Using the grill Using the chicken roasting Using cooker section Program types Cooking time table... -
Page 4: Important Warnings
IMPORTANT WARNINGS 1. Installation and repair should always be performed by “AUTHORIZED SERVICE”. Manufacturer shall not be held responsible for operations performed by unauthorized persons. 2. Please read this operating instructions carefully. Only by this way you can use the appliance safely and in a correct manner. - Page 5 12. Ensure that the oven door is completely closed after putting food inside the oven. 13. NEVER try to put out the fire with water. Only shut down the device circuit and then cover the flame with a cover or a fire blanket. 14.
- Page 6 22. Keep the ventilation channels open. 23. The appliance is not suitable for use with an external timer or a separate remote control system. 24. Do not heat closed cans and glass jars. The pressure may lead jars to explode. 25.
- Page 7 34. Do not put objects that children may reach on the appliance. 35. It is important to place the wire grill and tray properly on the wire racks and/or correctly place the tray on the rack. Place the grill or tray between two rails and make sure it is balanced before putting food on it.
- Page 8 42. User should not handle the oven by himself. 43. Food can spill when foot of oven is dismantled or gets broken, be careful. It may cause personal injuries. 44. During usage, the internal and external surfaces of the oven get hot. As you open the oven door, step back to avoid the hot vapour coming out from the interior.
- Page 9 52To prevent overheating, the appliance should not be installed behind of a decorative cover. 53. Turn off the appliance before removing the safeguards. After cleaning, install the safeguards according to instructions. 54. Cable fixing point shall be protected. 55. Please don’t cook the food directly on the tray / grid.
- Page 10 Electrical Safety 1. Have an authorized electrician set grounding equipment. Our company shall not be responsible for the damages that shall be incurred due to using the product without grounding according to local regulations. 2. The circuit breaker switches of the oven shall be placed so that end user can reach them when the oven is installed.
- Page 11 10. The rear surface of the oven also heats up when the oven is operated. Electrical connections shall not touch the rear surface, otherwise the connections may be damaged. 11. Do not tighten the connecting cables to the oven door and do not run them over hot surfaces. If the cord melts, this may cause the oven to short circuit and even a fire.
- Page 12 Intended Use 1. This product has been designed for domestic use. Commercial use is not permitted. 2. This appliance may only be used for cooking purposes. It shall not be used for other purposes like heating a room. 3. This appliance shall not be used to heat plates under the grill, drying clothes or towels by hanging them on the handle or for heating purposes.
-
Page 13: Methods For Protecting Ceramic Glass Cooking Surface
Methods for Protecting Ceramic Glass Cooking Surface Ceramic glass surface is unbreakable and scratch resistant to a certain degree. However, to avoid any damage, please do the following: 1. Never pour cold water on hot cookers. 2. Do not stand on a ceramic glass plate. 3. -
Page 14: Electrical Connection
Electrical Connection 1. Your oven requires 40 Amp fuse for mono phase or 3x16 Amp fuse for 3 phase supply according to electrical power for cooker section has 4 ceramic heater and oven section has electric models. Installation by a qualified electrician is mandatory. -
Page 15: Introduction Of The Appliance
INTRODUCTION OF THE APPLIANCE 1. Glass top plate 8.1. Drawer 2. Thermostat knob 8.2. Flap door 3. Command knob for oven 9. Lamp 4. Regulators for vitroceramic hobs 10. Grill 5. Oven door 11. Ceramic heater (140 mm / 250 mm) 6. -
Page 16: Accessories
Accesories Deep tray * Used for pastry, big roasts, watery foods. It can also be used as oil collecting container if you roast directly on grill with cake, frozen foods and meat dishes. Tray / Glass tray * Used for pastry (cookie, biscuit etc.), frozen foods. Circular tray * Used for pastry frozen foods. -
Page 17: Technical Features Of Your Oven
Technical features of your oven Specifications 50x55 50x60 60x60 Outer width 500 mm 500 mm 600 mm Outer depth 565 mm 630 mm 630 mm Outer height 855 mm 855 mm 855 mm Lamp power 15-25 W Bottom heating element 1000 W 1000 W 1200 W... -
Page 18: Installation Of Your Oven
INSTALLATION OF YOUR OVEN Check if the electrical installation is proper to bring the appliance in operating condition. If electricity installation is not suitable, call an electrician and plumber to arrange the utilities as necessary. Manufacturer shall not be held responsible for damages caused by operations performed by unauthorized persons. - Page 19 65 mm min. 65 mm min. WARNING: The kitchen furniture near the appliance must be heat resistant. WARNING: Do not install the appliance beside refrigerators or coolers. Heat radiated by the appliance increases the energy consumption of cooling devices. WARNING: Do not use the door and/or handle to carry or move the appliance.
-
Page 20: Chain Lashing Illustration
Chain lashing illustration Before using the appliance, in order to ensure safe use, be sure to fix the appliance to the wall using thechain and hooked screw supplied. Ensure that the hook is screwed into the wall securely. CONTROL PANEL 1. -
Page 21: Using Oven Section
Mechanical timer*: Used for determining the period for cooking in the oven. When adjusted time is expired, power to heaters is turned off and an audible warnig signal is emitted. Mechanical timer can be adjusted to desired period between 0-90 minutes. For cooking periods, see cooking tables. -
Page 22: Using The Grill
Using The Grill 1. When you place the grill on the top rack, the food on the grill shall not touch the grill. 2. You can preheat for 5 minutes while grilling. If necessary, you may turn the food upside down. 3. -
Page 23: Using Cooker Section
Using Cooker Section Using And Description Of Hob Section For Vitroceramic Level Level Level Level Level Level Level Level Level Max. 140 mm 1200 Commutator 180 mm 1230 1700 Commutator 180 mm 1800 1800 1800 1800 1800 1800 1800 1800 1800 Regulator 1000... - Page 24 Using Hot Plates Level 1 Level 2 Level 3 Level 4 Level 5 Level 6 80 mm 200 W 250 W 450 W 145 mm 250 W 750 W 1000 W 180 mm 500 W 750 W 1500 W 145 mm rapid 500 W 1000 W 1500 W...
-
Page 25: Program Types
PROGRAM TYPES Function Button: Used for determining the heaters to be used for cooking the dish to be cooked in the oven. Heater program types in this button and their functions are described below. All heater types and program types consisting of these heaters may not be available at all models. -
Page 26: Cooking Time Table
COOKING TIME TABLE WARNING: Oven must be preheated for 10 minutes before placing the food in it. Cooking Temperature Rack Cooking Foods Function (°C) Position Duration (min.) Cake (Tray / Mold) Static / Static+fan 170-180 35-45 Small cakes Static / Turbo+fan 170-180 25-30 Patty... -
Page 27: Maintenance And Cleaning
MAINTENANCE AND CLEANING 1. While oven is operating or shortly after it starts operating, it is extremely hot. You must avoid touching from heating elements. 2. Never clean the interior part, panel, lid, trays and all other parts of the oven by the tools like hard brush, cleaning mesh or knife. Do not use abrasive, scratching agents and detergents. -
Page 28: Installation Of The Oven Door
Installation Of The Oven Door Figure 2 Figure 3 Figure 2.1 Figure 2.2 Figure 3.1 Figure 3.2 Completely open Bring the hinge Afterwards, close To remove the the oven door by lock to the widest the oven door as to oven door, pull it pulling it to your- angle as shown in... -
Page 29: Cleaning And Maintenance Of The Oven's Front Door Glass
Cleaning And Maintenance Of The Oven’s Front Door Glass Remove the profile by pressing the plastic latches on both left and right sides as shown in figure 4 and pulling the profile towards yourself as shown in figure 5. Then remove the inner-glass as shown in figure 6. If required, middle glass can be removed in the same way. -
Page 30: Changing The Oven Lamp
Rack Positions It is important to place the wire grill into the oven properly. Do not allow wire rack to Rack 4 touch rear wall of the oven. Rack positions Rack 3 are shown in the next figure. You may place Rack 2 a deep tray or a standard tray in the lower Rack 1... -
Page 31: Using The Grill Deflector Sheet
Using The Grill Deflector Sheet * 1. A safety panel is designed to protect control panel and the buttons when the oven is in grill mode. (figure 10) 2. Please use this safety panel in order to avoid the heat to damage control panel and the buttons when the oven is grill mode. -
Page 32: Troubleshooting
TROUBLESHOOTING You may solve the problems you may encounter with your product by checking the following points before calling the technical service. Check Points In case you experience a problem about the oven, first check the table below and try out the suggestions. Problem Possible Cause What to Do... - Page 33 Problem Possible Cause What to Do Plastic or other not heat resistant When operating the oven burnt or At high temperatures, use suitable accessories are being used inside plastic odour coming out. glassware accessories. the oven. Oven door is open. Close the door and restart.
-
Page 34: Handling Rules
HANDLING RULES 1. Do not use the door and/or handle to carry or move the appliance. 2. Carry out the movement and transportation in the original packaging. 3. Pay maximum attention to the appliance while loading/unloading and handling. 4. Make sure that the packaging is securely closed during handling and transportation. -
Page 35: Environmentally-Friendly Disposal
ENVIRONMENTALLY-FRIENDLY DISPOSAL Dispose of packaging in an environmentally-friendly manner. This appliance is labelled in accordance with European Directive 2012/19/EU concerning used electrical and electronic appliances (waste electrical and electronic equipment - WEEE). The guideline determines the frame work for the return and recycling of used appliances as applicable throughout to the EU. - Page 36 Estimados Usuarios, Nuestro objetivo es hacer que este producto le proporcione el mejor resultado. Este producto se fabrica en nuestras instalaciones, modernas, con un entorno de trabajo cuidadoso y en conformidad con el concepto de calidad total. Por lo tanto, le sugerimos que lea el manual del usuario detenidamente antes de usar el producto y que lo tenga permanentemente a su disposición.
- Page 37 Contenido Advertencias importantes Formas de proteger la superficie cerámica de cocción Conexión eléctrica Introducción al uso del aparato Accesorios Características técnicas de su horno Instalación del horno Ilustración de amarre de cadena Panel de mandos Uso del horno Uso de la parrilla Uso del asador de pollo Uso de la sección de la estufa Tipos de programas...
-
Page 38: Advertencias Importantes
ADVERTENCIAS IMPORTANTES 1. La instalación y la reparación siempre deben ser realizadas por el “SERVICIO AUTORIZADO”. El fabricante no se hace responsable de las operaciones realizadas por personas no autorizadas. 2. Lea atentamente estas instrucciones de funcionamiento. Solo de esta manera puede usar el dispositivo de forma segura y correcta. - Page 39 11. Para limpiar el aparato, no use limpiadores de vapor. 12. Asegúrese de que la puerta del horno esté com- pletamente cerrada después de colocar los alimentos dentro del horno. 13. NO TRATE NUNCA de apagar el fuego con agua. Solo apague el circuito del dispositivo y luego cubra la llama con una cubierta o una manta ignífuga.
- Page 40 21. Coloque cortinas, tul, papel o cualquier material inflamable (inflamable) lejos del aparato antes de comenzar a usarlo. No coloque materiales inflamables encima o dentro del aparato. 22. Mantenga abiertos los canales de ventilación. 23. El aparato no es adecuado para su uso con un temporizador externo o un sistema de control remoto por separado.
- Page 41 32. No use el aparato con el cristal de la puerta frontal retirado o roto. 33. Coloque el papel de hornear junto con la comida en un horno precalentado poniéndolo dentro de una olla o en un accesorio de horno (bandeja, parrilla de alambre, etc.).
- Page 42 40. No utilice limpiadores abrasivos ni raspadores metálicos afilados para limpiar el cristal, ya que los arañazos que pueden ocurrir en la superficie del cristal de la puerta pueden hacer que el cristal se rompa. 41. No golpee las superficies de vidrio de las hornillas de vitrocerámica con un metal duro, la resistencia podría dañarse.
- Page 43 49. No quite los interruptores de encendido del aparato. De lo contrario, se puede acceder a los cables eléctricos vivos. Puede causar una descarga eléctrica. 50. El suministro del horno se puede desconectar durante cualquier trabajo de construcción en el hogar. Después de completar el trabajo, vuelva a conectar el horno debe ser hecho por un servicio autorizado.
- Page 44 Seguridad eléctrica 1. Haga que un electricista autorizado instale un equipo de puesta a tierra. Nuestra empresa no será responsable por los daños que se incurrirán debido al uso del producto sin conexión a tierra de acuerdo con las reglamentaciones locales.
- Page 45 9. No use cables cortados o dañados o cables de ex- tensión que no sean el cable original. 10. La superficie posterior del horno también se calienta cuando se opera el horno. Las conexiones eléctricas no deben tocar la superficie posterior, de lo contrario, las conexiones podrían dañarse.
- Page 46 15. El dispositivo está equipado con un cable tipo “Y”. 16. Las conexiones fijas se deben conectar a una fuente de alimentación que permita la desconexión omnipolar. Para dispositivos con categoría de sobretensión por debajo de III, el dispositivo de desconexión se conectará a la fuente de alimentación fija de acuerdo con el código de cableado.
- Page 47 Uso previsto 1. Este aparato está diseñado para uso en el hogar. El uso comercial del aparato no está permitido. 2. Este aparato solo se puede usar para cocinar. No debe usarse para otros fines, como calentar una habitación. 3. Este aparato no debe usarse para calentar placas debajo de la parrilla, para secar la ropa o las toallas colgándolas en el asa o con fines de calefacción.
-
Page 48: Formas De Proteger La Superficie Cerámica De Cocción
Formas De Proteger La Superficie Cerámica De Cocción La superficie cerámica es irrompible y resistente a los rayones hasta cierto punto. Sin embargo, a fin de evitar cualquier daño, puede hacer lo siguiente: 1. No verter nunca agua fría en los calentadores calientes. -
Page 49: Conexión Eléctrica
Conexión Eléctrica 1. Su horno requiere un fusible de 40 amperios de acuerdo con la po- tencia del dispositivo. Si es necesario, se recomienda la instalación por un electricista calificado. 2. Su horno se ajusta de acuerdo con el suministro eléctrico de 220- 240V CA / 380-415V CA, 50/60 Hz.. -
Page 50: Introducción Al Uso Del Aparato
INTRODUCCIÓN AL USO DEL APARATO 1. Bandeja de vidrio superior 8.1. Cajón 2. Perilla del termostato 8.2. Puerta abatible 3. Panel de mandos del horno 9. Bombilla 4. Reguladores de los quemadores vitr 10. Parrilla cerámicos 11. Calentador cerámico (140 mm / 250 mm) 5. -
Page 51: Accesorios
Accesorios Bandeja profunda * Se utiliza para pastelería, fritas y guiso. También puede utilizarla como recipiente de acumular aceite cuando se cocina pastel, comidas congeladas y comidas de carne directamente sobre parrilla. Bandeja / Bandeja vidrio * Se utiliza para pastelería (galleta e.t.c) y alimentos congelados. -
Page 52: Características Técnicas De Su Horno
Características Técnicas De Su Horno Propiedades 50x55 50x60 60x60 Ancho exterior 500 mm 500 mm 600 mm Profundidad externa 565 mm 630 mm 630 mm Altura exterior 855 mm 855 mm 855 mm Potencia de la lámpara 15-25 W Elemento de calefacción inferior 1000 W 1000 W 1200 W... -
Page 53: Instalación Del Horno
INSTALACIÓN DEL HORNO Verifique si la instalación eléctrica es adecuada para poner el aparato en funcionamiento. Si la instalación de electricidad no es adecuada, llame a un electricista y un plomero para organizar los servicios públicos según sea necesario. El fabricante no se hace responsable de los daños causados por las operaciones realizadas por personas no autorizadas. - Page 54 65 mm min. 65 mm min. ADVERTENCIA: Los muebles de cocina cerca del electrodoméstico deben ser resistentes al calor. ADVERTENCIA: No instale el aparato al lado de refrigeradores o refrige- radores. El calor irradiado por el aparato aumenta el consumo de energía de los dispositivos de refrigeración.
-
Page 55: Ilustración De Amarre De Cadena
Ilustración De Amarre De Cadena Antes de usar el artefacto, y a fin de lograr un uso seguro, no olvide sujetar el artefacto al muro utilizando la cadena y el tornillo en gancho provisto. Verifique que el gancho esté atornillado en el muro firmemente. PANEL DE MANDOS 1. -
Page 56: Uso Del Horno
Temporizador mecánico*: Se usa para determinar el tiempo para cocinar en el horno. Cuando expira el tiempo ajustado, la energía de los calentadores se apaga y se emite una señal de advertencia audible. El temporizador mecánico se puede ajustar al período deseado entre 0-90 minutos. -
Page 57: Uso De La Parrilla
Uso De La Parrilla 1. Cuando coloque la parrilla en el estante superior, la comida en la parrilla no tocará la resistencia. 2. Puede precalentar durante 5 minutos mientras asa a la parrilla. Si es necesario, puede voltear la comida boca abajo. 3. -
Page 58: Uso De La Sección De La Estufa
Uso Y Descripción De La Vitrocerámica Nivel Nivel Nivel Nivel Nivel Nivel Nivel Nivel Nivel Máx. 140 mm 1200 Conmutador 180 mm 1230 1700 Conmutador 180 mm 1800 1800 1800 1800 1800 1800 1800 1800 1800 Regulador 1000 1000 1000 1000 1000 1000... - Page 59 Uso De Placas De Calentamiento Nivel 1 Nivel 2 Nivel 3 Nivel 4 Nivel 5 Nivel 6 80 mm 200 W 250 W 450 W 145 mm 250 W 750 W 1000 W 180 mm 500 W 750 W 1500 W 145 mm rápido 500 W 1000 W...
-
Page 60: Tipos De Programas
TİPOS DE PROGRAMAS Botón de función: Se usa para determinar los calentadores a ser utilizados para cocinar el plato en el horno. Los tipos de programas de cocción en este botón y sus funciones se describen a continuación. Todos los tipos de calentadores y tipos de programas que constan de estos calentadores pueden no estar disponibles en todos los modelos. -
Page 61: Tabla De Horneado Y Asado
TABLA DE HORNEADO Y ASADO ADVERTENCIA: Deberá precalentar el horno durante 10 minutos antes de colocar alimentos en él. Función de Temperatura Parrilla Tiempo de Alimentos Cocción Cocción (°C) Cocción Cocción (mín.) Pastel Estático / Estático+Ventilador 170-180 35-45 Pequeñas tortas Estático / Turbo+Ventilador 170-180 25-30... -
Page 62: Mantenimiento Y Limpieza
MANTENIMIENTO Y LIMPIEZA 1. Mientras se está haciendo funcionar el horno o poco después de que comience a funcionar, alcanzará altísimas temperaturas. Debe evitar tocarlo en las partes que se calientan. 2. No limpie nunca la parte interior, el panel, la tapa, las bandejas y todas las otras partes del horno con herramientas como cepillos duros, esponjas metálicas o cuchillos. -
Page 63: Montaje De Puerta De Horno
Montaje De Puerta De Horno Figura 2 Figura 3 Figura 2.1 Figura 2.2 Figura 3.1 Figura 3.2 Abre la puerta del Pon la cerradura Después cierra la Para quitar la puerta horno totalmente de la bisagra como puerta del hornocomo del horno, cuando la tirándola hacia figura 2.2 a posición... -
Page 64: Limpieza Y Mantenimiento Del Vidrio De La Puerta Frontal Del Horno
Limpieza Y Mantenimiento Del Vidrio De La Puerta Frontal Del Horno Retire el perfil presionando los enganches plásticos tanto a la derecha como a la izquierda según se indica en la figura 4 y traccionando el perfil hacia usted como se indica en la figura 5. Luego retire el vidrio interno según se indica en la figura 6. -
Page 65: Posiciones Del Estante
Posiciones Del Estante Es importante colocar la rejilla de alambre en el horno adecuadamente. No permita que el estante de alambre toque la pared Estante 4 trasera del horno. Las posiciones de los Estante 3 estantes se muestran en la siguiente figura. Estante 2 Puede colocar una bandeja profunda o una Estante 1... -
Page 66: Uso De La Hoja Deflectora De La Parrilla
Uso De La Hoja Deflectora De La Parrilla * 1. Un panel de seguridad está diseñado para proteger el panel de mandos y los botones cuando el horno está en modo de cocinar a la parrilla. (figura 10) 2. Utilice este panel de seguridad para evitar que el calor dañe el panel de mandos y los botones cuando el horno esté... -
Page 67: Solución De Problemas
SOLUCIÓN DE PROBLEMAS Puede resolver los problemas que puede encontrar con su producto al verificar los siguientes puntos antes de llamar al servicio técnico. Puntos de verificación En caso de que experimente un problema con el horno, primero revise la tabla a continuación y pruebe las sugerencias. Problema Causa posible Qué... - Page 68 Problema Causa posible Qué hacer Se usan accesorios plásticos u Cuando utilice el horno, saldrá A altas temperaturas, debe usar otros accesorios no resistentes al olor a quemado o plástico. accesorios de cristalería adecuados. calor dentro del horno. La puerta está abierta. Cierre la puerta y reinicie.
-
Page 69: Reglas De Manipulación
REGLAS DE MANIPULACIÓN 1. No use la puerta y/o el asa para transportar o mover el aparato. 2. Realice el movimiento y el transporte en el embalaje original. 3. Preste la máxima atención al aparato mientras es cargado / descargado y manipulado. -
Page 70: Eliminación Respetuosa Con El Medio Ambiente
ELIMINACIÓN RESPETUOSA CON EL MEDIO AMBIENTE Deshágase del embalaje de una manera respetuosa con el medio ambiente. El aparato está etiquetado según la directiva europea 2012/19/EU sobre aparatos eléctricos y electrónicos usados (residuos de equipo eléctrico y electrónico - WEE por sus siglas en inglés).
Need help?
Do you have a question about the SVK5502EVB and is the answer not in the manual?
Questions and answers