Advertisement
Quick Links
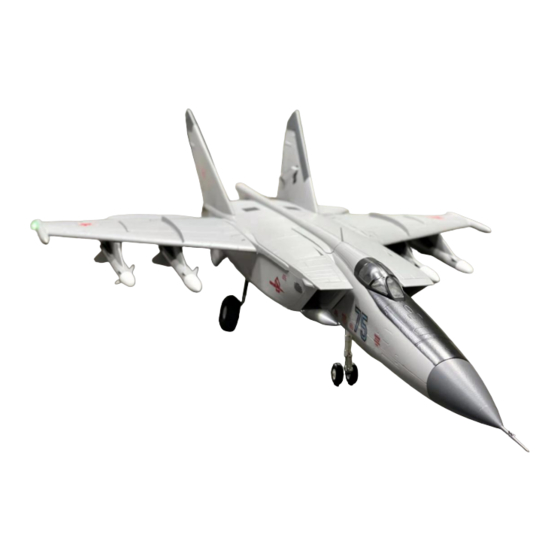
Basic parameters:
Wingspan: 912mm
Overall Length: 1430mm
Empty weight: 1510g
Take-off weight: 2670g
Equipment requirements:
Motor Size: 2840-2280kv 6S * 2 (PNP)
Ducted Fan: 64mm 12-Blade * 2 (PNP)
ESC: 40A 2-6S *2 & BEC 5V5A * 1 (PNP)
Servo: 9g * 7pcs 17g * 2pcs (PNP and Kit+Servo)
Battery: 3300-5200mah 60C 6s (not include)
Recommended Radio: 7 Channel (not included)
The KIT version include 40g Retractable Worm gearing & CNC ALU Damping Landing Gear &
4pcs navigation lights.
Advertisement

Related Manuals for FLYFANS MiG-25


Summary of Contents for FLYFANS MiG-25
- Page 1 Basic parameters: Wingspan: 912mm Overall Length: 1430mm Empty weight: 1510g Take-off weight: 2670g Equipment requirements: Motor Size: 2840-2280kv 6S * 2 (PNP) Ducted Fan: 64mm 12-Blade * 2 (PNP) ESC: 40A 2-6S *2 & BEC 5V5A * 1 (PNP) Servo: 9g * 7pcs 17g * 2pcs (PNP and Kit+Servo) Battery: 3300-5200mah 60C 6s (not include) Recommended Radio: 7 Channel (not included) The KIT version include 40g Retractable Worm gearing &...
- Page 2 KIT packing list: 1. Fuselage x 1 2. Left wing x 1 3. Right wing x 1 4. Left vertical fin x 1 5. Right vertical fin x 1 6. Left horizontal tail x1 7. Right horizontal tail x1 8. Detachable R40T air-to-air missile x 4 9.
-
Page 3: Installation Steps
Kit+Servo version: 1: Kit 2: 9g Servo * 7 (Installed) 3: 17g Positive servo *1 (Installed) 4: 17g Reverse servo *1 (Installed) PNP version: 1: Kit 2: 9g Servo* 7 (Installed) 3: 17g Positive servo *1 (Installed) 4: 17g Reverse servo *1 (Installed) 5: 40A ESC * 2 &... - Page 4 1: Power the 10cm lead 9g servos back to the neutral point and install the arm. Glue the servo into the hole with foam glue or hot glue sticks. The 2pcs horizontal tails all use Positive servo. 2: Install the elevator rod on servo arm and adjust the rod’s length.
- Page 5 3: Same to another horizontal tail. 4: Power the aileron and wing flap servo back to the neutral point and install the arm. Notice 2 arms direction.
- Page 6 5: Install the aileron rod and wing flap rod, make sure control surface flush with wing surface by adjust rod’s length 6: Same to another wing. Then let the servo lead through the wire way and the plastic parts hole.
- Page 7 7: Insert excess lead stuff into preset space of plastic part. 8: Open the battery cover, power the landing gear and control all landing gear down.
- Page 8 9: Power the front landing gear servo back to the neutral point and install the rod adjuster.
- Page 9 10: Glue the front landing gear servo, adjust the rod’s length and fixed the rod. 11: Then Glue the front landing gear’s cover.
- Page 10 12: Open the ducted fan and ESC‘s cover. 13: Install two 17g servos and fix them with glue.
- Page 11 14: Let the servo lead through the wire way. 15: Use screws install two ducted fans.
- Page 12 16: Put ESC into the hole, connect motor with ESC. Then test direction of motor’s rotation . 17: Install horizontal tail and fix them with 1.5mm socket head wrench.
- Page 13 18: Power servo back to the neutral point and install the arm. Install the elevator rod and adjust the rod length. 19: Install ESC cover. Then install ducted fan cover with screws.
- Page 14 20: Connect rudder servo, Glue the vertical tail into fuselage. 21: Install wing into fuselage with carbon fiber tube and fix wing with screws.
- Page 15 22: Connect all plugs into receiver by label. 23: Put receiver and lead into the hole behind battery room.
- Page 16 24: Install airspeed tube into the nose.
- Page 17 25: The center of gravity of Mig25 is at 125mm behind wing. 26: Adjust battery’s location by CG, then fix the battery with Hook and Loop tape. You can use 3300-5200mah 6S battery for Mig25, the best battery type is 4200mah 6S.
- Page 18 27: Install four missiles and fuel tank. Then we complete all installation work! Radio Travel Adjust Suggest Setting: Mig25’s battery position close to CG, so it’s not very sensitivity to CG, so minor error in the servo's stroke will not seriously affect the flight. Use D/R mode:...
Need help?
Do you have a question about the MiG-25 and is the answer not in the manual?
Questions and answers