Advertisement
Quick Links
Advertisement

Related Manuals for swimmax 07iPS

Summary of Contents for swimmax 07iPS
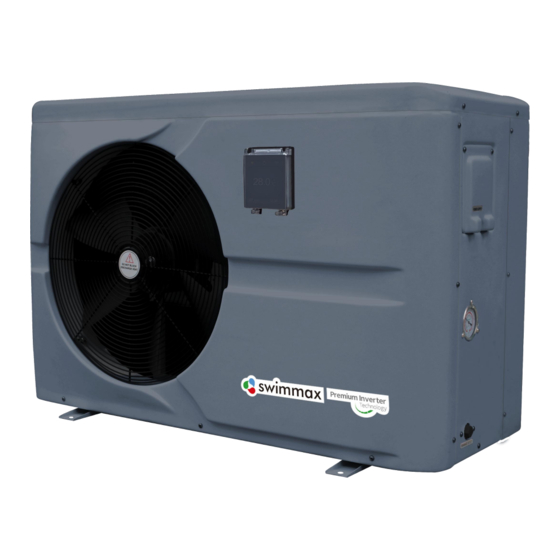
- Page 1 Swimming Pool Heat Pump User and Service Manual...
- Page 3 INDEX 1. Description 2. Transport information 3. Specifications 4. Accessories and options 5. Location and connection 6. Electrical Wiring 7. Start-up of the Heat Pump 8. Troubleshooting 9. Exploded Diagram 10. Maintenance 11. WIFI function- ‘Alsavo Pro’APP operation Thank you for using our swimming pool heat pump for your pool heating, it will heat your pool water and keep the constant temperature when the air ambient temperature is at -12 to 43℃.
- Page 4 - User and service manual - Draining plug (pcs: 2) - Water drainage pipes (pcs: 2) - 10 meters’ signal wire (pcs: 1) - Winter cover (pcs: 1) - Anti-vibration base (pcs: 4) 1.2 Dimension Model: Swimmax 07iPS - 2 -...
- Page 5 Model: Swimmax 11iPS/Swimmax 17iPS Model: Swimmax 20iPS/Swimmax 25iPS - 3 -...
- Page 6 Model: Swimmax 30iPS - 4 -...
- Page 7 2. Transport information 2.1 Delivery of the unit For the transportation, the heat pumps are fixed on the pallet and covered with a cardboard box. To protect from any damage, the heat pump must be transferred in its package. It is the responsibility of the addressee to notify of any damage incurred during delivery within 48 hours. No responsibility can be taken once the unit has been signed for.
- Page 8 3. Specifications CE Standard, R32, ABS Cabinet Swimmax Model Swimmax 07iPS Swimmax 11iPS Swimmax 20iPS Swimmax 25iPS Swimmax 30iPS 17iPS * Performance at Air 28℃, Water 28℃, Humidity 80% Heating capacity 7-2.2 11-2.9 17-3.8 19-4.7 24-5.9 28.5-6.8 Power consumption 1.25-0.14 1.77-0.18...
- Page 9 4. Accessories and options 4.1 Accessories list Anti-vibration base, 4 pcs Draining plug, 2 pcs Water drainage pipes, 2 pcs 10M signal wire, 1 pc Water connection assembly, 2 sets Winter Cover, 1 pc 4.2 The By-Pass Kit The By-Pass Kit is the essential accessory for the installation of your heat pump, it is also a tool for the optimization of the heating of the water.
- Page 10 4.3 Accessories Installation Anti-vibration bases 1. Take out 4 Anti-vibration bases 2. Install them on the bottom of machine. Draining plug 1. Install the draining plug under the bottom panel 2. Connect with a water pipe to drain out the water. Note: Lift the heat pump to install the draining plug.
- Page 11 5. Location and connection ATTENTION: Please observe the following rules when installing the heat pump: Any addition of chemicals must take place in the piping located downstream from the heat pump. Always keep the heat pump upright. If the unit has been held at an angle, wait at least 24 hours before applying mains power to the heat pump.
- Page 12 5.2 Check-valve installation NOTE Note: If automatic dosing equipment for chlorine and acidity (pH) is used, it is essential to protect the heat pump against excessively high chemical concentrations which may corrode the heat exchanger. For this reason, equipment of this sort must always be fitted in the piping on the downstream side of the heat pump, and it is recommended to install a check-valve to prevent reverse flow in the absence of water circulation.
- Page 13 NOTE The factory supplies only the heat pump. All other components, including a bypass if necessary, must be provided by the user or the installer. ATTENTION: In order to heat the water in the pool (or hot tub), the filtration pump must be running so the water is circulating through the heat pump.
- Page 14 Time delay - The heat pump has a built-in 3-minute start-up delay to protect the circuitry and avoid excessive electrical contactor wear. The unit will restart automatically after this time delay expires. Even a brief power interruption will trigger this time delay and prevent the unit from restarting immediately. Additional power interruptions during this delay period do not affect the 3-minute duration of the delay.
- Page 15 6. Electrical Wiring 6.1 Inverter swimming pool heat pump wiring diagram Swimmax 07iPS/Swimmax 11iPS/Swimmax 17iPS/Swimmax 20iPS/Swimmax 25iPS * Above electrical wiring diagram only for your reference, please subject machine posted the wiring diagram. - 13 -...
- Page 16 Swimmax 30iPS * Above electrical wiring diagram only for your reference, please subject machine posted the wiring diagram. - 14 -...
- Page 17 6.2 Installation of the display deportee Photo(1) Photo(2) Photo(3) Photo(4) Photo(5) - The end with plug connects with the control panel (photo1) - The other end of the signal wire. (photo2) - Open the cover of the terminal box and pass through it the cable of the remote screen.(photo3,4) ATTENTION : Disconnect: A means to disconnect should be located within sight of and readily accessible from the unit(circuit breaker, fused or un-fused switch).
- Page 18 Connection to pilot the water pump Dry contact timer connection Dry contact pump connection - 16 -...
- Page 19 7.Display Controller Operation 7.1. Guide for operation 7.2 The keys and their operations 7.2.1 button Press to start the heat pump unit. Press to stop the heat pump unit. 7.2.2 button Water temperature setting: Press to set the water temperature directly. Heating mode and Auto mode setting range:6-41℃,Cooling mode setting range: 6-35℃...
- Page 20 7.2.4 button for 2 seconds to enter secondary page. Press to enter. Press to select the functions and press 7.2.5 Heating/Cooling/Auto mode Select and press to enter, press to choose Heating/ Cooling/ Auto mode, press again to exit. The default mode is Heating mode. Note:Under Automatic mode, it is useless to set parameter P1 .
- Page 21 7.2.6 Parameter checking Select and press to enter, press to check d0-d11 value. Code Condition Scope Remark IPM mould temperature 0-120℃ Real testing value Inlet water temp. -9℃~99℃ Real testing value Outlet water temp. -9℃~99℃ Real testing value Ambient temp. flash if Real value<-9 -30℃~70℃...
- Page 22 7.2.7 Parameter setting Select and press to enter, press to set P0-P16 value. Code Name Scope Default Remark 0: Default normal operation Mandatory defrosting 1: mandatory defrosting. 1:Always running; Water pump 0:Depends on the running of compressor Water temp. calibration -9~9 Default setting: 0 Reset factory setting...
- Page 23 Press to enter and to select Timer on or Timer off. Press to save the setting. to select on/off and press to set the time. Press Long press for 5 seconds to set the current time. - 21 -...
- Page 24 8.Troubleshooting 8.1 Error code display on wire controller Error Malfunction Reason Solution code 1. The sensor in open or short 1. Check or change the sensor Inlet water temperature sensor PP01 circuit 2.Re-fix the wiring of the failure T1 2. The wiring of sensor is loose sensors 1.
- Page 25 Malfunction Error code Reason Solution 1. Check the EEV and piping 1. EEV has blocked or pipe system is system Check the motor jammed Low pressure failure 2. Through the high pressure EE02 2. Motor speed is abnormal or motor has gauge to check the pressure value damaged 3.
- Page 26 Malfunction Error code Reason Solution 1. Check and re-connect the signal wire Communication failure 1. Poor signal wire connection or 2. Change a new signal wire between controller and EE08 damaged signal wire 3. Turn off electricity supply and main board 2.
- Page 27 Malfunction Error code Reason Solution 1. Change a driver board 1. Output exception of IPM module 2. Check if the fan motor speed IPM module temperature thermal circuit EE15 is too low or fan motor damaged, too high protection 2. Motor is abnormal or damaged change it 3.
- Page 28 Malfunction Error code Reason Solution 1.Compressor runs out of step 1. Check the main board or Software control 2. Wrong program EE21 change a new one exception 3. Impurity inside compressor causes 2. Enter correct program the unstable rotate speed 1.
- Page 29 Remarks: 1. In heating mode, if the water out temperature is higher than the set temperature over 7℃, controller displays EE04 for water over-heating protection. 2. In cooling mode, if the water out temperature is lower than the set temperature over 7℃, controller displays PP11 for water over-cooling protection.
- Page 30 Water pump running logic and error code EE03 or ‘ON’. There are two options for water pump running. Option 1:Water pump starts or stops in relation to heat pump operation. Water pump starts 60s before compressor, water pump start 30s and then detect the water flow switch. When the heat pump meet the requirement of standby mode, water pump will stop 5mins after compressor stops.
- Page 31 8.2 Other Malfunctions and Solutions (No display on wire controller) Malfunctions Observing Reasons Solution LED wire controller Check cable and circuit breaker No power supply no display. if it is connected Heat pump under LED wire controller. standby Startup heat pump to run. Displays the actual time.
- Page 32 9.Exploded Diagram 7. Exploded Diagram Mode: Swimmax 07iPS - 30 -...
- Page 33 Model : Swimmax 07iPS Part name Part name Top cover High pressure switch Ambient temp. sensor T5-TH1 Discharge pipe Ambient temp. sensor clip 4-way valve to exchanger Back grill Low pressure switch Evaporator Main capillary Evaporator temperature sensor T3-TH2 Pipe...
- Page 34 Model: Swimmax 11iPS/ Swimmax 17iPS - 32 -...
- Page 35 Spare parts list: Swimmax 11iPS/ Swimmax 17iPS Part name Part name Top cover Compressor Ambient temp. sensor T5-TH1 Water inlet temp. sensor T1-TH6 Ambient temp. sensor clip Exchanger temperature sensor clip Back grill Titanium heat exchanger Evaporator Drainage plug Evaporator temperature sensor...
- Page 36 Model:Swimmax 20iPS/Swimmax 25iPS - 34 -...
- Page 37 Spare parts list: Swimmax 25iPS Part Name Part Name Top cover Pressure gauge Back grill Clip Evaporator Terminal board cover Pillar 5-ways terminal block Top frame Right panel Isolation panel Water outlet temp. sensor T2-TH5 Reactor Water flow switch Fan motor support...
- Page 38 Model: Swimmax 30iPS - 36 -...
- Page 39 Spare parts list: Swimmax 30iPS Part Name Part Name Top cover Evaporator pipe Ambient temp. sensor T5-TH1 Back panel Ambient temp. sensor clip Needle valve Back grill Gas return piping Evaporator Low pressure switch Evaporator temperature sensor T3-TH2 Pipe Clip...
- Page 40 10. Maintenance You should check the water supply system regularly to avoid air entering the system and creation of low water flow, because it would reduce the performance and reliability of HP unit. Clean your pools and filtration system regularly to avoid the damage of the unit. Only a qualified technician is authorized to operate the cooling system pressure.
- Page 41 11. WIFI function- ‘Alsavo Pro’APP operation 11.1 operation 1. Firstly download ”Alsavo Pro” APP from App store or Google play in your smart phone. Parameter P17=1 (WIFI function) could be auto recognition in the controller if the machine already install WIFI PCB.
- Page 42 - 40 -...
- Page 43 3. The main interface 1) Turn ON/OFF Click “ ” to turn on or off heat pump. 2) Switch mode There are there modes (Auto mode, cooling or heating) for the invertboost unit. Click its icons to switch (Auto mode , heating cooling 3) Timer setting...
- Page 44 4) Parameter checking and setting Click Parameter , then enter the password “0757”. - 42 -...
- Page 45 Parameter setting: (1) There are 2 modes optional for water pump operation (1: Always running, 0: Depends on the running of compressor) (2) Inlet water temperature calibration. (-9.0 to 9.0℃) (3) Temperature unit: ℃ or ℉. When you want to reset to factory default setting, tips as below pop up . - 43 -...
- Page 46 5)Switch running modes In heating or cooling mode, there are 3 running modes(Silent, Smart, Powerful) for options While in Auto mode, its default running mode is Smart. 6) Malfunction If error occurs, the malfunction icon turns red . Click it to check the error. - 44 -...
- Page 47 7) Temperature setting You can set the target water temperature by adjusting the slider or press “ ” or ” ”. The setting water temperature on the controller display correspondingly changes after letting go. When the setting water temperature on the display changes, it will be synchronously updated to the APP. 8)Check device information In the main interface, click the upper right “Alsavo Pro”.
- Page 48 - 46 -...
- Page 49 - 47 -...
- Page 50 A0207SMIR305...
Need help?
Do you have a question about the 07iPS and is the answer not in the manual?
Questions and answers