Table of Contents
Advertisement
Quick Links
S W E D E N
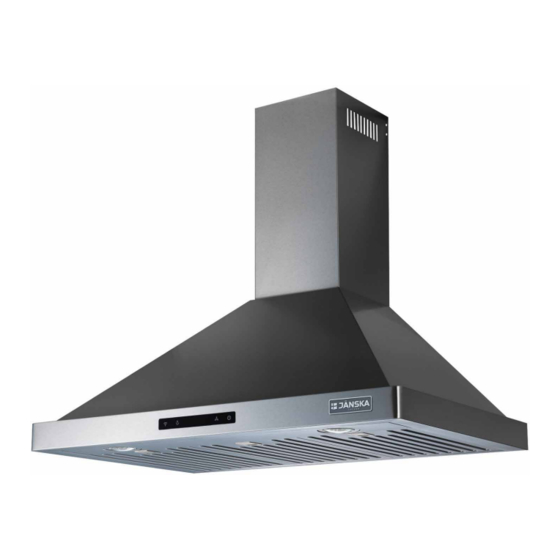
Wall-Mount
RANGE HOOD
Models:
RHW-3052 (30in)
RHW-3652 (36in)
USER MANUAL
Your satisfaction is guaranteed. If you are not completely satisfied with our
Wall-Mount Range Hood and the results it brings, we insist that you let us know.
We'll help make the Range Hood work for you, or we'll refund your money.
Advertisement
Table of Contents

Subscribe to Our Youtube Channel
Related Manuals for JANSKA RHW-3052


Summary of Contents for JANSKA RHW-3052
- Page 1 S W E D E N Wall-Mount RANGE HOOD Models: RHW-3052 (30in) RHW-3652 (36in) USER MANUAL Your satisfaction is guaranteed. If you are not completely satisfied with our Wall-Mount Range Hood and the results it brings, we insist that you let us know.
-
Page 2: Table Of Contents
TABLE OF CONTENTS IMPORTANT SAFETY INSTRUCTIONS………………………………………………………..…… INSTALLATION REQUIREMENTS ……………………………………………..……...………… Parts Supplied ……………………………………………………………......…. Location Requirements ……………………………………………………....……… Ventilation Requirements …………………………………………………..…………………. Electrical Requirements ………………………………………………......…….. INSTALLATION INSTRUCTIONS ……………………………………………..……………………. Prepare Location ……………………………………………………………………....….. Venting Methods ……………………………………………………………………..…….. Install the Range Hood ……………………………………………………………..………. RANGE HOOD USE ……………………………………………………………………..……….. Range Hood Controls …………………………………………………………..……………. Operating the Range Hood……………………………………………………..……………... -
Page 3: Important Safety Instructions
IMPORTANT SAFETY INSTRUCTIONS WARNING: TO REDUCE THE RISK OF FIRE, ELECTRIC SHOCK, OR INJURY TO PERSONS, READ THE FOLLOWING: • Use this unit only in the manner intended by the manufacturer. • Make sure that the voltage indicated on the rating plate of the appliance corresponds to your outlet voltage. - Page 4 • Always turn the hood ON when cooking at high heat or when flambéing food. • Clean ventilation fans frequently. Grease should not be allowed to accumulate on the fan or filter. WARNING: TO REDUCE THE RISK OF INJURY, IN THE EVENT OF A RANGE TOP GREASE FIRE, READ THE FOLLOWING: •...
-
Page 5: Installation Requirements
INSTALLATION REQUIREMENTS PARTS SUPPLIED: Duct Tube Range Dia - 5.9in / Hood 150mm Max length - 59in / 1500mm Power cord (attached Exhaust to the Range Hood) Duct Cover (upper & lower) Wall Anchor (for the Wall Mount) Top Bar Wall Anchor Screw (M4x40mm) Stainless... -
Page 6: Location Requirements
LOCATION REQUIREMENTS: Installation Type – STAND ALONE Installation Type - EMBEDED This range hood has been designed to be wall mounted above a stove/hob. Before starting the installation, consideration should be given as to how the installation will be be carried out, ensuring adequate space and clearances above the stove/hob. -
Page 7: Electrical Requirements
FOR THE MOST EFFICIENT OPERATION: • A distance between 28” to 31” is recommended* between the stove top and the bottom of the range hood. • It is recommended that the range hood be vented vertically through the roof through 6” (15.2 cm) or bigger round metal/aluminum vent work. -
Page 8: Installation Instructions
This installation is for mounting the product to a wall. Ensure your wall has the proper sup- port to hold the range hood weight (RHW-3052 30in - 37.5 lbs / 17 kg, and RHW-3652 36in - 41.9 lbs / 19 kg. These instructions are general guidelines; please consult your installation specialist regarding the best type of mounting hardware and support system based on your wall construction. - Page 9 Horizontal Option 1: Option 2: Wall Venting Side wall cap Roof cap Vertical Roof Venting ADVANCED PREPARATION: 1. Place the range hood on a flat, stable surface. Connect the power cord of the range hood to a designated standard outlet, 110̃120V/60Hz, AC only and turn the range hood ON. Verify all operations of the range hood by referring to Operating The Range Hood section of this manual, then turn the Range Hood OFF and unplug from the power outlet.
-
Page 10: Install The Range Hood
INSTALL THE RANGE HOOD: 1. Measure the distance between stove top and the bottom of range hood. A distance between 28” to 31” is required. Make sure the range hood is level and not tilted. 2. Mark the locations of the Hanging Bracket Holes (of the range hood body) on the wall. - Page 11 7. Connect the Duct to the Adaptor on the Hood Body and seal the connection with foil tape or duct tape. 8. Calculate the height of the Duct Tube and extend approximately 6” (15 cm) longer than required, connect the lower end of the duct tube to the range hood and the upper end to the vent system.
-
Page 12: Range Hood Use
RANGE HOOD USE RANGE HOOD CONTROLS: 00:00 Remote Lights Digital Exhaust Power Control Sensor On/Off Display Fan Speed On/Off OPERATING THE RANGE HOOD: - To Turn the Fan ON press the Power Button and select the Exhaust Fan Speed: • Press Once - Low (Digital Display shows F1) •... -
Page 13: Range Hood Care
RANGE HOOD CARE WARNING: To reduce the risk of electrical shock, DO NOT clean the hood while it's operating. WARNING: Never put your hands into the area housing the fan when the fan is operating. CLEANING & MAINTENANCE: IMPORTANT: Clean the hood and panel filters frequently according to the following instructions. Exterior Surfaces: To avoid damage to the exterior surface, do not use steel wool or soap-filled scouring pads. -
Page 14: Troubleshooting
TROUBLESHOOTING 1. If the range hood does not operate after installation: • Check if the range hood has been plugged in, make sure that all power has been turned back on and all electrical wirings are properly connected. • Swap out light assembly to working ones to determine whether it is caused by defective bulbs. (See Replacing the LED light bulb, page 12) 2. -
Page 15: Specifications
SPECIFICATIONS Model: Model: RHW-3052 (30in) RHW-3652 (36in) Power: 120V/60Hz Power: 120V/60Hz Dimensions: Dimensions: 29.5in x 19.6in x 11.8in 35.5in x 19.6in x 11.8in Weight: Weight: 37.5 lbs / 17 kg 41.9 lbs / 19 kg Filter size: Filter size: 14.3in x 8.8in x 0.4in... - Page 16 S W E D E N Your purchase comes with a 100% satisfaction guarantee from Janska If you are not happy with the product for any reason, please contact us at support@janskaus.com with your feedback or questions, and we will do our best to make...
Need help?
Do you have a question about the RHW-3052 and is the answer not in the manual?
Questions and answers