
Subscribe to Our Youtube Channel
Related Manuals for Engcon EC02


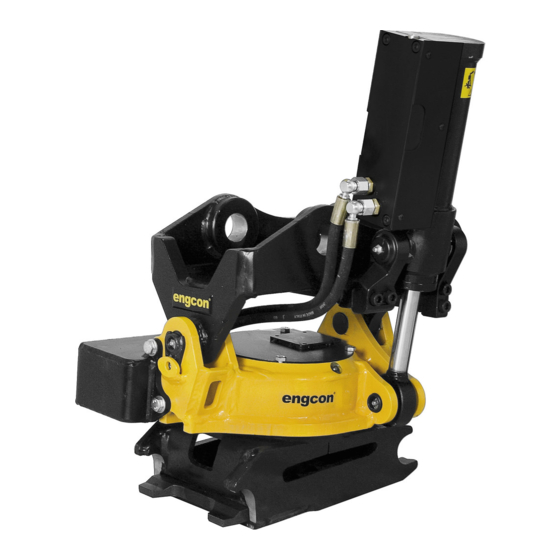
Summary of Contents for Engcon EC02
- Page 1 User manual TILTROTATOR EC02 | EC05B | EC10B | EC15B | EC20B | EC30 Language Country Article 9000112 | Version 1.8 Original Instructions...
- Page 2 Dear Customer, Thank you for choosing a product from engcon. engcon is the market leader in tiltrotators and tools for excavators. We represent innovation, knowledge and experience, and we develop our products with a focus on the customer's needs. Please visit our website for contact information and details about the rest of our product range.
-
Page 3: Table Of Contents
Table of Contents Table of Contents 1. Introduction 1.1. General......................6 1.2. Scrapping and recycling.................. 6 1.3. Transport and storage..................6 1.3.1. Temperature during operation and storage..........7 1.4. Warranty......................7 1.5. Technical support and spare parts..............7 1.6. Product approval..................... 8 1.6.1. - Page 4 Table of Contents 5.8.3. Control system 9-2 (for machines with two or more proportionally controlled hydraulic circuits)................5.8.4. Control system 1 (for machines with double-acting hydraulic circuit)..27 5.8.5. Control system 15 (for machines with double-acting hydraulic circuit)..27 5.8.6. Externally controlled quick coupler lock – SQ/QSC......... 27 5.9.
- Page 5 Table of Contents 10.2. Abbreviations....................60 10.3. Tiltrotator overview..................61 11. Service 11.1. Service schedule................... 62 11.2. Service record....................63...
-
Page 6: Introduction
1.2. Scrapping and recycling engcon makes constant efforts to reduce its environmental impact. engcon's products comprise at least 99 per cent recyclable material. All assembly and service work must take place in compliance with legislation and ordinances governing the environment, health and occupational safety. -
Page 7: Temperature During Operation And Storage
All customers receive a press 2-year warranty on tiltrotators delivered after 1 January, 2018. We encourage you to register your tiltrotator to enjoy faster service. Visit www.engcon.com and search for "register your product". 1.5. Technical support and spare parts Contact information for support and spare parts can be found at www.engcon.com. -
Page 8: Product Approval
ISO 10567:2007, SAE J2506:2012, SAE J1362:2018 This declaration and engcon's warranties will cease to be valid immediately if spare parts other than engcon original spare parts are used, or if any changes or other interventions are made without engcon's permission. -
Page 9: Type Certification For Lifting Hook
1 Introduction 1.6.2. Type certification for lifting hook The following certification is valid for tiltrotators supplied with a lifting hook. -
Page 10: Safety
2 Safety 2. Safety 2.1. General It is important that you read and understand all warnings prior to installation work on this product or before you use it and any accessories supplied. The warning texts highlight potential risks and describe how to avoid them. The following warning levels are used in this user manual: DANGER Indicates that an accident will occur if the regulation is... -
Page 11: Design And Function
3 Design and function 3. Design and function 3.1. General The engcon tiltrotator adds flexibility and efficiency to an excavator and allows it to be used for more operations. The product provides the ability to both tilt and rotate a tool. DANGER Do not exceed tipping load limits. -
Page 12: Overview
3 Design and function 3.2.1. Overview Figure 1. Position Description Power supply Alarm indication Sensor, machine coupler hook Sensor, machine coupler ejector Sensor, quick coupler hook Sensor, quick coupler ejector Warning lamp Table 1. For indications, see section 7.1.1. Indications. -
Page 13: Hs And Sw Quick Coupler With Sensor
3 Design and function 3.3. HS and SW quick coupler with sensor The HS and SW quick coupler with sensor monitors whether or not the quick coupler is in the open position. The alarm output is connected to a QLM module mounted on the stick. It uses sound and light warning signals when the tool’s locking cylinder is open, as the primary safety purpose of the quick coupler is to protect personnel nearby. -
Page 14: Overview
3 Design and function 3.3.1. Overview Figure 2. Position Description Power supply Alarm indication Indication for open quick coupler Warning lamp Table 2. For indications, see section 7.2.1. Indications... -
Page 15: Ec-Oil
3 Design and function 3.4. EC-Oil engcon’s system for more efficient tool changes. It provides the ability to switch hydraulic tools without leaving the cab. The system is designed for maximum reliability in harsh environments. It is a fully hydraulic system that handles the connection of tools under full system pressure. -
Page 16: Eps/C2C
3 Design and function 3.5. ePS/C2C Together with the tiltrotator, engcon's ePS rotation sensor creates an ePS-compatible excavator guidance system – a concept that provides the selected system with more functions. It provides full control of the bucket and the ability to see its exact rotational position. -
Page 17: Installation
Welding is not permitted. It can have a negative impact on safety. Risk of personal injury and damage to property. For welding, contact your dealer or engcon Nordic AB. WARNING Beware of moving parts. A lack of awareness may lead to crush injuries. -
Page 18: Oil
4 Installation 4.1. Oil On delivery, your product is filled with Fuchs Hydraway White 46, a white oil-based hydraulic oil. An oil drain pan must be available during installation. T and P are labeled with: Max 2,5 MPa Max 22 MPa (if possible, use free return) IMPORTANT... -
Page 19: Attaching The Tiltrotator
Risk of personal injury and damage to property. WARNING If you have any doubts concerning the safety aspects of your knowledge, the equipment or work, contact a dealer or engcon Nordic AB. Incorrect installation affect safety. IMPORTANT Assembly and installation may only be carried out at a workshop authorized by the manufacturer. - Page 20 4 Installation Installation 1. Fit any O-rings if such must be used. 2. Position the dog bone linkage to align with the appropriate holes in the upper section of the tiltrotator. 3. Shim the width if necessary. 4. Insert the intended shaft journal. 5.
-
Page 21: Electrical And Hydraulics
4.4. Electrical and hydraulics For electrical and hydraulic hose installation, refer to the separate installation instructions supplied with the selected control system. Also available on the website or by contacting engcon. IMPORTANT Maintenance and repair of the electrical system may only be carried out by professionally qualified persons. -
Page 22: On Completion
4 Installation 4.5. On completion 1. Affix the warning decals supplied in a conspicuous place in the operator's cab, without obscuring operator visibility. WARNING Replace damaged or illegible signs and decals before using the machine. Risk of personal injury and damage to property. -
Page 23: Operation
5 Operation 5. Operation 5.1. Before and during use Check your base machine manufacturer's recommendations for calculating tipping loads, and be sure to include the increased weight and reach the product entails. DANGER Do not exceed tipping load limits. The weight of the product and the increased reach may impair stability. -
Page 24: Lifting Points
5 Operation 5.2. Lifting points Approved Not approved Figure 12. Figure 13. Figure 14. Check max permitted load for the lifting hook, as stamped on the lifting hook and rating plate. Designed with safety factor 5:1. WARNING The base machine must be equipped with a load- holding valve on the boom/stick and an overload warning when using a lifting hook on the tiltrotator. -
Page 25: Hydraulic Hammers
5 Operation WARNING When lifting, make sure the load burdens both grab arms. Make sure the load cannot shift and only burden one grab arm. When all force is exerted by only one arm, the grab is at risk of opening. Risk of injury and property damage. -
Page 26: Crane Boom
5.8.1. DC2 control system (for machines with double-acting hydraulic circuit) The engcon control system allows simultaneous operation of all functions. Refer to separate user manual supplied on delivery. Also available on the website or by contacting engcon. -
Page 27: Control System 1 (For Machines With Double-Acting Hydraulic Circuit)
5.9. Changing tools The following instructions concern general operation of the engcon quick coupler. For further information and instructions, refer to the separate user manual for the quick coupler concerned. - Page 28 5 Operation 2. Activate the hydraulics to operate the locking bolts. HS/SW with sensor: The sound and light warning signals are activated when the locking cylinder is in the open position. 3. Check that the indicator rod is out. Indicator rod location may vary depending on the tiltrotator model.
- Page 29 5 Operation 5. Connect the tool by moving the quick coupler toward one shaft on the tool. Q-Safe: The sound and light warning signals are activated. 6. Raise the tiltrotator very slightly above the ground so that the tool moves towards the quick coupler. IMPORTANT The machine may only be operated with the quick coupler...
-
Page 30: Disconnecting The Tool, Hydraulic Lock
5 Operation 9. Check that the quick coupler lock function engages and that the indicator rod no longer protrudes from the quick coupler. Q-Safe: The sound and light warning signals are deactivated when the coupler is correctly connected. HS/SW with sensor: The sound and light warning signals are deactivated when the locking cylinder is in the closed position. -
Page 31: Connecting The Tool, Mechanical Lock
5 Operation 4. The locking cylinders are activated and open position is reached when the indicator rod is visible. Q-Safe: The sound and light warning signals are activated. HS/SW with sensor: The sound and light warning signals are activated when the locking cylinder is in the open position. - Page 32 5 Operation 2. Move the quick coupler towards the tool. To avoid overloading when connecting the pallet forks, the quick coupler locking pins must be turned away from the forklift tines. 3. Connect the quick coupler to the tool. 4. Raise the tiltrotator very slightly above the ground so that the tool moves towards the quick coupler.
-
Page 33: Disconnecting The Tool, Mechanical Lock
6. Check that the quick coupler lock's lock function has engaged. In the case of engcon’s other quick couplers, the blue indicator rod will no longer protrude from the coupler. Indicator rod location may vary depending on the tiltrotator model. -
Page 34: Fitting And Setting Up Quick Coupler Locks
5 Operation 3. The locking bolts are now in the open position and the tool is free. Carefully raise the tiltrotator from the tool. 5.10. Fitting and setting up quick coupler locks DANGER Check the attachment points regularly and be alert for the formation of cracks. - Page 35 5 Operation Quick coupler S30-S80 Quick coupler S1-S3 Figure 16. Figure 17. Quick coupler A (max) Quick coupler A (min) 0.2 inch 1.2 inch 0.39 inch 1.2 inch 0.39 inch 1.2 inch 0.39 inch Table 5. 0.79 inch 0.87 inch 0.98 inch Table 4.
- Page 36 5 Operation Quick coupler RF40-90 (PUP) Quick coupler ECPUP Figure 19. Figure 18. Quick coupler A (max) Quick coupler A (max) PUP40-90 0.55 inch ECPUP45 0.08 inch ECPUP50 0.2 inch Table 6. ECPUP60 0.87 inch ECPUP65 0.98 inch ECPUP70 0.98 inch ECPUP80 1.2 inch Table 7.
- Page 37 5 Operation Quick coupler CW10-45 Quick coupler HS Figure 20. Figure 21. Quick coupler A (max) Quick coupler A (max) CW10-45 A ≥ B * 0.75 HS08 0 to 0.55 inch HS10 0 to 0.2 inch Table 8. HS20/21/25 0.39 to 0.2 inch Table 9.
-
Page 38: Maintenance
6 Maintenance 6. Maintenance 6.1. General Intervals for greasing and inspections to be performed by the user: - Daily, carried out on all configurations before the machine is put into use for the working day. - Every 8 operating hours, lubrication as per lubrication schedule. - Every 250 operating hours;... -
Page 39: Daily Inspections
6 Maintenance IMPORTANT Be sure to keep your product clean. Inadequate cleaning can cause damage to your equipment. 6.2. Daily inspections WARNING Avoid contact with hydraulic oil. Risk of burns. WARNING Never use your hands to search for leaks in the hydraulic system. - Page 40 - that no grease leakage is present on hoses or in connectors - that shaft journal lock attachment points (A) are not loose. Shaft journal lock design may differ from the images below depending on the tiltrotator model. Not EC02 or EC05.
-
Page 41: Special Maintenance
6 Maintenance 6.3. Special maintenance 6.3.1. EC-Oil Cleaning - Clean oil connections, electrical connectors, grease connections and dirt guards before and after use in order to avoid oil or grease leakage and safeguard EC-Oil function. - If oil or grease leakage occurs despite cleaning, we recommend face seal replacement. -
Page 42: Lubrication Every 8 Operating Hours
6 Maintenance REMARKS Install the tapered face seal with a narrow edge outward. Figure 24. 6.4. Lubrication every 8 operating hours Grease recommendation: On delivery, we fill your product with our recommended universal mineral oil-based grease with an EP additive, a lithium soap thickener and a hardness of (NLGI) 2. In severe cold we recommend hardness (NLGI) 1. - Page 43 6 Maintenance EC02 EC05B EC10B EC15B...
-
Page 44: Greasing The Quick Coupler
6 Maintenance EC20B EC30 6.4.2. Greasing the quick coupler Grease quantity: 3-4 pump strokes per nipple. Grease nipples on both sides, applies to all examples. The arrows show the location of the grease nipples. Example, S80 Example, S70 Figure 25. Figure 26. -
Page 45: Lubrication, Integrated Grabber Gr10, Gr20
6 Maintenance 6.4.3. Lubrication, integrated grabber GR10, GR20 Grease quantity: 3-4 pump strokes per nipple. The arrows show the location of the grease nipples. Figure 29. 6.4.4. Lubrication, integrated grabber GR20RR Grease quantity: 3-4 pump strokes per nipple. The arrows show the location of the grease nipples. Figure 30. -
Page 46: Service Every 250 Operating Hours
6 Maintenance 6.5. Service every 250 operating hours Check is performed by operator. Make entry in service record; see 11.2. Service record. - Review points according to section 6.2. Daily inspections. - Shimming, tilt upper section. - Visual inspection of bushings and spherical bearings; see section 10.3. Tiltrotator overview. -
Page 47: Checking Axial And Radial Play
(refer to technical data), and/or neglected lubrication maintenance. If play exceeds limitation values, contact an authorized dealer or engcon Nordic AB. Rotation play may occur either at the contact surface of the worm wheel/worm screw, or in the worm screw's axial washers. - Page 48 6 Maintenance EC02 Fastener Dimension Quality Quantity Torque Screw cap 12.9 58 lb-ft Quick coupler 12.9 100 lb-ft Yoke bracket 12.9 58 lb-ft Hydraulic motor 12.9 30 lb-ft Table 11. EC05B Fastener Dimension Quality Quantity Torque Screw cap 12.9 58 lb-ft Quick coupler 12.9...
- Page 49 6 Maintenance EC20B Fastener Dimension Quality Quantity Torque Screw cap 12.9 246 lb-ft Quick coupler 12.9 479 lb-ft Center ring 12.9 246 lb-ft / 288 lb-ft* Yoke bracket 12.9 246 lb-ft Hydraulic motor 12.9 100 lb-ft Table 15. * Applies to bolts with strength class 14.9 EC30 Fastener Dimension...
-
Page 50: Troubleshooting
7 Troubleshooting 7. Troubleshooting 7.1. Q-Safe 7.1.1. Indications Position Behavior Indicates Remarks 1 flash Power supply OK Applies to DC2 without QSC *_*_*_ 2 flashes Power supply OK Applies to QSC **_**_**_ Constant light Power supply OK Applies to SS0-SS9 without 1 flash CAN time out Applies to QSC... - Page 51 7 Troubleshooting Position Behavior Indicates Remarks 1 flash Tiltrotator removed Applies to DC2 *_*_*_ Constant light Connected tool Hook sensor for the quick coupler under the tiltrotator 1 flash Tiltrotator removed Applies to DC2 *_*_*_ Constant light Connected tool Ejector sensor for the quick coupler under the tiltrotator Flashing white light and Unsafe tool connection...
-
Page 52: Hs And Sw With Sensor
7 Troubleshooting 7.2. HS and SW with sensor 7.2.1. Indications Position Behavior Indicates Remarks Flashing light Power supply OK Other control systems with Constant light Power supply OK Other control systems without 1 flash Short circuit, power to sensor Applies when starting the *_*_*_ in RF system... -
Page 53: Eps/C2C
7 Troubleshooting 7.3. ePS/C2C 2 X2 3 Figure 32. 7.3.1. Indications Position Sign Indicates Remarks No power supply Constant light No communication in X1 Flashing CAN communication with the unit connected to X1 No power supply Constant light No communication in X2 Flashing CAN communication with the unit connected to X2... -
Page 54: Decals
8 Decals 8. Decals Machine instructions, decals and warning signs must be kept clearly legible. Contact your supplier to order replacements. WARNING Replace damaged or illegible signs and decals before using the machine. Risk of personal injury and damage to property. 8.1. - Page 55 8 Decals 8.2.1.2. 9000352 WARNING KEEP CLEAR Moving and rotating equipment. Hazard zone 10 feet. Caution when handling long objects. Bear in mind inertia and the extended risk area when handling long objects. Crush hazard. Stay clear of moving parts. Falling material hazard.
-
Page 56: Warning Decals On Product
8 Decals 8.2.2. Warning decals on product 8.2.2.1. 9000343 WARNING KEEP CLEAR Moving and rotating equipment. Crush hazard. Keep hands clear of moving parts. Falling material hazard. Never stand under or pass beneath a raised tool. Read and understand the user manual before operating this machinery. -
Page 57: Technical Data
9 Technical data 9. Technical data 9.1. Tiltrotator Description EC02 EC05B EC10B EC15B EC20B EC30 Max machine size 7,700 15,400 30,900 39,700 52,900 70,500 Max tensile stress lb-ft 14,750 33,190 66,380 99,570 132,760 236,020 Max bucket width inch 35.4 47.2 55.1... - Page 58 9 Technical data Description EC02 EC05B EC10B EC15B EC20B EC30 Rec open/close 3050 pressure SQ Q- Safe Weight lbs* 1,367 1790 Width (A) inch* 10.2 12.6 12.6 17.7 19.7 Width (B) inch* 11.2 11.8 15.4 Width (C) inch* 11.4 12.1 12.2...
-
Page 59: Integrated Grabber Cassette
- tip) at 21 MPa Max load 2205 3307 4409 4850 6614 Weight lbs* Max hydraulic 3200 3200 3200 3200 3200 pressure Table 22. *Depending on attachment See separate user manual for detachable GRD. Also available on the website or by contacting engcon. -
Page 60: Glossary
3.5. ePS/C2C. Integrated locking hydraulics Warning light and sound that alerts if the bucket or other tool is incorrectly connected. engcon's standardized locking system for controlling all types of machine couplers and quick couplers. SQ – separate locking hydraulics. -
Page 61: Tiltrotator Overview
10 Glossary 10.3. Tiltrotator overview Pos. Designation Load-holding valve EC-Oil block T (Option) Tilt cylinder Yoke bracket Bushing, yoke bracket Spherical bearings QS/Q-safe Slip ring (Option) Single-point lubrication Tilt axle Shim set, tilt axle Cylinder axle Clamping half Hydraulic motor QS/Q-safe Sensor (Option) EC-Oil block H (Option) Locking cylinder... -
Page 62: Service
11 Service 11. Service 11.1. Service schedule Carried out by a specialist at initial machine service or no later than 500 operating hours: - Check the product compliance with the rating plate and user manual. - Review points according to section 6.2. Daily inspections. - Tighten bolted joints according to section 6.7. -
Page 63: Service Record
11 Service 11.2. Service record On the service record, there is space to note actions performed on the product that this user manual refer to. Specify the date of the action, what was done and who did it. Service partners must also imprint an ASP stamp in the space provided. This will make sure your product is a safe buy for any future owner. - Page 64 11 Service Date 500 h 250 h 2000 h Remark/Action Stamp/Signature...
- Page 65 11 Service Date 250 h 2000 h Remark/Action Stamp/Signature...
- Page 66 11 Service Date 250 h 2000 h Remark/Action Stamp/Signature...
- Page 67 Notes ..................................................................................................................................................................................................................................................................................................................................................................................................................................................................................................................................................................................................................................................
- Page 68 North America Inc. 2666 State St. 9, Hamden, CT 06517 Phone +1 (203) 691 5920, northamerica@engcon.com www.engcon.com...
Need help?
Do you have a question about the EC02 and is the answer not in the manual?
Questions and answers