Advertisement
Quick Links
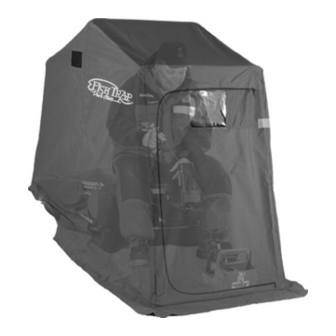
M o d e l N o .
- 8 24 4 -
p / n 1 0 8 3 2 1
Specifications
▪
He ight:
58" (2 0" packe d)
▪
W id th:
36"
▪
Depth:
80" (4 8" packe d)
▪
W eight: 47 lbs.
▪
Instruction p /n 102475
- C l a m C u s t o m e r S e r v i c e I n f o r m a t i o n -
NOTICE !! Once us ed, this shelter cannot be r etur ned to the stor e. If you have a
w arra nty c laim, hav e your sale s rec eipt rea dy and c ontac t Clam Corpora tion
Customer Ser vice by email inquiry or dir ect by callin g:
▪
Custome r Serv ice Hrs: - 9 a m to 4p m, Mon. - Fr i. Ce ntra l Standard T ime
▪
C lam Corpo rat ion
600 C lyd esdale T ra il
Me din a, MN 5534 0
▪
Phone - 763-231 -4120
▪
Fax - 763-231 -4 121
▪
Website – ww w.cla mc orp.com
▪
Ema il –
cus tomerserv ice @clamcorp.c o m
Clam Co rpora tion can not honor w arranty w ithout an original, dated r eceipt.
Advertisement

Related Manuals for Clam Corp Fish Trap Scout 8244


Summary of Contents for Clam Corp Fish Trap Scout 8244
- Page 1 M o d e l N o . - 8 24 4 - p / n 1 0 8 3 2 1 Specifications ▪ He ight: 58” (2 0” packe d) ▪ W id th: 36” ▪ Depth: 80” (4 8” packe d) ▪...
- Page 2 ITEM NO. PART NUMBER 101080 101081 101082 101083 101088 101140 101043 101609 101042 101141 102494 101095 101096 101148 101055 101486 101144 101429 101097 101607 101147 101048 101146 102432 102475 - P a r t s L i s t - DESCRIPTION SCREW, 1/4-20 X 1.25 WASHER, 1/4 FLAT...
- Page 3 - P a r t s D i a g r a m -...
- Page 4 - S t e p O n e -...
- Page 5 - S t e p T w o -...
- Page 6 - S t e p T h r e e - Scout Base (p/n 102494)
- Page 7 - S t e p F o u r -...
- Page 8 - S t e p F i v e -...
- Page 9 - S t e p S i x -...
- Page 10 - S t e p S e v e n -...
- Page 11 - S t e p E i g h t - Scout Tent (p/n 102432)
- Page 12 - S t e p N i n e -...
- Page 13 - S t e p T e n - If everything still looks good, secure the Molding with the #6 Phillips Screws. Evenly space them about every ten to twelve inches, and also put a screw in the center of both corners. Since there aren’...
- Page 14 Set-Up - Rotate the hoop poles forward, then position and expand the adjustable spreader pole in the rear of the unit to take the slack out of the tent. Tighten the tension knob on the rear adjustable spreader pole to hold its position. Take-Down - Go around the shelter and tuck the tent material in between the rested hoops to keep the tent from spilling out of the base and contacting the ground.
Need help?
Do you have a question about the Fish Trap Scout 8244 and is the answer not in the manual?
Questions and answers