Table of Contents
Advertisement
Quick Links
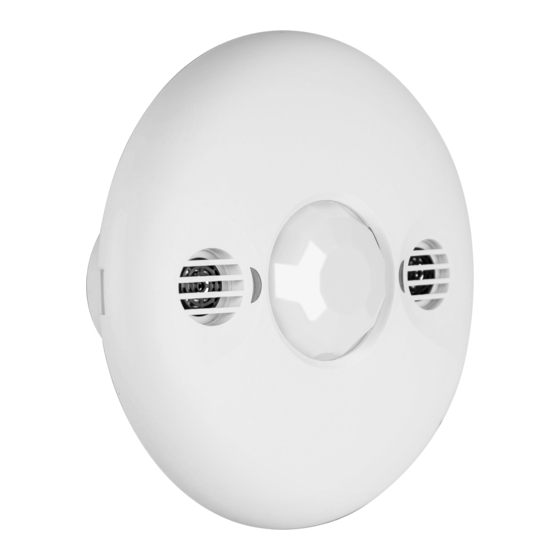
Specifications and Installation: RNET-OCC-LV-DT-CM
360° Dual-Technology PIR/Ultrasonic Low Voltage Occupancy Sensor
SPECIFICATIONS
Voltage ................................................................................... 24VDC
Current Consumption .............................................................. 20mA
Power Supply ......................................................................... RNET-OCC-PP Power Pack
Operating Temperature ........................................................... 32°to 131°F (0°to 55°C)
Adjustment Time Delay ........................................................... 5 Sec. to 30 Min.
Test Mode .............................................................................. Delay time is 5 sec. lasts 30 Min. at each time by setting
PIR Adjustment ....................................................................... 50% or 100% (DIP switch 1)
Ultrasonic Adjustment ............................................................. Minimum to Maximum (trimpot 1)
Light Level Adjustment ............................................................ 100 Lux –daylight (trimpot 2)
PIR Coverage ......................................................................... 1600ft
Ultrasonic Coverage ............................................................... 1000ft
DESCRIPTION
The RNET-OCC-LV-DT-CM 360° Dual-Technology Occupancy Sensor combines advanced passive infrared (PIR) and ultrasonic technologies into
one unit. The combined technologies help to avoid false triggering. Selectable operating modes allow the sensor to turn a load on, and hold it on as
long as either or both technologies detect occupancy. After no movement is detected for the selected time delay, the lights switch off.
The RNET-OCC-LV-DT-CM Operated on 24V supplied by RNET-OCC-PP Power Packs.
COVERAGE PATTERN
The RNET-OCC-LV-DT-CM provides a 360° coverage pattern. The coverage
9 feet. For building spaces with lower levels of activity or with obstacles and barriers, coverage size may decrease.
th
177 Broad Street, 12
Floor, Stamford, CT 06901 T
Copyright 2017 Revolution Lighting. All rights reserved.
2
2
–
–
877 578 2536 E
Support@rvlti.com
INS009_01_20170524
shown represents walking motion at mounting height of
rvlti.com
Page 1 of 8
Advertisement
Table of Contents

Related Manuals for Revolution Lightning RNET-OCC-LV-DT-CM


Summary of Contents for Revolution Lightning RNET-OCC-LV-DT-CM
- Page 1 DESCRIPTION The RNET-OCC-LV-DT-CM 360° Dual-Technology Occupancy Sensor combines advanced passive infrared (PIR) and ultrasonic technologies into one unit. The combined technologies help to avoid false triggering. Selectable operating modes allow the sensor to turn a load on, and hold it on as long as either or both technologies detect occupancy.
- Page 2 As a general rule, each occupant should be able to clearly view the sensor. Often the best location to install a RNET-OCC-LV-DT-CM in a closed office is off-center (see Figure 2). Avoid placing a sensor directly in line with an open door through which it has a clear view out, as the sensor may detect people walking by.
- Page 3 WIRING DIRECTIONS CAUTION! TURN POWER OFF AT THE CIRCUIT BREAKER BEFORE INSTALLING POWER PACKS OR SENSORS. Each RNET-OCC-PP power pack can supply power for 6 RNET-OCC-LV-DT-CM sensors. When using more sensors than this, multiple power packs are required. – –...
- Page 4 MOUNTING Using an Octagonal Junction Box Pull the low voltage wires from power pack into the Octagonal Junction Box through the conduit knockout. Connect the low voltage wires to the appropriate wires on the sensor. Loosen the appliance mounting screws attached to the Octagonal Junction Box. Align the sensor in the Octagonal Junction Box so that the mounting screws on the box match the holes on the sensor's rear housing.
- Page 5 SENSOR ADJUSTMENT There is a 40-second warm-up period when power is first applied. The sensors are factory preset to allow for quick installation in most applications. To make adjustments, open the Front Cover. Set the DIP Switch to the desired settings. See "DIP Switch Setting" below. –...
- Page 6 DIP SWITCH SETTING The RNET-OCC-LV-DT-CM has 8 DIP switches under the cover. They are used to set PIR sensitivity, time delay, override and trigger mode feature settings. PIR Sensitivity setting: Switch 1 50%, sensor's coverage is smaller, just about half of the widest range.
- Page 7 TROUBLESHOOTING Lights do not turn on with occupancy: Neither LED flash: Check that the circuit breaker has been turned back on. Check all sensor and power pack wire connections. Check for 24VDC input to the sensor between the red and black low voltage wires. ...
- Page 8 WARRANTY INFORMATION Our company warranties this product to be free of defects in materials and workmanship for a period of two (2) years. There are no obligations or liabilities on the part of our company for consequential damages arising out of, or in connection with, the use or performance of this product or other indirect damages with respect to loss of property, revenue or profit, or cost of removal, installation or reinstallation.
Need help?
Do you have a question about the RNET-OCC-LV-DT-CM and is the answer not in the manual?
Questions and answers