Table of Contents
Advertisement
Quick Links
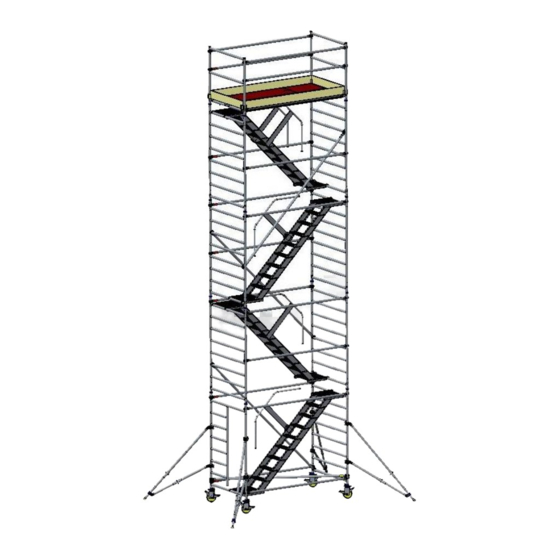
CUSTERS STAIR TOWER
maximum load:
maximum platformheight: 12 meter indoors
9.505.600.012EN
CUSTERS HYDRAULICA B.V.
Smakterweg 33,
P.O.Box 22,
e-mail
type HANDY
5804 AE VENRAY NL
5800 AA VENRAY NL
custers@custers.nl
INSTRUCTION MANUAL
2
200 kg/m
8 meter
outdoors
Telephone
Fax
: +31 (0) 478 55 30 10
Website
:
www.custers.nl
Sept. 2014
: +31 (0) 478 55 30 00
Advertisement
Table of Contents

Related Manuals for CUSTERS HANDY

Summary of Contents for CUSTERS HANDY
- Page 1 INSTRUCTION MANUAL CUSTERS STAIR TOWER type HANDY maximum load: 200 kg/m maximum platformheight: 12 meter indoors 8 meter outdoors 9.505.600.012EN Sept. 2014 CUSTERS HYDRAULICA B.V. Smakterweg 33, 5804 AE VENRAY NL Telephone : +31 (0) 478 55 30 00 P.O.Box 22,...
-
Page 2: Table Of Contents
Custers Hydraulica BV, Venray, the Netherlands. No part of this publication may be copied, duplicated and/or published by means of photocopying, printing, microfilm, CD-ROM, DVD, the Internet or any other means whatsoever, without the express written permission of Custers Hydraulica B.V. -
Page 3: Introduction
INTRODUCTION The Custers stair tower is part of a wide range of aluminium scaffolding products. If assembled according to the instructions given in this manual, the Custers stair tower meets the requirements of the EN1004. The Custers stair tower is available in the following lengths: - Scaffolding length: 1.8 m and 2.5 m... -
Page 4: Warranty And Liability
WARRANTY AND LIABILITY Custers provides a guarantee for material and manufacture faults. This guarantee is valid for 12 months after delivery. This means that we will repair faults or, at our discretion, we will take back part of the delivery or the whole delivery and replace it with a new delivery free of charge. -
Page 5: Safety Instructions
SAFETY INSTRUCTIONS Checking before assembly Check whether the people assembling the stair tower are suitably qualified and check if the location where the stair tower is to be erected is safe and suitable. Note: - The surface must be flat and sufficiently strong. - The area must be free from obstructions, both at ground level and above the ground. -
Page 6: Outriggers/Elbow Outriggers
Outriggers/elbow outriggers The outriggers/elbow outriggers stated in the assembly tables must always be fitted as soon as the bottom section of the stair tower reaches a height of 2 metres. The basic shape to be used, i.e. the outrigger/elbow outrigger to be used (small or large), can be found in the assembly tables. - Page 7 outrigger elbow outrigger optional:horizontal When the tower is positioned against a wall, do not remove the outriggers/elbow outriggers, but turn them parallel to the wall. When the tower is positioned in a corner, remove the inside outrigger/elbow outrigger, and turn the outside two parallel to the wall.
-
Page 8: Assembly Of The Stair Tower Zig-Zag
ASSEMBLY OF THE STAIR TOWER ZIG-ZAG 1: insert both wheels in the frame; make sure that the wheels are locked correctly 2: place the horizontals on the stands of the frame here walk through frame (or 8-rung frame) 3: insert both wheels in the frame; make sure that the wheels are locked correctly 4: place the horizontals on the stands of... - Page 9 between 5th and 6th step from bottom; firmly screw wingnut position the horizontal/diagonal position the stairs; make sure the stairs are properly secured (under the rung) position the stairs guardrail on the inside of the stairs place both horizontals on the stands of the frames apply the brakes and make the tower level by rotating the wheels' spindle...
- Page 10 16: position both frames 17: position locking pins between the mutual frames 18: position the diagonal (from 1 rung) 19: position a horizontal on the stands of the frames 20: position the stairs; make sure the stairs are properly secured (under the rung) 21: position the stairs guardrail on the inside of the stairs...
- Page 11 the penultimate level: 30: position both frames 31: position locking pins between the mutual frames 32: position the guardrail/diagonal along the stairs of the previous level 33: place both horizontals on the stands of the frames 34: position the stairs; make sure the stairs are properly secured (under the rung) 35: position the stairs guardrail on the...
-
Page 12: Assembly Of The Stair Tower Parallel
ASSEMBLY OF THE STAIR TOWER PARALLEL 1: insert both wheels in the frame; make sure that the wheels are locked correctly 2: place the horizontals on the stands of the frame here walk through frame (or 8-rung frame) 3: insert both wheels in the frame; make sure that the wheels are locked correctly 4: place the horizontals on the stands of... - Page 13 between 5th and 6th position the horizontal/diagonal step from bottom; position the stairs; make sure the firmly screw wingnut stairs are properly secured (under the rung) position the diagonal (from 1 rung) position the stairs guardrail on the inside of the stairs position the platform;...
- Page 14 18: position both frames 19: position locking pins between the mutual frames 20: position a horizontal on the stands of the frames 21: place both horizontals on the stands of the frames 22: position the stairs; make sure the stairs are properly secured (under the rung) 23: position the platform;...
- Page 15 the penultimate level: 33: position both frames 34: position locking pins between the mutual frames 35: place a horizontal on the stands of the frames 36: position the guardrail/diagonal along the stairs of the previous level 37: place both horizontals on the stands of the frames 38: position the stairs;...
-
Page 16: Using The Stair Tower
USING THE STAIR TOWER The following must be carried out each time before the stair tower is used: - Check whether the base (including the outriggers/elbow outriggers, wheel brakes) of the stair tower is correct. - Check whether the entire construction is correct and complete. - Check whether there are any changes in the circumstances which may affect the safe use of the stair tower. -
Page 17: Moving The Stair Tower
MOVING THE STAIR TOWER The stair tower may only be moved manually along the ground. When moving the stair tower, the normal walking speed must not be exceeded and no people or materials may left on the tower. Pay attention to obstructions, both on the ground and above ground level, when moving the stair tower. -
Page 18: Components
12 COMPONENTS 12.1 Component list standard components scaffold scaffold length 1.8m length 2.5m eight rung frame 9501.200.010 9501.200.010 walk through frame 9501.200.109 9501.200.109 tower railing frame 9501.200.125 9501.200.125 wheel 9501.510.010 9501.510.010 outrigger 1300 9501.410.100 9501.410.100 outrigger 2000 9501.420.100 9501.420.100 stairs 9501.600.??? 9501.600.370 stairs guardrail 9501.600.??? 9501.600.400... - Page 19 9/10 zig-zag...
- Page 20 9/10 parallel...
-
Page 21: Assembly Tables
12.2 Assembly tables The tables below shows which components are necessary for the assembly of a tower of a certain height. Make sure these components are present. Assembly table stair tower zigzag, available in the lengths: 1,8 m. and 2,5 m. 10 12 14 Working height (m): 10 12... - Page 22 Assembly table stair tower parallel, available in the lengths: 1,8 m. and 2,5 m. 10 12 14 Working height (m): 10 12 Platform height (m): Description Article number 8-rung frame 9501.200.010 12,5 walk through frame 9501.200.109 12,0 tower railing frame 9501.200.125 wheel 9501.510.010...
Need help?
Do you have a question about the HANDY and is the answer not in the manual?
Questions and answers