Table of Contents
Advertisement
Quick Links
Advertisement
Table of Contents

Related Manuals for MetaLife REFORMER


Summary of Contents for MetaLife REFORMER
- Page 1 Equipment Manual REFORMER Review January 10, 2020...
- Page 2 EQUIPMENT. PLEASE READ IT CAREFULLY BEFORE STARTING INSTALLATION AND OPERATION. PRESERVE AND KEEP IT FOR FUTURE CONSULTATIONS. Equipment manual REFORMER Throughout this manual, this symbol on the left will indicate extremely important information that must be read, understood and strictly followed.
-
Page 3: Table Of Contents
TABLE OF CONTENTS Product presentation ............4 Technical specifications ............ 5 Packaging content ............6 Installation manual ............7 Components ..............8 Preparation for assembly ..........9 Detailed assembly ............10 User manual ..............12 Uses and settings ............12 Maintenance and Safety ..........16 Warranty Term .............. -
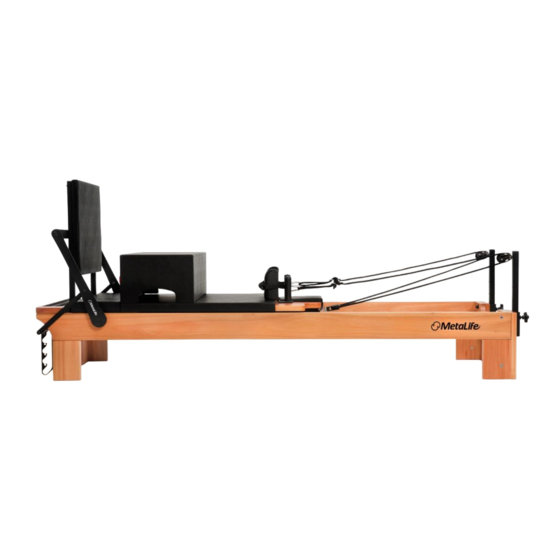
Page 4: Product Presentation
PRODUCT PRESENTATION The Reformer is deemed an essential equipment for those who work with the Pilates Method. Its configuration, which is composed of systems with simple and quick adjustments, allows an easy adaptation for users of different sizes and skill levels. -
Page 5: Technical Specifications
TECHNICAL SPECIFICATIONS DIMENSION REFORMER HIGH REFORMER 0.40m 0.62m 2.70m 2.70m 0.77m 0.77m 90 KG 140 KG Note: The weight of the MAXIMUM equipment may change due to WEIGHT the density variation of the raw SUPPORTED material used in its manufacture. -
Page 6: Packaging Content
PACKAGING CONTENT CONTENT RF BASE SET RF PLATE CARRIAGE SET RED SPRING 3X31X499MM (4x) BLUE SPRING 2.6X31X499MM FR FOOTBOARD SET 1 FR FOOTBOARD SET 2 RF/CD HEADBOARD FOOT 2 SET RF/CD HEADBOARD FOOT 1 SET RF PACKAGING RF TR MANUAL KIT RF HANDLE SHOULDER PAD SET (2X) RF AUXILIARY BAR SET... - Page 7 CONTENT THIGH-FOOT HANDLE (2x) RF GRAB BAR SUPPORT 1 RF GRAB BAR SUPPORT 2 FULL RF HOOK BLOCK SET (2x) PS SUPPORT BRACKET SET (2x) SINGLE LOCK CARABINER 8X80MM (3x) SUPPORT STRAP RF STOPPER WRENCH KIT HAND HANDLE (2x) RF SUPPORT LOCK ROPE HANDLE/LOCKED FOOT STRAP BLACK 8X5000MM INT HEX SCREW PN ZP 1/4X3/4 (8x) INT HEX SCREW CH ZP 1/4X1 (4x)
-
Page 8: Installation Manual
INSTALLATION MANUAL For your convenience, Metalife has a Network of Authorized Technicians qualified to install your equipment. An installation fee will be charged for this service. Such installation does not comprise site preparation services, which are the responsibility of the client. - Page 9 CONTENT HEX NUT AT ZB M10 (8x) RF GRAB BAR SUPPORT 1 RF GRAB BAR SUPPORT 2 RF SUPPORT LOCK FR GRAB BAR AUXILIARY TUBE FR FOOTBOARD SET 1 FR FOOTBOARD SET 2 RF/CD HEADBOARD FOOT 1 SET RF/CD HEADBOARD FOOT 2 SET SPRING FASTENER SET PS SUPPORT BRACKET (2x) FLAT WASHER ZB 2X10.5X21MM (M10) (4x)
-
Page 10: Preparation For Assembly
PREPARATION FOR ASSEMBLY The Reformer must be installed and used in an environment conducive to Pilates practice. The following characteristics must be respected in the equipment installation area: • Proper leveling and floor stability; • Low humidity; • Protection against sunlight. -
Page 11: Detailed Assembly
DETAILED ASSEMBLY CARRIAGE Remove the carriage from the Reformer's base frame. Rest the upholstery with the holes facing up. Turn the carriage frame over and align the holes in the chassis with those in the upholstery. Secure using INT HEX SCREWS PN ZP 1/4X3/4. -
Page 12: User Manual
1/4X1. Tighten up with the SHORT HEXAGONAL ALLEN WRENCH 5/32. SETTING THE FEET Start assembly by placing the feet along the base frame of your Reformer equipment. One person must lift the base frame for another person to assemble the feet, correctly fitting the dowels into the holes under the base frame. - Page 13 FIXING THE HEADBOARD FEET Attach the Headboard Feet to the Base Frame using the Complete Hook Block Set, FLAT WASHER ZB 2X10.5X21MM (M10) and HEX NUT AT ZB M10. Use the 17MM COMBINATION WRENCH in this procedure. MAKE SURE THAT THE COMPLETE HOOK BLOCK SET IS ALIGNED VERTICALLY.
- Page 14 After pre-assembling the parts, if you have the Jump Board, attach it to the PS brackets to ensure the alignment of the parts and then tighten up the nuts using 17MM COMBINATION WRENCH. Check the Jump Board manual for further information. EXERCISES CANNOT BE PERFORMED WITH THE JUMPING BOARD USING MORE THAN 03 SPRINGS AT THE SAME TIME.
- Page 15 INSTALLATION OF SHOULDER PAD AND HANDLE SETS Insert the shoulder pad with the upholstery facing the grab bar. MAKE SURE THAT THE SHOULDER PAD IS PROPERLY POSITIONED. STOPPER FITTING Insert the Stopper into one of the six positions of the adjustment bracket. NEVER USE THE EQUIPMENT WITHOUT THE STOPPER BEING FITTED IN ONE OF THE POSITIONS.
- Page 16 INSTALLATION OF ROPES Pass the end of the unknotted rope through one of the hook blocks (A) on the support. Pass this same end through the carriage's hook block (B). Then pass it through the hook block that is free (C). Align and pull the two ends of the rope towards the support bar.
- Page 17 USER MANUAL USES AND REGULATIONS SUPPORT BAR Its height can be adjusted through the brackets that are on the feet. They have 5 (five) placement levels. To adjust, slide the bracket's safety lock, and then move the bar's auxiliary handle to the desired height.
- Page 18 Different combinations of springs increase or reduce the intensity of strength exerted in the equipment. The Reformer is equipped with four red (very strong) springs and one blue (strong) spring. The springs can be identified by the seals with colors. In addition to identifying it, the seal contains the spring's serial number, so do not remove it.
- Page 19 It is recommended to establish a balance of the springs when they are not all used at the same time. When using two red springs, avoid attaching them to the same side of the carriage. In this case, it is recommended to use a spring WRONG WRONG at each end of the carriage or...
- Page 20 ASSEMBLING THE KNOT WITH A DOUBLE EYEBOLT 4. Tighten the lace, consuming the Apply the double eyebolt to the rope in 5 clearances of the rope in the double steps: 1. Pass the rope through the two double eyebolt, checking if the mooring was eyebolt rings;...
-
Page 21: Maintenance And Safety
IRREVERSIBLY. THE WOOD SURFACES ARE DELICATE; CONTACT TECHNICAL ASSISTANCE ON 0800 648 7400, THEY ACCEPT CLEANING WITH DRY FLANNEL OR CLOTH OR BY E-MAIL ASSISTENCIA@METALIFE.COM.BR. WE MOISTENED IN SOLUTION OF NEUTRAL SOAP AND WILL BE AT YOUR DISPOSAL FOR ANY CLARIFICATIONS. - Page 22 KNOCKS, WHICH DAMAGE THE SURFACE FINISH, REPLACEMENT OF ITS COMPONENTS. LEAVING THE METAL APPARENT AND SUSCEPTIBLE TO METALIFE ASSUMES NO LIABILITY UNDER ANY FORM OXIDATION. NEVER USE ABRASIVE MATERIALS SUCH AS OF IMPROPER USE OF THE EQUIPMENT. ENSURE THAT STEEL SPONGES, SYNTHETIC SPONGES, CREAM IT IS INSTALLED IN A SUITABLE ENVIRONMENT FOR CLEANERS OR SOLVENTS.
- Page 23 ANY FAULTY COMPONENT SHOULD NOT BE USED REPLACE THEM ONLY WITH PARTS SUPPLIED BY UNTIL IT IS PROPERLY REPAIRED OR REPLACED WITH A METALIFE, ENSURING THEIR SAFETY AND DURABILITY. NEW ONE; - MAKE SURE THAT SPRING TENSIONING STILL CORRESPONDS TO ITS USE. IF VARIATIONS IN SPRINGS...
-
Page 24: Warranty Term
- Expenses arising and resulting from the installation of parts and accessories that do not belong to the product, even those sold by Metalife Ind. e Com. de Móveis Ltda., except for those specified for each model in the Equipment Manual;... - Page 25 General considerations: - Metalife does not authorize any person or entity to assume, on its behalf, any other liability related to the warranty of its products, other than those set forth herein;...
- Page 26 Metalife Indústria e Comércio de Móveis Ltda Rodovia BR 280, 2.147 - Galpão 1 Rio Negrinho - SC CEP 89295-000 www.metalifepilates.com.br...
Need help?
Do you have a question about the REFORMER and is the answer not in the manual?
Questions and answers