Table of Contents
Advertisement
Quick Links
Advertisement
Table of Contents

Related Manuals for Metertech SP-870+


Summary of Contents for Metertech SP-870+
- Page 2 Metertech Inc. provides this publication “as is” without warranty of any kind, either express or implied, including, but not limited to the implied warranties of merchantability or fitness for a particular purpose. All rights are reserved, including those to reproduce this publication or parts thereof in any form without permission in writing from Metertech Inc.
-
Page 3: Table Of Contents
CONTENTS Introduction ..................Description ................... Components ................. Keyboard and display layout ............Rear panel layout ................. Specifications ................Installation ..................Standard equipment ..............Environmental and electrical conditions ........Installation ................... Operation ..................Powering up the equipment ............Absorbance and Transmittance measurements ......10 Concentration measurement with a factor ........ -
Page 4: Introduction
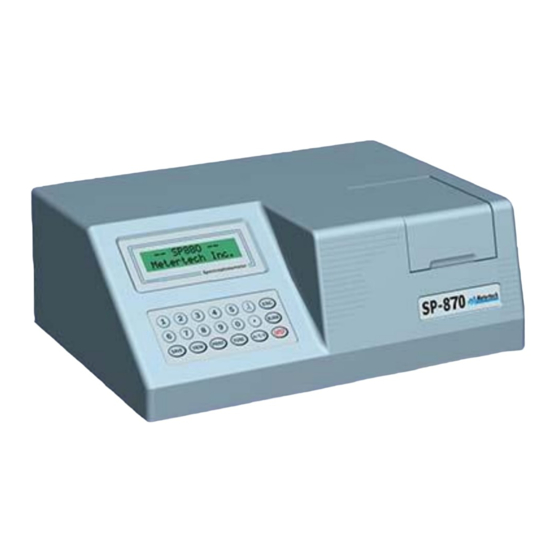
INTRODUCTION Description The model SP-870+ visible spectrophotometer is a digital microprocessor controlled instrument, providing photometric absorbance, transmittance and concentration measurements with the wavelength range of 330 to 1100 nm. The spectrophotometer has the following unique features: 1. Two-line, 16-large character LCD display 2. -
Page 5: Keyboard And Display Layout
Keyboard and display layout 1. A/T/C button: Switch among absorbance, %transmittance and concentration modes 2. λbutton: For entering desired wavelength 3. Numerical buttons: input wavelength, factor, concentration 4. ENTER button: To confirm selections or entries of fields or parameters, or to start measuring process according to current setting 5. -
Page 6: Rear Panel Layout
Rear panel layout 1. DC fan 2. Power switch 3. DC voltage input 4. RS232 port 5. Printer port Figure 3: Rear panel layout... -
Page 7: Specifications
Specifications _______________________________________________________________ Wavelength 330 ~ 1100nm Bandwidth pass Wavelength accuracy +/- 1nm Wavelength repeatability +/- 0.5nm Photometric range -0.300 ~ 3.500Abs Measurement mode A / %T / C Factor 0.1 ~ 9,999.9 Concentration 0.000 ~ 99,999.99 Photometric accuracy 1% or 0.003A(from 0.000 to 2.500A), whichever is greater by NIST SRM930e Stability <... -
Page 8: Installation
INSTALLATION Standard equipment The package contains items listed below. Unpack the carton and inspect carefully. If any part is damaged or missing, contact your dealer immediately. Description SP-870+ spectrophotometer AC adapter Power cord Operator’s manual 10mm plastic square cuvette Dust cover 50mm cuvette bracket 1 inch tube bracket Environmental and electrical conditions... -
Page 9: Installation
Installation 1. Place the spectrophotometer on a solid and level surface in a dry, clean environment. 2. Leave an open space at least 50mm distance from rear panel and side walls to guarantee air flow around the instrument. 3. Connect the female end of power cord into the inlet of AC adapter, and then the outlet plug of AC adapter into the DC input hole on the rear panel of instrument. - Page 10 Figure 4b: 50 mm rectangular cell holder Figure 4c: 1” cylindrical cell holder...
-
Page 11: Operation
1. Empty the cell holder and close the cell compartment lid. 2. Power on the SP-870+ spectrophotometer, LCD shows “—SP-870+ --, Metertech Inc.” for 2 seconds. 3. Then “Initialize, Zeroing…” for monochromator and filter wheel initialization. It takes less than one minute to finish optical zero-search. -
Page 12: Concentration Measurement With A Factor
Concentration measurement with a factor 2. Press “A/T/C” to select the concentration mode. 3. At conc&factor mode, the display begins with “Conc @ Factor, ->ENTER”. 4. Press “ENTER” into this mode and display shows concentration unit and its reading. 5. Press “ESC” and display shows current factor “F: XXX” with blinking at the first digit. -
Page 13: Concentration Measurement With A Standard
Concentration measurement with a standard 1. Press “A/T/C” to select the concentration mode. 2. At conc&standard mode, the display begins with “Conc @ Stand, ->ENTER”. 3. Press “ENTER” and LCD shows “WL: XXX nm, C: 0.000” with blinking at the first digit. 4. -
Page 14: System Functions
System Functions There are 11 options available in system functions. Press “FUNC” and display “1: Initial WL”. Press “ESC” repeatedly will display each option sequentially as explained below. 1. Initial WL Press “ENTER” and displays “nm: 500 A” with blinking at first digit. The initial wavelength and reading unit after power up are set up here. - Page 15 6. Data Print Press “ENTER” and shows “->0: No 1: Yes”. Saved measured data up to 100 sets can be all printed out by pressing “1” (printer must be set “ON” at option 3) or stopped any time by pressing “ESC”. Press “ESC” twice to the next option.
-
Page 16: Data Saving And Retrieve
Data saving and retrieve 1. The current reading, wavelength and measuring unit at any measuring mode can be saved permanently in memory by pressing “SAVE” to display “[00] Name: M “. 2. Then enter name MXX at blinking position by numerical value from 00 to 99, and press “ENTER”. -
Page 17: Maintenance
MAINTENANCE Routine care Very little maintenance is required to keep the instrument in good working condition. The interior should be kept as dust free as possible and the sample compartment cleaned regularly; wipe off spilt chemicals immediately. WARNING: Do not remove the cover of the instrument. CAUTION: Do not allow moisture to leak into the instrument. - Page 18 WARNING: Do not touch lamps with bare hands. Use glove or cloth to prevent staining of the bulb. WARNING: Pay extreme attention not to touch parts other than those as instructed. 1. Turn off and unplug the instrument. 2. Allow the lamp to cool for at least 10 minutes. 3.
-
Page 19: Messages
11. In the lamp house (figure 5b), loosen the white thumbscrew (#1) and adjust the vertical flange (#2) close to it forward/backward. The displayed number XXX will vary in accordance with flange movement. Find the largest number and tighten the thumbscrew. 12.
Need help?
Do you have a question about the SP-870+ and is the answer not in the manual?
Questions and answers