
Subscribe to Our Youtube Channel
Related Manuals for BC Strength Thruster


Summary of Contents for BC Strength Thruster
- Page 1 Thruster ASSEMBLY INSTRUCTIONS Thank you for your recent purchase. Please read these instructions carefully prior to constructing the Thruster.
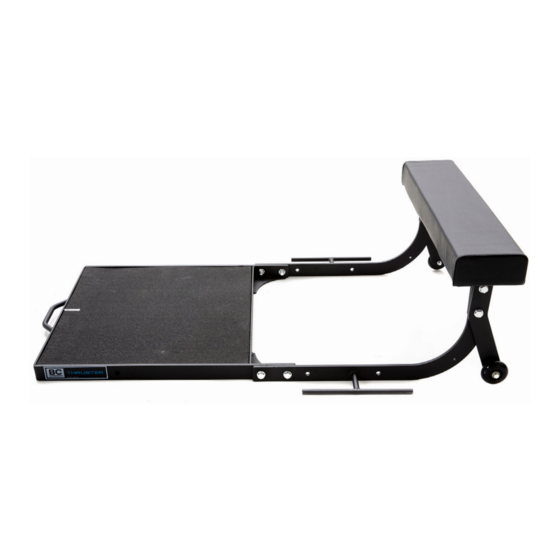
- Page 2 PARTS Tools required (not included): 19mm and 10mm socket wrench and a metric standard wrench BASE FRAME RUBBER MAT FOOT PLATE BASE FRAME J-SHAPED SIDES (x2) WHEEL BRACKETS (x2) BACK PAD BRACKET BACK PAD LARGE BOLTS (x8) LARGE WASHERS (x16) bcstrength.com | bcstrength.co.uk | bcstrength.com.au...
- Page 3 PARTS LOCK NUT (x8) SMALL BOLTS (x4) FOOT PLATE BASE FRAME SMALL WASHER (x4) bcstrength.com | bcstrength.co.uk | bcstrength.com.au...
- Page 4 ASSEMBLY INSTRUCTIONS STEP 1 a) Place Base Frame on flat surface (part A) STEP 2 a) Insert Rubber Mat (part B) into Base Frame b) Ensure the marked arrows align STEP 3 a) Place J-shaped sides (part C) b) Align with holes c) Insert Large Bolt and Large Washer (part G, part H) d) Place Large Washer and Lock Nut (part H, part I) bcstrength.com | bcstrength.co.uk | bcstrength.com.au...
- Page 5 ASSEMBLY INSTRUCTIONS STEP 3 (cont) e) Repeat on second hole f) Lightly tighten Bolts on both sides g) Repeat on the other side STEP 4 b) Hold Back Pad Bracket (Part E) on inside of a) Align Wheel Bracket with wheel on the outside J-shaped sides (Part C) and insert Large Bolt (Part D) onto J-shaped sides (Part C) and Large Washer (Part G, Part H)
- Page 6 ASSEMBLY INSTRUCTIONS STEP 4 (cont) f) Lightly tighten Bolts on both sides e) Repeat on the other side STEP 5 a) Place Back Pad (Part F) onto Back Pad Bracket b) Screw in Small Bolt with Small Washer (Part J, Part (Part E) and align holes K), repeating on all 4 holes DISCLAIMER...
Need help?
Do you have a question about the Thruster and is the answer not in the manual?
Questions and answers