Advertisement
JENNA
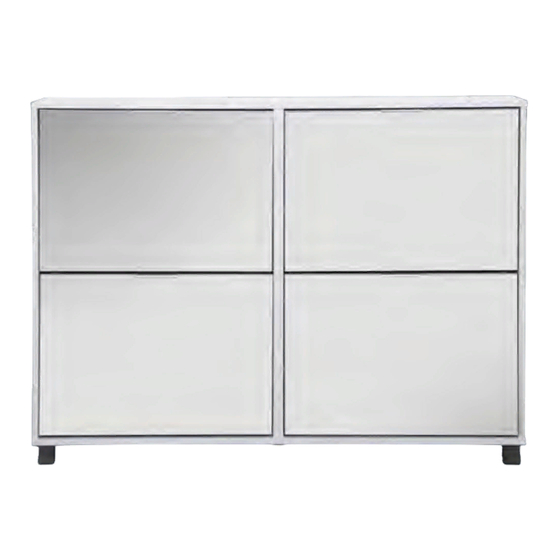
Mirrored Shoe Cabinet
Assembly Instructions
AFTER SALES SUPPORT
AFTER SALES SUPPORT
ASSEMBLY INSTRUCTIONS
ASSEMBLY INSTRUCTIONS
1 of 19
1300 777 137
1300 777 137
MODEL: GLS19745 PRODUCT CODE: 700314 04/2020
MODEL: GLS19745 PRODUCT CODE: 700314 04/2020
service@unclebills.com.au
service@unclebills.com.au
Advertisement

Related Manuals for ALDI SOHL Furniture Jenna GLS19745


Summary of Contents for ALDI SOHL Furniture Jenna GLS19745
- Page 1 JENNA Mirrored Shoe Cabinet Assembly Instructions AFTER SALES SUPPORT AFTER SALES SUPPORT ASSEMBLY INSTRUCTIONS ASSEMBLY INSTRUCTIONS 1 of 19 1300 777 137 1300 777 137 MODEL: GLS19745 PRODUCT CODE: 700314 04/2020 MODEL: GLS19745 PRODUCT CODE: 700314 04/2020 service@unclebills.com.au service@unclebills.com.au...
-
Page 2: Table Of Contents
Contents Warranty Details Assembly Tips Using Cam Lock and Quickfit Parts List Assembly Instructions Wall Mounting & Fixing Guide Repair and Refurbished Goods or Parts Notice Assembly requirements Equipment: phillips head screwdriver, flat head screwdriver and hammer 2x adults required 1m x 2m assembly space required 1.5 hour assembly time AFTER SALES SUPPORT... -
Page 3: Warranty Details
Jenna Mirrored Shoe Cabinet Warranty Details REGISTER YOUR PURCHASE AT www.aldi.com.au/en/about-aldi/product-registration/ TO KEEP UP-TO-DATE WITH IMPORTANT PRODUCT INFORMATION The product is guaranteed to be free from defects in workmanship and parts for a period of 12 months (dependent on product) from the date of purchase. Defects that occur within this warranty period, under normal use and care, will be repaired, replaced or refunded at our discretion. -
Page 4: Assembly Tips
Assembly Tips Important • Please read these instructions carefully before use and keep for future reference. • This product is intended for domestic use only and is not designed for commercial use. • Do not use this item if any components are missing or damaged. •... -
Page 5: Using Cam Lock And Quickfit
Using Cam Lock and Quickfit QUICKFIT Tighten quickfit until shoulder is flush with panel. Do not overtighten or undertighten. CAM LOCK When fitting cam lock, ensure starting position is correct before you insert connecting quickfit. Quickfit head should be in the centre of the Turn cam lock clockwise to tighten. -
Page 6: Parts List
Parts List Hardware 10 x A 10 x B 16 x C 20 x D Quickfit Screw Cam Lock Wooden Dowel Screw 8 x E 8 x F 48 x G 8 x H Stopper Screw Holder Screw Screw Holder 8 x I 4 x J 2 x K... - Page 7 Parts List Parts 1 - 1pc 2 - 2pcs 3 - 1pc 4 - 1pc 5 - 1pc 6 - 1pc 7 - 1pc 8 - 4pcs 9 - 8pcs 10 - 4pcs AFTER SALES SUPPORT ASSEMBLY INSTRUCTIONS 7 of 19 1300 777 137 MODEL: GLS19745 PRODUCT CODE: 700314 04/2020 service@unclebills.com.au...
-
Page 8: Assembly Instructions
Assembly Instructions Step 1 DOORS J x 1 Fit part 10 into brackets J and Q. Q x 1 Step 2 Fix brackets J and Q to part 10 using screws G. G x 2 AFTER SALES SUPPORT ASSEMBLY INSTRUCTIONS 8 of 19 1300 777 137 MODEL: GLS19745 PRODUCT CODE: 700314 04/2020... - Page 9 Assembly Instructions (cont) Step 3 Fix brackets J and Q to part 8 using screws G. G x 6 Step 4 Fix brackets J and Q to part 9 using screws G. G x 2 Fix handle L to part 8 using screws D. D x 2 L x 1 Repeat step 1 to 4 for the remaining doors.
- Page 10 Assembly Instructions (cont) Step 5 Fit stoppers E and screw holders F to parts 3, 4 and 5, as shown. E x 8 F x 8 Please make sure the flat smooth side of parts E are assembled facing upwards towards the top of the panels.
- Page 11 Assembly Instructions (cont) Step 6 Fit quickfit screws A and wooden dowels C to parts 3 and 4. A x 2 Insert cam locks B to part 2. Fit parts 3 and 4 to part 2. Turn cam locks clockwise to tighten. B x 2 C x 2 Step 7...
- Page 12 Assembly Instructions (cont) Step 8 Fit wooden dowels C to parts 3, 4 and 5. O x 6 Fit part 6 to parts 3, 4 and 5 and secure with screws O. C x 6 Step 9 D x 10 Fix feet N to part 6 using screws D.
- Page 13 Assembly Instructions (cont) Step 10 Fix quickfit screws A to part 1. D x 2 Fix wall brackets P to part 1 with screws D, as shown. P x 2 A x 6 Step 11 Insert cam locks B and wooden dowels C into parts 3, 4 and 5. Fit part 1 to the assembled unit and turn camlocks clockwise to secure.
- Page 14 Assembly Instructions (cont) Step 12 Fix back panel 7 to the assembled unit with nails M, as shown. Note: please ensure you face the white side in towards the cabinet. M x 18 AFTER SALES SUPPORT ASSEMBLY INSTRUCTIONS 14 of 19 1300 777 137 MODEL: GLS19745 PRODUCT CODE: 700314 04/2020 service@unclebills.com.au...
- Page 15 Assembly Instructions (cont) Step 13 For extra stability, you must fix your cabinet to the wall using the additional hardware K and O, as shown. Screws O are fixed from inside the unit, through the brackets and into the wall plugs K. K x 2 Should you choose not to affix the product to the wall, serious injury may be caused if the product tips over.
- Page 16 Assembly Instructions (cont) Step 14 Fix doors to the assembled unit, as shown. H x 8 One person holds the door in place, while the other attaches the screws I through screw holders H to secure. I x 8 Step 15 Slot shelf 9 into door and secure G x 8 with screws G, as shown.
- Page 17 Assembly Instructions (cont) Step 16 Your mirrored shoe cabinet is ready for use. Register your purchase at www.aldi.com.au/en/about-aldi/product-registration/ to keep up-to-date with important product information AFTER SALES SUPPORT ASSEMBLY INSTRUCTIONS 17 of 19 1300 777 137 MODEL: GLS19745 PRODUCT CODE: 700314 04/2020...
-
Page 18: Wall Mounting & Fixing Guide
Wall Mounting & Fixing Guide NOTE: Supplied wall plugs are only suitable for use in masonry walls. If you have any doubts about using the correct plug for your wall, please seek professional advice. Failure of the product due to using incorrect fixings is the responsibility of the installer. IMPORTANT: When drilling into walls, always check for hidden wires or pipes, etc. -
Page 19: Repair And Refurbished Goods Or Parts Notice
Please be assured though, refurbished parts or replacements are only used where they meet ALDI’s stringent quality specifications. If at any time you feel your repair is being handled unsatisfactorily, you may escalate your complaint.
Need help?
Do you have a question about the SOHL Furniture Jenna GLS19745 and is the answer not in the manual?
Questions and answers