Table of Contents
Advertisement
Quick Links
Advertisement
Table of Contents

Related Manuals for SmartPro Aura


Summary of Contents for SmartPro Aura
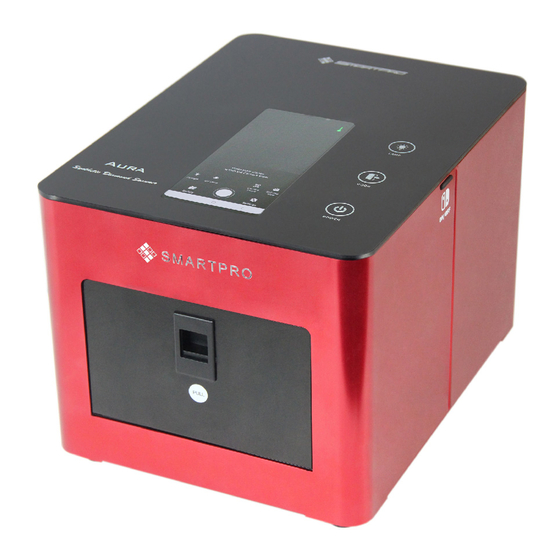
- Page 1 USER’S MANUAL v2.2 SmartPro Aura Synthetic Diamond Scanner...
-
Page 2: Table Of Contents
CONTENTS DISCLAIMERS, EXCLUSIONS, AND LIMITATIONS OF LIABILITY….. p. 3 ABOUT SMARTPRO AURA……………………………………………… p. 3 III. FEATURES AND ADVANTAGES……………………………………….. p. 4 PRODUCT SPECIFICATIONS…………………………………………… p. 4 TESTER OVERVIEW……………………………………………………… p. 5 ACCESSORIES……………………………………………………………. p. 8 VII. POWERING DEVICE……………………………………………………… p. 9 VIII. TESTER LIGHT INDICATORS…………………………………………… p. 10 CONTROL SETTINGS…………………………………………………….. -
Page 3: Disclaimers, Exclusions, And Limitations Of Liability
Smartpro Aura referred to in this user manual is provided and/or sold on the “as is” basis. Except as required by applicable law, no warranties of any kind, expressed or implied, including, but not limited to, the implied warranties of merchantability and fitness for a particular purpose. -
Page 4: Features And Advantages
estimated diameter size (mm) and counting of each loose stones being tested, plus auto-generating test certificate results. III. FEATURES AND ADVANTAGES FEATURES Able to test Mounted Jewelry and loose stones Able to Detect as small as 0.002 ct. stones ... -
Page 5: Tester Overview
Mobile Battery Auto-charging Ventilation Requirements Do not obstruct the ventilation holes TESTER OVERVIEW Tester Parts and Accessories A. Aura Carrying Bag B. Smartpro Aura Tester C. AC Power Cable D. Loose Stone Tray 1 (SPABST) E. Loose Stone Tray 2 (SPALST) F. - Page 6 Tester Overview...
- Page 7 Mobile Screen Overview Mobile Temperature Indicator Mobile Camera View Important Info Controls Gallery of Saved Main Settings Detection Results Back Button Test Button...
-
Page 8: Accessories
ACCESSORIES Loose Stone Tray – view size: 64 x 64 mm For Bulk Stones / Stones inside Transparent Plastic For Big and Separated Stones Tray Code: SPALST Tray Code: SPABST Ring / Jewelry Tray - 10 slots for ring and earrings. Ring and Earing slots Camera view... -
Page 9: Powering Device
POWERING DEVICE Turning ON the AURA Box. i. Connect the Power Cable into the Inlet Power Socket at the backside of AURA and the other end of cable plug to the Power Outlet. ii. Switch ON the Inlet Power Switch. -
Page 10: Tester Light Indicators
Turning ON the built-in mobile. Click and hold the Mobile Switch at the right side of AURA until the mobile screen opens. Note: Mobile blocked other applications that Smartpro Application will run smoothly without any error/bugs. VIII. TESTER LIGHT INDICATORS 1. -
Page 11: Control Settings
CONTROL SETTINGS Users may control the Daylight ON and OFF as well as the UV Lamp to manually observe stones. Camera Focus and 360 view may also adjust for a better image view. 1. Daylight Icon – controls the Daylight LED source ON/OFF. 2. -
Page 12: Testing / Detection
TESTING / DETECTION There are many types of mounting of stones in Jewelries and some are selling loose. So we created a tester that can test in almost all types of settings. Here are the available Detection Options: – this mode is capable to test the following: Quick Test Mode Bulk Stones on Tray Bulk Stones in Clear Plastic... - Page 13 Notes: Do not place stones or Jewelry over the Detection Area (black foam area). Jewelry is Jewelry is placed placed over the within the detection area. detection area. Arrange the Jewelries on the same height as possible to get a better camera focus for the best detection process.
- Page 14 Notes: For accurate testing, user should separate stones from the other (not overlapping) especially if the user is targeting to have proper counting and estimated diameter measurements. Size measurement is especially for round stones. This process cannot be used for bulk stones testing. Stones are nearly placed Stones are separated with each other.
-
Page 15: Test Results And Image Preview
TEST RESULTS AND IMAGE PREVIEW Quick Test Mode Results Stones with Red Marks = Synthetic / Lab Grown Diamond Stones without Red Marks = Natural Diamond / Unknown Stones Important: No red mark stones must compare with the given fluorescent reference images to confirm its type. - Page 16 After the detection process, the Preview Image Page will be shown on screen. Preview Image View Mode Daylight Touch to Result Image View Mode Fluorescent Result Image (pinch-to-zoom the image) Reference Images Touch to (Slide the stones to View Mode see more images) Different images view selection: Touch Text to...
- Page 17 Separated Test Mode Results Border Color Equivalent: Yellow : Diamond Blue : CVD Synthetics : HPHT Synthetics No Border : Unknown Stones / Similar behavior as other stones (overlapping color values) Important: Keep stones separated from each other to have better and accurate results. If the result images are blur, kindly do a retest.
- Page 18 View Mode Daylight Result Image Touch Text to select image Fluorescent Result Image pinch-to-zoom the image Border Color Equivalent Reference Fluorescent Images. (Slide the stones to see more images) 360 Detection The same detection as Jewelry on the tray but uses a Jewelry attachment to hold Rings and Jewelry and a motor for the rotation.
-
Page 19: Test Certificate
XII. TEST CERTIFICATE To show the test result professionally, Smartpro has made an auto-generated Test Certificate that will be found in the Preview Page after the detection process. This Certification may send directly to any email address by clicking the share button. - Page 20 OVERVIEW Test Unique ID Date Generated Fluorescent Image Test Result Test Results with counting and estimated stone diameter Details from the registration page Smartpro Website QR code Tester Serial No.
-
Page 21: Sharing Images / Test Certificate
XIII. SHARING IMAGES / TEST CERTIFICATE Go to Gallery and choose the image/file you want to share and touch the share Icon then enter the Receiver’s email address. This needs internet connection. Make sure that you turned ON the Wi-Fi and connect to the internet. -
Page 22: Image / Folder Gallery
IMAGE / FOLDER GALLERY Image Gallery has 3 available folders to save images from detection and all images will be saved automatically to their respective folder. The folders are Quick Test folder, Separated folder, and 360 folder. All files from the older mobile app. - Page 23 3. Deleting Folders or Images In case the user wants to delete each image or folder, just click the delete icon between the share and print icons. Delete Icon For Multiple folders/images deletion, touch and hold an image/folder, choose the images/folders to be deleted and then touch the Delete icon on the upper right side of the screen to delete selected images/folders.
-
Page 24: Main Settings
6. User’s Manual – this includes the User’s Manual and some supporting files that may be useful in using the Smartpro Aura tester. 7. Customer Support – A blank from where User may type their Name, Email Address, Contact Number, and Problems or Issues details to be sent automatically to customercare@smartproinstrument.com... -
Page 25: Safe Handling / Maintenance
If mobile is unable to turn-on, let it charge its battery by turning ON the AURA Box power switch at the back of the tester. Let the mobile charge for some time before using it. How can I contact online support? ... -
Page 26: Tester Thumbscrew Assembly
TESTER THUMBSCREW ASSEMBLY There are 4 pcs. of Thumbscrews to support the tester. See the picture below on how to assemble. We thank you for purchasing SmartPro AURA. Enjoy! SmartPro Instrument Co., Ltd. 249/40, MOO 9, J.S.P. BUILDING, BANGBON 1 ROAD, BANGBON, BANGBON, BANGKOK 10150, THAILAND E MAIL: SALES@SMARTPROINSTRUMENT.COM... - Page 27 Smartpro Instrument Co., Ltd. www.smartproinstrument.com Copyright © 2014 SmartPro Instrument Co., Ltd. All rights reserved.
Need help?
Do you have a question about the Aura and is the answer not in the manual?
Questions and answers