Advertisement
Table of Contents
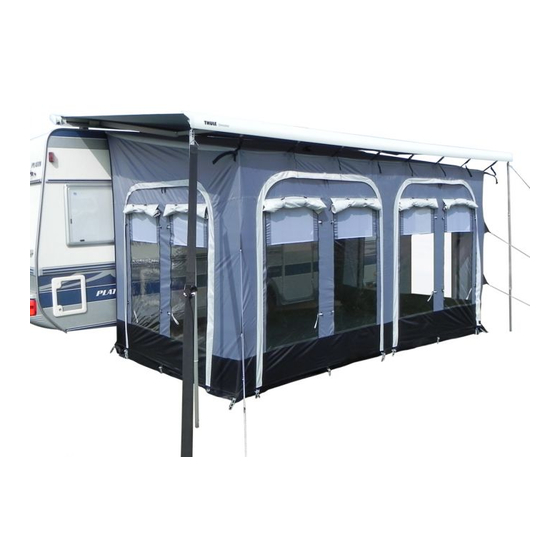
EASY TOURING
OPBOUWINSTRUCTIE • PITCHING INSTRUCTION • AUFBAUANLEITUNG
8.
Opbouwinstructie
1. Draai de luifel uit.
2. Plaats de Rafter (niet inbegrepen, optioneel).
3. Peesband met clips.
4. Schuif de peesband in de rail van de voorbox.
5. Schuif de tent door de caravanrail/camperrail.
6. Bevestig het klitteband aan de rafter (niet inbegrepen, optioneel).
7. Bevestig de tentclips met de peesbandclips. Werk vanuit het midden naar de zijkanten.
8. Trek de straps aan, zodat de het dak wordt gespannen. Begin op de hoeken en werk naar binnen.
9. U kunt de tent afspannen.
1.
3.
4.
5.
1.
6.
8.
1.
5.
4.
7.
8/9.
2
7.
9.
Advertisement
Table of Contents

Related Manuals for Obelink EASY TOURING


Summary of Contents for Obelink EASY TOURING
- Page 1 EASY TOURING OPBOUWINSTRUCTIE • PITCHING INSTRUCTION • AUFBAUANLEITUNG 8/9. Opbouwinstructie 1. Draai de luifel uit. 2. Plaats de Rafter (niet inbegrepen, optioneel). 3. Peesband met clips. 4. Schuif de peesband in de rail van de voorbox. 5. Schuif de tent door de caravanrail/camperrail.
- Page 2 Pitching instruction 1. Unroll the awning. 2. Place the optional rafter (not included) underneath the awning for extra support. 3. Beading with attachment clips. 4. Slide the beading with the attachment clips in the rail of the front box from the awning. 5.
Need help?
Do you have a question about the EASY TOURING and is the answer not in the manual?
Questions and answers