Table of Contents
Advertisement
Available languages
Available languages
Quick Links
Technical Specification
Model
Rated voltage
Article No.
Vacuum pressure
Warranty
The manufacturer provides warranty in accordance with the
legislation of the customer's own country of residence, with a
minimum of 12 months, starting from the date on which the appliance
is sold to the end user.
The warranty only covers defects in material or workmanship, which
will not apply in cases of:
- Normal wear and tear
- Incorrect use, e.g. overloading of the appliance, use of non-approved
accessories
- Use of force, damage caused by external influences
- Damage caused by non-observance of the user manual, e.g.
connectionto an unsuitable mains supply or non-compliance with
the installation instructions
- Partially or completely dismantled appliances.
Declaration of Conformity
This product is in accordance with the
following European directives:
2014/30/EU (EMV)
2014/35/EU (Niederspannung)
2011/65/EG (RoHS)
Disposal Information
If the icon below (crossed-out trashcan on wheels) is found on the product, the
European directuve 2002/96/EG applies. These products may not be disposed of in
the household waste at the end of its useful life. Disposal can take
place at appropriate collection points provided in your country.
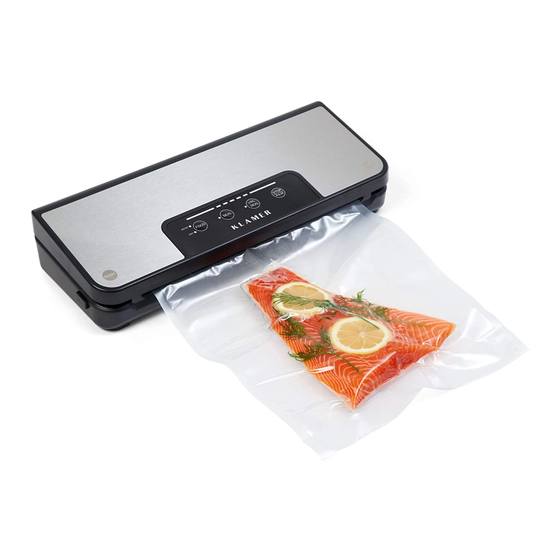
KLAMER Classic Vacuum Pro 80
220-240 V / 50-60 Hz
72063
80 kPa
23
VAKUUMIERER
BEDIENUNGSANLEITUNG
Lesen Sie diese Anleitung sorgfältig durch, bevor Sie das Gerät
verwenden und bewahren Sie sie auf
KLAMER Classic
Vacuum Pro 80
Hilfe und Video-Anleitungen
auf vacu.klamer-kitchen.com
oder QR-Code Scannen
Advertisement
Table of Contents

Related Manuals for Klamer Classic Vacuum Pro 80


Summary of Contents for Klamer Classic Vacuum Pro 80
- Page 1 VAKUUMIERER Technical Specification BEDIENUNGSANLEITUNG Model KLAMER Classic Vacuum Pro 80 Rated voltage 220-240 V / 50-60 Hz Lesen Sie diese Anleitung sorgfältig durch, bevor Sie das Gerät Article No. 72063 verwenden und bewahren Sie sie auf Vacuum pressure 80 kPa...
-
Page 2: Über Dieses Gerät
7. Schließen Sie dieses Gerät niemals an eine externe Zeitschaltuhr oder ein separates Fernbedienungssystem an, um Gefahr zu Hinweis vermeiden. Zum Trennen der Verbindung schalten Sie das Gerät aus Bitte wenden Sie sich bei Fragen oder Unklarheiten an das KLAMER Customer- Support Team unter hello@klamer-kitchen.com. Wir helfen Ihnen gerne! -
Page 3: Vor Der Ersten Benutzung
Bedienungsdiagramm Vor der ersten Benutzung 1. Entfernen Sie alle Verpackungen und alle Aufkleber oder Etiketten vom Gerät. 2. Wischen Sie die Innen- und Außenseite des Geräts mit einem feuchten Tuch ab. 3. Stellen Sie das Gerät auf eine feste, kühle und trockene Unterlage. MOIST STOP FOOD... - Page 4 Benutzung des Vakuumierers mit Rolle 1. Stellen Sie das Gerät auf eine stabile, horizontale und ebene Unterlage. Rollen Sie so viel Beutel von der Beutelrolle, dass die zu vakuumierenden Nahrungsmittel vollständig hineinpassen. Wichtig Füllen Sie den Beutel nur so weit, dass am oberen Rand genug Abstand für die Versiegelung ist.
-
Page 5: Reinigung Und Lagerung
Der Zusatz-Schlauch Empfehlung für Haltbarkeitszeiten Öffnen Sie den Deckel des Geräts und befestigen Sie den Haltbarkeit Haltbarkeit Vakuumschlauch am Anschluss im Gerät. nicht vakuumiert vakuumiert Befestigen Sie das andere Ende am Behälterdeckel. Verwenden Sie je Lagerung im Gefrierschrank (-15 / -18 °C) nach Behälter gegebenenfalls einen Adapter (siehe Bedienungsanleitung Ihrer Vakuumbehälter). -
Page 6: Problembehebung
Hilfreiche Tipps Problembehebung 1. Reinigen Sie Innen- und Außenseite des Beutels vor dem Versiegeln. Problem Mögliche Ursache Lösung Das obere Ende des Beutels muss flach in das Gerät eingelegt werde. Wenn Sie ein größeres Objekt vakuumieren, ziehen Sie den Beutel Der Vakuumierer geht nicht Das Gerät ist nicht mit der Stecken Sie den Netzstecker... -
Page 7: Technische Daten
VACUUM SEALER Technische Daten INSTRUCTION MANUAL Model KLAMER Classic Vacuum Pro 80 Netzspannung 220-240 V / 50-60 Hz Read this manual thoroughly before using and save it for future Artikelnr. 72063 reference Vakuumdruck 80 kPa Garantie KLAMER Classic Der Hersteller gewährt eine Garantie gemäß der Gesetzgebung des... -
Page 8: About This Device
Note: 7. Never connect this unit to an external timer or separate remote Please contact the KLAMER customer support team if you have any questions or control system to avoid danger. To disconnect, turn off the power problems. You can reach us via hello@klamer-kitchen.com. -
Page 9: Before First Use
Before first use Display Diagram 1. Remove all packaging and any stickers or labels from the device. 2. Wipe the inside and outside of the device with a damp cloth. 3. Place the device on an even, cool and dry surface. Product Diagram MOIST STOP... - Page 10 Using the vacuum sealer and the bag roll 1. Place the device on a stable, horizontal and level surface. Roll enough bag from the bag roll so that the food to be vacuumed will fit comfortably and there will be some space left towards the opening.
-
Page 11: Cleaning And Storage
The extra hose Shelf life recommendation Open the lid of the vacuum sealer and attach the vacuum hose to the Shelf life Shelf life vacuum nozzle on the left side. Not vacuumed Vacuumed Attach the other end of the hose to the container lid. Depending on Storage in freezer (-15 / -18 °C) the container, use an adapter if necessary (see the operating instructions for your vacuum containers). -
Page 12: Helpful Advice
Helpful Advice Problem solving 1. Clean the inside and outside of the bag before sealing. Make sure Problem Possible cause Solution that the top of the bag is placed flat in the machine. The vacuum sealer can’t be The device is not connected Insert the power plug into a 2.
Need help?
Do you have a question about the Classic Vacuum Pro 80 and is the answer not in the manual?
Questions and answers