Table of Contents
Advertisement
Quick Links
Advertisement
Table of Contents

Related Manuals for Varla PEGASUS


Summary of Contents for Varla PEGASUS
- Page 1 Varla Scooter PEGASUS Owner’s Manual Varla Electric Scooter www.varlascooter.com...
- Page 2 7. DO NOT violently hit the deck and other parts deliberately as this could damage the battery and frame and it will not be covered by the warranty. 8. If you ride in the dark, please wear visible and re�lective clothing. 9. Do not modify the electric scooter at will. These are some basic tips, now start your learning of the Pegasus scooter in details!
-
Page 3: Table Of Contents
CONTENTS Safety Warnings · · · · · · · · · · · · · · · · · · · · · · · · · · · · · · · · · · · · · · · · · · · · · · · · · · · · · · · · · · · · · · · · · · · · · · · · · · · · · · · · · · · · · · · · · · · · · · · · · · · · · · · · · · · · · · · · · · · · · · · · · · · · · · · · · · 1 Product Speci�ications ·... -
Page 4: Safety Warnings
Safety Warnings ☆ Riding an electric scooter does present potential risks and caution is required. Like any vehicle, an electric scooter has inherent hazards associated with its use (for example, falling off or riding it into a hazardous situation). ☆ The recommended minimum rider age is 16 and older. Any rider unable to �it comfortably on the scooter should not attempt to ride it. ☆... - Page 5 Safety Warnings 1. Please wear a helmet during the 2. Charge the battery with the original 3. Do not ride on bumpy and slippery riding and other protective gear, such charger, and someone needs to be roads, such as dirt road, gravel road, as elbow and knee protectors.
-
Page 6: Product Speci�Ications
Product Speci�ications Rated Motor 2x500W Top Speed 28 MPH Climbing Angle 25 degrees Battery 48V/15.6Ah Battery Max Range 28 Miles (depends on riding condition) Brake Dual Disc Brake Tire 8 inches Fat Tire Display LCD Display Frame Material Aluminum+Magnesium Alloy Suspension Dual Spring Suspension Throttle... -
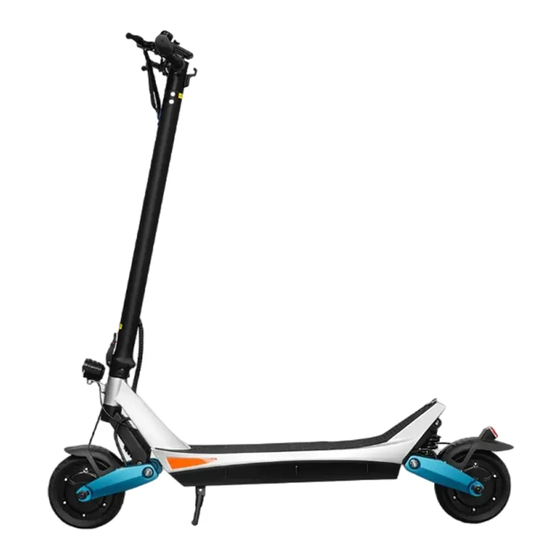
Page 7: Product Dimensions
Product Dimensions 20.8″ Handlebar Length 39.3″ Standing Height 49.1″ Overall Height 19.7″ Deck Length 18.9″ Folded Height 6.7″ 47.2″ Deck Width Overall Length To improve quality and safety of the product, the speci�ication might be changed without prior notice. -
Page 8: Electric Scooter Parts
Electric Scooter Parts Handlebar LCD Display Thumb Throttle Steering Bar Brake Deck Lock Rear Caliper Folding Clamp Deck mat Front light Deck Taillight Front Fender Rear Fender Rear Motor Kickstand Front Motor Front Charging Solid Tire Port Rear Rear Suspension Front Solid Tire Front Caliper... -
Page 9: Assembly
Assembly Put the handlebar on the stem, align center. Put the cover and tighten the screws at both ends. Install the LCD display, adjust to appropriate angle, and tighten the �ix screws. - Page 10 Assembly When connecting these two connectors, the arrow must be aligned with the arrow. You can turn on the power only when the assembly is completed.
- Page 11 Assembly How to Unfold the Scooter 2.Lift up the main rod 1.Unlock the clamp 3.Lock the clamp How to Fold the Scooter Step 1: Power off Step 3: Put down the main rod Step 2: Unlock the clamp...
- Page 12 Assembly *Please check if the folding buckle is fastened before you go. If it is loose, please adjust the nut and screw.
- Page 13 Dashboard (Current / Max / Average) BATTERY LEVEL INDICATOR (In the Event of a Problem) ERROR CODE INDICATOR (3 LEVELS OF GEAR) SPEED INDICATOR 3 LEVELS OF GEAR (On / Off) BACKLIGHT INDICATOR (Real-Time) VOLTAGE OUTPUT INDICATOR (Current Trip / System Mileage) DISTANCE INDICATOR...
-
Page 14: General Operation
General Operation When the power is on, it will show PAS 1, the top speed is 10 mph; ☆ Riding Methods Press the UP button, it will show PAS 2, the top speed is 16 mph; Press the UP button twice, it will show PAS 3, the top speed is 28 mph; Press and hold the M button for 3 seconds to turn on the LCD Display. - Page 15 General Operation Enter P-Setting - P16, then Long press UP button for 6 seconds to reset to 0. ☆ Lifetime odometer reset Balance the charge protection: balance the cell voltage automatically to protect the battery. ☆ Battery Overcharge protection: overcharge would damage the battery severely. Our battery would stop charging after been fully charged. Charging temperature protection: when the charging temperature is below 5 degrees celsius or over 40 degrees celsius, it will harm the battery, and may cause the battery to not be used normally.
- Page 16 General Operation Battery of the electric scooter Charger Plug Charger getting warm during use is normal. If your charger does not get warm during use, it does not mean that it is not working properly. ☆ Note: Don’t charge the scooter immediately after a long-distance ride. Please wait for at least 30 minutes. Continue charging the scooter even if light turns green prior to 12 hours.
-
Page 17: Accessing Settings
Accessing Settings Long press the UP and DOWN button at the same time to access the P-setting menu. Press the M button to toggle through P-settings. Use the UP/DOWN button to adjust the value. To save settings, allow the LCD display to timeout (8 seconds) or long press UP and DOWN button to exit the menu. - Page 18 P-Setting Instruction Setting Feature Backlight brightness Notes 1: low 2: mid 3: high Default: 1 Speedometer units 0: kph 1: mph Default: 0 Battery voltage (do not adjust) From 24V to 60V Default: 48V Auto-off time 0: not set 60: 60 min Default: 5 Gear number (do not adjust) 0: 0-3 gears...
- Page 19 P-Setting Instruction Setting Motor magnets (do not adjust) Feature Higher value Notes means lower speed. Default: 15 Power level 1: slowest 100: fastest Default: 100 km/h Start mode 0: zero start 1: kick to start Default: 0 Running mode (do not adjust) 0: only PAS, no throttle 1: only electricity no pas mode 2: PAS and throttle both work...
- Page 20 P-Setting Instruction Setting PAS sensor type (do not adjust) Feature Value: 5/8/12 Notes Default: 12 Controller limit (do not adjust) From 10-20 Default: 20A Controller voltage protection (do not adjust) Default: 40 Lifetime odometer reset Long-press Up button for 6s to reset to 0 Cruise control 0: off 1: on...
- Page 21 LCD Display Error Code: E06 Battery under voltage E07 Motor faulty E08 Throttle faulty E09 Controller faulty E10 Communication receive faulty (In the Event of a Problem) E11 Communication sending faulty ERROR CODE INDICATOR E13 Headlight faulty...
-
Page 22: Pre-Ride Checklist
Pre-Ride Checklist Check the brake options for proper function. When you pull the brake lever, the brake should provide positive braking action. ☆ Brake *When riding in gear 2 or above, the front and rear brakes must be braked together when you brake! Periodically inspect the tires has suf�icient tread remaining. -
Page 23: Warranty And Contact Information
Warranty and Contact Information Your purchase includes the following warranty. The warranty would be registered automatically when the initial purchaser ordered it in the online shop. The warranty is ONLY under the INITIAL PURCHASER. The 2-year warranty would be started since the initial owner receives it. Affected Part Warranty Period Service Content... - Page 24 HOW TO MAKE A WARRANTY CLAIM If you believe your Varla scooter has a warranty issue, your �irst point of contact should be your Store where you purchased. If you purchased directly from Varla Online Store, please contact our customer service team: customer@varlascooter.com.
- Page 26 WARRANTY CARD WARRANTY CARD Please complete the following details. Owner’s Name: Address: City: State: Zip Code: Order Number(s): Serial number(s): Date of Purchase: Phone number: Email:...
- Page 28 www.varlascooter.com...
Need help?
Do you have a question about the PEGASUS and is the answer not in the manual?
Questions and answers