Table of Contents
Advertisement
Quick Links
Advertisement
Table of Contents
Troubleshooting

Subscribe to Our Youtube Channel
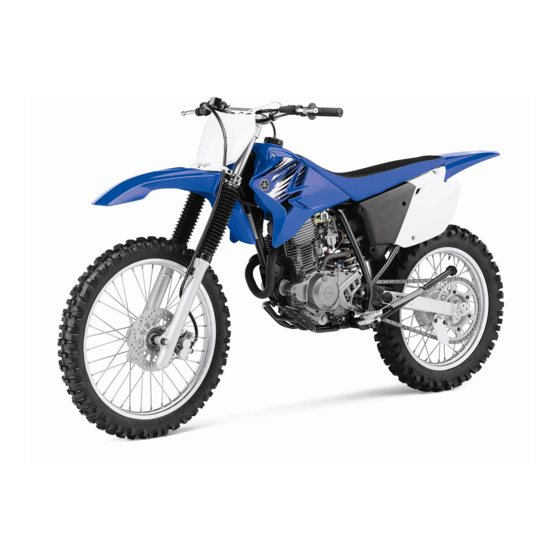
Related Manuals for Yamaha TT-R230V 2005


Summary of Contents for Yamaha TT-R230V 2005
- Page 1 OWNER’S MANUAL TT-R230V 1C6-F8199-21...
- Page 2 INTRODUCTION Congratulations on your purchase of the Yamaha TTR230V. This model is the result of Yamaha’s vast experience in the production of fine sporting, touring, and pacesetting racing machines. It represents the high degree of craftsmanship and reliability that have made Yamaha a leader in these fields.
- Page 3 ● Yamaha continually seeks advancements in product design and quality. Therefore, while this manual contains the most current product information available at the time of printing, there may be minor discrepancies between your motorcycle and this manual. If you have any questions concerning this manual, please consult your Yamaha dealer.
- Page 4 IMPORTANT MANUAL INFORMATION PLEASE READ THIS MANUAL AND THE “YOU AND YOUR MOTORCYCLE: RIDING TIPS” BOOKLET CAREFULLY AND COMPLETELY BEFORE OPERATING THIS MACHINE. DO NOT ATTEMPT TO OPERATE THIS MOTORCYCLE UNTIL YOU HAVE ATTAINED ADEQUATE KNOWLEDGE OF ITS CONTROLS AND OPERATING FEATURES AND UNTIL YOU HAVE BEEN TRAINED IN SAFE AND PROPER RIDING TECHNIQUES.
- Page 5 IMPORTANT MANUAL INFORMATION TTR230V OWNER’S MANUAL c c c c c 2005 by Yamaha Motor da Amazônia Ltda. 1st edition, May 2005 All rights reserved. Any reprinting or unauthorized use without the written permission of Yamaha Motor da Amazônia Ltda.
-
Page 6: Table Of Contents
TABLE OF CONTENTS SAFETY INFORMATION ....1-1 POINTS ..........5-1 Changing the brake fluid ....6-19 Location of important labels .... 1-6 Starting and warming up a cold Drive chain slack ......6-19 engine .......... 5-1 Lubricating the drive chain ... 6-20 Starting a warm engine .... - Page 7 TABLE OF CONTENTS CONSUMER INFORMATION ..... 9-1 Identification numbers ..... 9-1 Maintenance record ......9-2...
-
Page 8: Safety Information
SAFETY INFORMATION MACHINES ARE SINGLE TRACK Safe riding angle for the speed). Never travel ● VEHICLES. THEIR SAFE USE AND Always make pre-operation checks. faster than warranted by conditions. ● OPERATION ARE DEPENDENT UPON Careful checks may help prevent Ride cautiously in unfamiliar areas. THE USE OF PROPER RIDING an accident. - Page 9 Modifications made to this machine not Loading this machine. Since Yamaha cannot test approved by Yamaha, or the removal of The total weight of the operator, all other accessories that may be original equipment, may render the...
- Page 10 SAFETY INFORMATION does not in any way reduce ground therefore, such accessories are leaving the machine unattended clearance or cornering clearance, not recommended. and remove the key from the main ● limit suspension travel, steering Use caution when adding electrical switch.
- Page 11 SAFETY INFORMATION see your doctor immediately. If any gasoline spills on your skin or clothing, immediately wash the affected area with soap and water and change your clothes. 1 - 4...
- Page 12 SAFETY INFORMATION 1 - 5...
-
Page 13: Location Of Important Labels
SAFETY INFORMATION Location of important labels Please read the following important labels carefully before operating this vehicle. 1 - 6... - Page 14 SAFETY INFORMATION TIRE INFORMATION Cold tire normal pressure should be set as follows. FRONT: 100kPa, (1.00kgf/cm ), 15psi REAR: 100kPa, (1.00kgf/cm ), 15psi 3RV-21668-A0 1 - 7...
-
Page 15: Description
DESCRIPTION Left view 1. Fuel cock (page 3-5) 2. Starter (choke) knob (page 3-6) 3. Air filter element (page 6-11) 4. Shift pedal (page 3-2) 2 - 1... -
Page 16: Right View
DESCRIPTION Right view 1. Fuse (page 6-26) 2. Battery (page 6-24) 3. Shock absorver assembly spring preload adjusting nut (page 3-7) 4. Engine oil filter element (page 6-8) 5. Brake pedal (page 3-3) 2 - 2... -
Page 17: Controls And Instruments
DESCRIPTION Controls and instruments 1. Clutch lever (page 3-2) 2. Engine stop switch (page 3-1) 3. Main switch (page 3-1) 4. Start switch (page 3-1) 5. Brake lever (page 3-2) 6. Throttle grip (page 6-13) 7. Fuel tank cap (page 3-3) 2 - 3... -
Page 18: Instrument And Control Function
INSTRUMENT AND CONTROL FUNCTIONS Main switch Handlebar switches Engine stop switch “ ” Push this switch to stop the engine in Left case of an emergency, such as when the motorcycle overturns or when the throttle cable is stuck. Start switch “ ”... -
Page 19: Clutch Lever
INSTRUMENT AND CONTROL FUNCTIONS Clutch lever Brake lever Shift pedal 1. Brake lever The brake lever is located at the right 1. Clutch lever 1. Shift pedal handlebar grip. To apply the front brake, The clutch lever is located at the left The shift pedal is located on the left side pull the lever toward the handlebar grip. -
Page 20: Brake Pedal
INSTRUMENT AND CONTROL FUNCTIONS Brake pedal Fuel tank cap Fuel 1. Brake pedal The brake pedal is on the right side of 1. Fuel tank cap 1. Fuel tank filter tube the motorcycle. To apply the rear brake, 2. Remove 2. - Page 21 INSTRUMENT AND CONTROL FUNCTIONS Your Yamaha engine has been designed to use regular unleaded gasoline with a Immediately wipe off spilled fuel with pump octane number [(R+M)/2] of 86 or a clean, dry, soft cloth, since fuel may higher, or a research octane number of deteriorate painted surfaces or plastic 91 or higher.
-
Page 22: Fuel Tank Breather Hose
INSTRUMENT AND CONTROL FUNCTIONS Fuel tank breather hose Fuel cock The fuel cock supplies fuel from the tank to the carburetor while filtering it also. The fuel cock has three positions: FUEL 1. Arrow mark positioned over “ON” 1. Fuel tank breather hose FUEL With the lever in this position, fuel flows Before operating the motorcycle:... -
Page 23: Starter (Choke) Knob
INSTRUMENT AND CONTROL FUNCTIONS Starter (choke) knob “ ” Seat To remove the seat Remove the bolts, and then pull the seat off. FUEL 1. Arrow mark positioned over “RES” 1. Starter (choke) knob “ ” This indicates reserve. If you run out of Starting a cold engine requires a richer fuel while riding, move the lever to this air-fuel mixture, which is supplied by the... -
Page 24: Adjusting The Shock Absorber Assembly
● A special wrench is needed to make Never attempt to turn an adjusting this adjustment and it can be mechanism beyond the maximum or obtained at a Yamaha dealer. minimum settings. ● The spring preload setting is 1. Projection... -
Page 25: Starting Circuit Cut-Off System
Distance A = 194 mm (7.6 in) If a malfunction is noted, have a open the gas cylinder. Standard: Yamaha dealer check the system ● ● ● ● ● Do not subject the shock Distance A = 204 mm (8.0 in) before riding. - Page 26 INSTRUMENT AND CONTROL FUNCTIONS 3 - 9...
-
Page 27: Pre-Operation Checks
• If necessary, add recommended oil to specified level. • Check vehicle for oil leakage. • Check operation. • If soft or spongy, have Yamaha dealer bleed hydraulic system. • Check lever free play. • Adjust if necessary. Front brake •... - Page 28 • Make sure that operation is smooth. • Check cable free play. 6-13 Throttle grip • If necessary, have Yamaha dealer adjust cable free play and lubricate cable and 6-21 • grip housing. • Make sure that operation is smooth.
- Page 29 PRE-OPERATION CHECKS Pre-operation checks should be made each time the vehicle is used. Such an inspection can be accomplished in a very short time; and the added safety it assures is more than worth the time involved. If any item in the Pre-operation check list is not working properly, have it inspected and repaired before operating the vehicle.
-
Page 30: Points
OPERATION AND IMPORTANT RIDING POINTS Starting and warming up a 5. Start the engine by pushing the start switch. cold engine ● ● ● ● ● This model is designed for off- In order for the starting circuit cut-off road use only. In most instances, system to enable starting, one of the If the engine fails to start, release the it is illegal to ride this model... -
Page 31: Starting A Warm Engine
OPERATION AND IMPORTANT RIDING POINTS Starting a warm engine Shifting Follow the same procedure as for The engine is warm when it responds starting a cold engine with the exception normally to the throttle with the starter that the starter (choke) is not required (choke) turned off. -
Page 32: Engine Break-In
To allow the engine to cool down from the temporary buildup If any engine trouble should occur of heat, cruise at a lower engine speed. during the engine break-in period, immediately have a Yamaha dealer check the vehicle. 5 - 3... -
Page 33: Parking
OPERATION AND IMPORTANT RIDING POINTS Parking When parking, stop the engine, push the main switch to “OFF”, and then turn the fuel cock lever to “OFF”. ● ● ● ● ● Since the engine and exhaust system can become very hot, park in a place where pedestrians or children are not likely to touch them. -
Page 34: Periodic Maintenance And Minor Repair
The most important points of silencer port, and going to and render the vehicle unsafe for use. motorcycle inspection, adjustment, and Consult a Yamaha dealer before inside of the engine if no lubrication are explained on the following protection. From air intake port attempting any changes. -
Page 35: Periodic Maintenance Chart For The Emission Control System
From 7000 km (4200 mi) or 9 months, repeat the maintenance intervals starting from 3000 km (1800 mi) or 3 months. ● Items marked with an asterisk should be performed by a Yamaha dealer as they require special tools, data and technical skills. -
Page 36: General Maintenance And Lubrication Chart
PERIODIC MAINTENANCE AND MINOR REPAIR General maintenance and lubrication chart INITIAL EVERY 1000 km 3000 km 5000 km ITEM CHECKS AND MAITENANCE JOBS (600 mi) or (1800 mi) or (3000 mi) or 1 month 3 months 6 months Clutch • Check operation. •... - Page 37 PERIODIC MAINTENANCE AND MINOR REPAIR INITIAL EVERY 1000 km 3000 km 5000 km ITEM CHECKS AND MAITENANCE JOBS (600 mi) or (1800 mi) or (3000 mi) or 1 month 3 months 6 months • Check bearing assemblies for looseness. 10 * Steering bearing •...
- Page 38 (3000 mi) or 1 month 3 months 6 months 18 * Control cables • Apply Yamaha chain and cable lube or engine oil 10W-30 thoroughly. 19 * Throttle grip housing and • Check operation and free play. cable • Adjust the throttle cable free play if necessary.
-
Page 39: Removing And Installing The Panels
PERIODIC MAINTENANCE AND MINOR REPAIR Removing and installing the the panel needs to be removed and Panel B installed. To remove the panel panels 1. Remove the screw. Panel A 2. Pull the panel B to your direction. To remove the panel To make it easier, use the opening Remove the screw. -
Page 40: Checking The Spark Plug
(the ideal color when the vehicle is may occur ridden normally). If the spark plug shows a distinctly different color, the engine could be defective. Do not attempt to diagnose such problems yourself. Instead, have a Yamaha dealer check the vehicle. 6 - 7... -
Page 41: Engine Oil And Oil Filter Element
PERIODIC MAINTENANCE AND MINOR REPAIR Engine oil and oil filter 2. Check the spark plug for electrode 2. Clean the surface of the spark plug erosion and excessive carbon or gasket and its mating surface, and element other deposits, and replace it if then wipe off any grime from the The engine oil level should be checked necessary. - Page 42 PERIODIC MAINTENANCE AND MINOR REPAIR When removing the oil drain plug, the o-ring, compression spring and oil strainer will fall out. Take care not to lose these parts. 4. Remove the oil filter element drain bolt to drain the oil from the oil filter element.
- Page 43 PERIODIC MAINTENANCE AND MINOR REPAIR 5. Remove the oil filter element cover Tightening torque: Recommended oil: by removing the bolts. Oil filter element cover bolt: See page 8-1. 6. Remove the oil filter element and 7 Nm (0.7 m.kgf, 5.1 ft.lbf) Oil quantity: O-rings.
-
Page 44: Cleaning The Air Filter Element
2. Pull the air filter element out of the engine off immediately so it will air filter case. 1. Bleed bolt not seize. If this occurs, have a Yamaha dealer repair the vehicle. Tightening torque: ● ● ● ● ● After checking the oil pressure, Bleed bolt: 7Nm (0,7m.kgf, 5,0 ft.lbf) - Page 45 Recommended oil: 7. Install the panel. Yamaha foam air filter oil or other quality air filter oil 1. Wingnut 6. Install the air filter guide, air filter 2. Washer 3. Air filter element element, washer, wing nut onto the 4.
-
Page 46: Adjusting The Carburetor
To prevent this from most carburetor adjustments should be occurring, the valve clearance must be left to a Yamaha dealer, who has the adjusted by a Yamaha dealer at the necessary professional knowledge and intervals specified in the periodic experience. -
Page 47: Tires
PERIODIC MAINTENANCE AND MINOR REPAIR Tires ● ● ● ● ● Do not carry along loosely Off-road riding: packed items, which can shift To maximize the performance, durability, Front: during a ride. and safe operation of your motorcycle, 100 kPa (15 psi) ●... - Page 48 The replacement of all wheeland otherwise handling brake-related parts, including the characteristics of the vehicle tires, should be left to a Yamaha cannot be guaranteed. dealer, who has the necessary ● ● ● ● ● After extensive tests, only the ti-...
-
Page 49: Spoke Wheels
If any 5. Loosen the locknut further down the damage is found, have a Yamaha clutch cable. dealer replace the wheel. Do not 6. To increase the clutch lever free... -
Page 50: Adjusting The Brake Pedal Position
For brake pedal adjustment, be sure to proceed as follows (it is advisable 2. Free play to have a Yamaha dealer make this The rear brake pedal free play adjustment.) should be adjusted to 20 ~ 30 mm (0.8 ~ 1.2 in) at the brake pedal end. -
Page 51: Checking The Front Brake Pads And Rear Brake Shoes
1. Lower level indicator. If the indicator reaches the that the wear indicator groove have wear limit line, ask a Yamaha dealer to almost disappeared, have a Yamaha Insufficient brake fluid may allow air to replace the shoes. -
Page 52: Changing The Brake Fluid
Drive chain slack reservoir is level. ● Use only the recommended quality Have a Yamaha dealer change the brake The drive chain slack should be checked brake fluid, otherwise the rubber fluid at the intervals specified in the before each ride and adjusted if... -
Page 53: Lubricating The Drive Chain
PERIODIC MAINTENANCE AND MINOR REPAIR Lubricating the drive chain The drive chain must be cleaned and lubricated at the intervals specified in the periodic maintenance and lubrication chart, otherwise it will quickly wear out, especially when riding in dusty or wet areas. -
Page 54: Checking And Lubricating The Cables
If a cable is periodic maintenance chart. damaged or does not move smoothly, have a Yamaha dealer check or replace Recommended lubricant: Yamaha Chain and Cable Lube or engine oil SAE 10W-30 (API SE) -
Page 55: Checking And Lubricating The Brake And Clutch Levers
Lithium-soap-based grease (all- necessary. purpose grease) Recommended lubricant: Lithium-soap-based grease (all- purpose grease) If the sidestand does not move up and down smoothly, have a Yamaha dealer check or repair it. Recommended lubricant: Lithium-soap-based grease (all- purpose grease) 6 - 2 2... -
Page 56: Checking The Front Fork
If any free play can position. a Yamaha dealer check or repair it. be felt, have a Yamaha dealer check 2. While applying the front brake, push or repair the steering. -
Page 57: Checking The Wheel Bearings
If there is play in the wheel hub or if the wheel does not turn smoothly, have a Yamaha dealer check the wheel bearings. 1. Battery The battery is located behind panel A. - Page 58 Always keep the battery charged. dangerous since it contains To charge the battery Storing a discharged battery can sulfuric acid, which causes 1. Have a Yamaha dealer charge the cause permanent battery severe burns. Avoid any contact battery as soon as possible if it damage.
-
Page 59: Replacing The Fuse
4. If the fuse immediately blows again, To service the front wheel have a Yamaha dealer check the 1. Fuse 1. Stabilize the rear of the motorcycle 2. Spare fuse electrical system. -
Page 60: Front Wheel
To remove the rear wheel ● ● ● ● ● ● ● ● ● ● It is advisable to have a Yamaha It is advisable to have a Yamaha Do not apply the brake after the wheel dealer service the wheel. - Page 61 PERIODIC MAINTENANCE AND MINOR REPAIR 4. Lift the rear wheel off the ground To install the rear wheel Tightening torque: according to the procedure on page 1. Install the wheel. Axle nut: 6-26. 2. Install the drive chain onto the rear 80 Nm (8.0 m.kgf, 58 ft.lbf) 5.
-
Page 62: Troubleshooting
Use only genuine Yamaha replacement parts. Imitation parts may look like Yamaha parts, but they are often inferi- or, have a shorter service life and can lead to expensive repair bills. 6 - 2 9... -
Page 63: Troubleshooting Chart
Remove the spark plug and check the electrodes. The engine does not start. Have a Yamaha dealer check the vehicle. Check the battery. 4. Battery The engine turns over The battery is good. -
Page 64: Motorcycle Care And Storage
MOTORCYCLE CARE AND STORAGE Care ● ● ● ● ● connectors, including the spark Do not use any harsh chemical plug cap, are tightly installed. products on plastic parts. Be sure While the open design of a motorcycle 5. Remove extremely stubborn dirt, to avoid using cloths or sponges reveals the attractiveness of the like oil burnt onto the crankcase,... - Page 65 MOTORCYCLE CARE AND STORAGE windshield is scratched, use a caused by stones, etc. quality plastic polishing 7. Wax all painted surfaces. Do not use warm water since it compound after washing. 8. Let the motorcycle dry completely increases the corrosive action of the before storing or covering it.
-
Page 66: Storage
4. Fill up the fuel tank and add fuel Consult a Yamaha dealer for advice on stabilizer (if available) to prevent the what products to use. ● ● ● ● ●... - Page 67 MOTORCYCLE CARE AND STORAGE or warm place [less than 0 C (30 or more than 30 C (90 F)]. For more To prevent damage or injury from information on storing the battery, sparking, make sure to ground the see page 6-24. spark plug electrodes while turning the engine over.
-
Page 68: Specifications
SPECIFICATIONS Starting system: Fuel reserve amount: Dimensions: Electric starter 1.8 L (0.48 us.gal) (0.4 imp.gal) Overall length: 2065 mm (81.3 in) Lubrication system: Carburetor: Wet sump Overall width: Manufacturer: 800 mm (31.5 in) TEIKEI Engine oil: Overall height: Type: Type x quantity: 1180 mm (46.5 in) SAE 10W30 or SAE 10W40 or Y26P x 1... - Page 69 SPECIFICATIONS 2nd: Maximum load: Operation: 34/18 (1.889) 90.0 kg (198 lb) Right foot operation 3rd: (Total weight of rider, passenger, cargo Front suspension: 30/21 (1.428) and accessories) Type: Tire air pressure (measured on cold Telescopic fork 4th: tires): 27/24 (1.125) Spring/shock absorber type: Off-road riding: Coil spring/oil damper...
- Page 70 Record the vehicle identification number and model label information in the spaces provided below for assistance when ordering spare parts from a Yamaha dealer or for reference in case the vehicle is stolen. VEHICLE IDENTIFICATION NUMBER: 1. Model label 1. Vehicle identification number The model label is affixed to the frame.
- Page 71 CONSUMER INFORMATION Maintenance record Have a Yamaha dealer complete this record when the motorcycle is serviced. Maintenance Date of Servicing dealer Mileage Remarks interval name and address service 9 - 2...
- Page 72 YAMAHA MOTOR DA AMAZÔNIA LTDA. PRINTED IN BRAZIL 500 - 09/2004 - GYL...
Need help?
Do you have a question about the TT-R230V 2005 and is the answer not in the manual?
Questions and answers