Sign In
Upload
Download
Table of Contents
Contents
Add to my manuals
Delete from my manuals
Share
URL of this page:
HTML Link:
Bookmark this page
Add
Manual will be automatically added to "My Manuals"
Print this page
×
Bookmark added
×
Added to my manuals
Manuals
Brands
Yamaha Manuals
Motorcycle
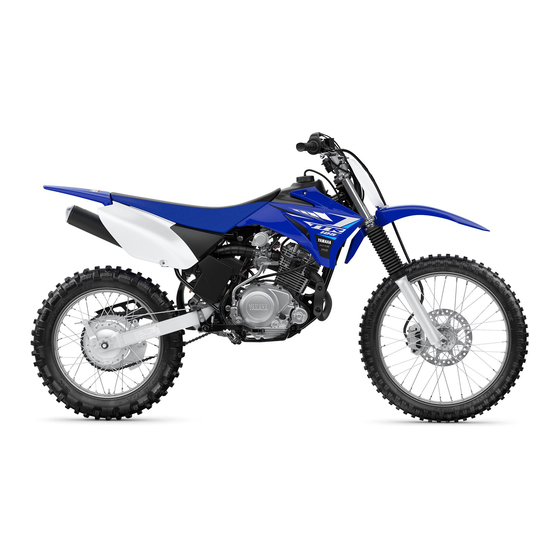
TTR 125 2020
Owner's manual
Yamaha TTR 125 2020 Owner's Manual
Hide thumbs
1
2
3
4
5
6
Table Of Contents
7
8
9
10
11
12
13
14
15
16
17
18
19
20
21
22
23
24
25
26
27
28
29
30
31
32
33
34
35
36
37
38
39
40
41
42
43
44
45
46
47
48
49
50
51
52
53
54
55
56
57
58
59
60
61
62
63
64
65
66
67
68
69
70
71
72
73
74
75
76
77
78
79
80
81
82
83
84
85
86
page
of
86
Go
/
86
Contents
Table of Contents
Troubleshooting
Bookmarks
Table of Contents
Table of Contents
Location of Important Labels
Safety Information
Description
Left View
Right View
Controls and Instruments
Instrument and Control Functions
Main Switch
Handlebar Switches
Clutch Lever
Shift Pedal
Brake Lever
Brake Pedal
Fuel Tank Cap
Fuel
Fuel Tank Breather Hose
Fuel Cock
Starter (Choke) Knob
Kickstarter
Seat
Adjusting the Front Fork
Adjusting the Shock Absorber Assembly
Sidestand
Starting Circuit Cut-Off System
For Your Safety - Pre-Operation Checks
Operation and Important Riding Points
Engine Break-In
Starting a Cold Engine
Starting a Warm Engine
Shifting
Parking
Periodic Maintenance and Adjustment
Periodic Maintenance Chart for the Emission Control System
General Maintenance and Lubrication Chart
Removing and Installing Panels
Checking the Spark Plug
Engine Oil
Cleaning the Air Filter Element and Check Hoses
Cleaning the Spark Arrester
Adjusting the Carburetor
Adjusting the Engine Idling Speed
Adjusting the Throttle Grip Free Play
Valve Clearance
Tires
Spoke Wheels
Adjusting the Clutch Lever Free Play
Adjusting the Brake Lever Free Play
Adjusting the Brake Pedal Height and Free Play
Checking the Front Brake Pads and Rear Brake Shoes
Checking the Brake Fluid Level
Changing the Brake Fluid
Drive Chain Slack
Cleaning and Lubricating the Drive Chain
Checking and Lubricating the Cables
Checking and Lubricating the Throttle Grip and Cable
Checking and Lubricating the Brake and Shift Pedals
Checking and Lubricating the Brake and Clutch Levers
Checking and Lubricating the Sidestand
Checking the Front Fork
Checking the Steering
Checking the Wheel Bearings
Battery
Replacing the Fuse
Supporting the Motorcycle
Front Wheel
Rear Wheel
Troubleshooting
Troubleshooting Chart
Motorcycle Care and Storage
Care
Storage
Specifications
Consumer Information
Identification Numbers
Motorcycle Noise Regulation
Maintenance Record
Yamaha Motor
Off-Road Motorcycle
Limited Warranty
Yamaha Extended Service (Y.e.s.)
Index
Advertisement
Quick Links
1
Table of Contents
2
Engine Oil
3
Adjusting the Carburetor
4
Specifications
Download this manual
TT-R125LWE
LIT-11626-34-46
2PT-F8199-17
Table of
Contents
Previous
Page
Next
Page
1
2
3
4
5
Advertisement
Table of Contents
Troubleshooting
Troubleshooting
66
Troubleshooting chart
68
Need help?
Do you have a question about the TTR 125 2020 and is the answer not in the manual?
Ask a question
Questions and answers
Related Manuals for Yamaha TTR 125 2020
Motorcycle YAMAHA TT-R125(W) Owner's Service Manual
(617 pages)
Motorcycle YAMAHA TT-R125(S) Owner's Service Manual
(611 pages)
Motorcycle YAMAHA TT-R125(T) Owner's Service Manual
(610 pages)
Motorcycle YAMAHA TT-R125(V) Owner's Service Manual
(610 pages)
Motorcycle Yamaha TT-R125Y Owner's Manual
(248 pages)
Motorcycle Yamaha TT-R125E Owner's Manual
(92 pages)
Motorcycle Yamaha TT-R125 2007 Owner's Service Manual
(616 pages)
Motorcycle Yamaha TTR 125 2023 Manual
(90 pages)
Motorcycle YAMAHA TT-R125(M) Owner's Service Manual
(443 pages)
Motorcycle Yamaha TT-R125EW Owner's Service Manual
Lit-11626-20-01; 1b2-f8199-12 (290 pages)
Motorcycle YAMAHA TT-R125(P) Owner's Service Manual
(509 pages)
Motorcycle Yamaha TT-R125EY Service Manual
(258 pages)
Motorcycle Yamaha TT-R125(R) 2002 Owner's Service Manual
(510 pages)
Motorcycle Yamaha TT-R125(N) 2000 Owner's Service Manual
(508 pages)
Motorcycle Yamaha TT-R125LWE 2023 Manual
(90 pages)
Motorcycle Yamaha TT-R125L WER 2023 Manual
(90 pages)
This manual is also suitable for:
Tt-r125lwe 2020
Tt-r230 2021
Ttr125 2021
Tt-r125lwe
Table of Contents
Save PDF
Print
Rename the bookmark
Delete bookmark?
Delete from my manuals?
Login
Sign In
OR
Sign in with Facebook
Sign in with Google
Upload manual
Upload from disk
Upload from URL


Need help?
Do you have a question about the TTR 125 2020 and is the answer not in the manual?
Questions and answers