Advertisement

Quick Links

COLUMBUS, RIDEAU & AURORA E-BIKE
PLEASE READ THIS MANUAL BEFORE ASSEMBLING OR RIDING YOUR E-BIKE
USER MANUAL
his user's manual explains the operation and maintenance of your E-Bike.
T
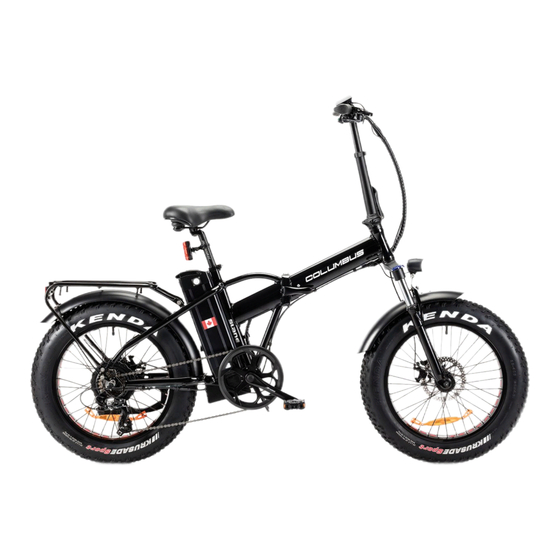
Diagrams in this manual may differ from actual products; refer to your local dealer's existing products.
Slane reserves the right to change or improve their products; further notice will not be given.

Advertisement

Table of Contents
loading
Need help?

Need help?

Do you have a question about the COLUMBUS and is the answer not in the manual?

Questions and answers

Summary of Contents for Slane COLUMBUS

  • Page 1 E-Bike. Diagrams in this manual may differ from actual products; refer to your local dealer’s existing products. Slane reserves the right to change or improve their products; further notice will not be given.
  • Page 2: Table Of Contents

    • Riding Safely..................14 • Parking & Maintenance..............15 • Don’t detach and disassemble spare parts or rebuild this electric bicycle. Purchase spare parts from an authorized dealer of SLANE E-Bikes. • Cleaning & Inspecting your E-Bike..........16 • Battery Storage................17 • If you find the cut-power function doesn’t happen when using the front or rear brake, have it repaired immediately.
  • Page 3: Technical Data

    TECHNICAL DATA HELMETS COLUMBUS RIDEAU AURORA Motor Rated Power (W) Motor Rated Voltage (V) Max Speed (km/h) Gear Shift Shimano 7 Speed Shimano 7 Speed Single • Many Provinces require specific safety devices. It is your responsibility to Range (km)
  • Page 4: Front Fender & Wheel Assembly

    FRONT FENDER & WHEEL ASSEMBLY INSTALL THE FRONT WHEEL RIDEAU, COLUMBUS & AURORA • Open the box from the top, take the bike, parts and accessories box out. • Carefully remove all protective carton pieces, foam pads, tie wraps, plastic fittings, •...
  • Page 5: Powering On/Dx 900 Led Display Operation

    POWERING ON RIDEAU & COLUMBUS INSERT KEY INTO THE IGNITION ON THE BATTERY CASE AND TURN TO “ON” RIDEAU & COLUMBUS Press and Hold to power on/off. When the motor stops working and the E-bike is not When the throttle or sensor is engaged (powering the motor), and the E-Bike is operated for a consecutive 5 minutes (this can be configured), the display will turn off automatically.
  • Page 6: Throttles

    A downshift is a shift to a lower or slower gear, which makes it easier to pedal. The RIDEAU & COLUMBUS are equipped with a thumb An up-shift is a shift to a higher or faster gear, which makes it harder to pedal.
  • Page 7: Adjusting The Saddle

    ADJUSTING THE FRONT BRAKES FOLDING THE E-BIKE CAUTION MAKE SURE ALL WIRES ARE CLEAR AND NOT PINCHED WHEN FOLDING THE E-BIKE. FAILURE TO DO SO MAY CUT OR DAMAGE THE WIRES AND WILL NOT 1. Insert an elbowed hex key into the screw port of the brake frame, turning the screw BE COVERED UNDER WARRANTY.
  • Page 8: Battery Charging

    BATTERY CHARGING • Switch off power and remove the key. • Remove (rotate to open) rubber stopper in the charging hole. Plug the output plug of the charger into the socket of the battery box. Then plug the power input plug (110-220V) into a household power socket to start the charging process.
  • Page 9: Riding Safely

    PARKING RIDING SAFELY • Shut off the power switch after you get off to prevent an unintentional abrupt start-up • Once you have completed the initial battery charge, you are ready to ride. of the bicycle • It is your responsibility to know and abide by all local laws that govern and •...
  • Page 10: Cleaning & Inspecting Your E-Bike

    BATTERY STORAGE CLEANING YOUR E-BIKE To avoid damage or accidents caused by wet inner electrical parts, do not wash your E-bike with STORING YOUR BATTERY FOR AN EXTENDED PERIOD a high-pressure washer. Clean off dirt on any painted metal or plastic parts with a damp cloth using a mild cleaning product.
  • Page 11: Flat Tire/Broken Spoke

    FLAT TIRE TROUBLE-SHOOTING If you get a flat tire, remove the wheel and depress the tire valve to let all the air out of the tube. Malfunction Analysis of Malfunction Solution Remove one bead of the tire from the rim by grasping the tire at a point opposite the valve stem with both hands lifting and peeling one side of the tire off the rim.
  • Page 12: Dealer Info & Purchase Record

    DEALER INFO AND PURCHASE RECORD Fill in immediately and retain as a record of your purchase. Retain your sales receipt for any possible warranty claims* Your name: THANK YOU FOR CHOOSING Address: Date purchased: Place of purchase: Model & brand information: HAVE FUN AND RIDE SAFE! Wheel size: Color:...
  • Page 13 THANK YOU FOR CHOOSING HAVE FUN AND RIDE SAFE!

This manual is also suitable for:

RideauAurora

Table of Contents