Table of Contents
Advertisement
DIAGNOSTIC X-RAY UNIT
User Manual
ULTRA 90BT
- ORANGE 9020BT, ULTRA 9020BT, ANYPLX 3-BT
Document No. : EUM-BT-03
Issued Date : Apr. 09, 2019
Revision : 1.1
For better performance and safety, this manual may be changed without any prior notice.
The original version of ULTRA 90BT is being written in English.
Advertisement
Table of Contents

Related Manuals for Ecoray ULTRA 90BT


Summary of Contents for Ecoray ULTRA 90BT
- Page 1 - ORANGE 9020BT, ULTRA 9020BT, ANYPLX 3-BT Document No. : EUM-BT-03 Issued Date : Apr. 09, 2019 Revision : 1.1 For better performance and safety, this manual may be changed without any prior notice. The original version of ULTRA 90BT is being written in English.
-
Page 2: Table Of Contents
Diagnostic X-ray Unit USER MANUAL Table of Contents Section 1. (General Information) Complied Standard ..........................Contact ................................5 Guarantee Condition & Contact ...................... 6 Intended Use .............................. 7 Product Name Designation ........................ Notes to Use ............................. Symbols and Terms ..........................7 Safety Information ........................... - Page 3 Diagnostic X-ray Unit USER MANUAL Section 3. (Service Manual) User Mode ........................35 Calibration Mode ......................Default Mode ........................ 38 Diagnostic X-Ray Unit Stand Fixing ................Battery Pack Exchange Procedure ................Fuse Exchange Procedure ..................42 Collimator LED Lamp Exchange Procedure .............. 43 Section 4.
-
Page 4: Section 1. (General Information)
Diagnostic X-ray Unit USER MANUAL Section 1. General Information... -
Page 5: Complied Standard
Contact ■ Manufacturer Ecoray Co., Ltd. - Manufacturer : Ecoray Co., Ltd. - Address : #714-716, ForHu B/D, 58, Wangsimni-ro, Seongdong-gu, Seoul, Korea. - TEL : +82-70-7510-3400 / FAX : +82-70-8630-3420 - E-Mail : info@ecoray.kr / info@ecoviewmedical.com... -
Page 6: Guarantee Condition & Contact
The guarantee does not cover additional and indirect damages related with system operation. Service may be requested by callings +82 70 7510 3400 (or email to info@ecoray.kr) customer service department for R.A numbers. The product name, serial number, date of purchase and the details of the problem should be provided. -
Page 7: Intended Use
Intended Use This X-ray unit is the equipment to diagnose the fracture of the object. Product Name Designation Main product name : ULTRA 90BT Addition product name : ORANGE 9020BT, ULTRA 9020BT, ANYPLX 3-BT Notes to User To ensure safe operation and long term performance stability, it is essential that you fully understand the functions, operating and maintenance instruction reading this manual before operating equipment. -
Page 8: Safety Information
Diagnostic X-ray Unit USER MANUAL Safety Information This equipment is designed and manufactured with due consideration given to the safety of the operator and subject, and also to the reliability of equipment. The following precaution must be observed for additional safety. Caution [ General ] Only an experienced expert should operate the unit. - Page 9 Diagnostic X-ray Unit USER MANUAL Caution [ Battery ] When you discover strange smell or liquid leakage, turn off the power Ø immediately and report to authorized dealer or manufacturer. If any liquids from the battery get into eyes, clean it with pure water Ø...
-
Page 10: Radiation Information
Diagnostic X-ray Unit USER MANUAL Radiation Information This equipment is manufactured with the necessary devices and it protects object from the ionized radiation that is radiated form the X-ray source assembly Caution User and operator must use a protective devices (X-ray protection partition) Ø... -
Page 11: Warning Information
Diagnostic X-ray Unit USER MANUAL Warning Information This is the important information for the reader or user. User or reader should pay attention to this important information. If not, serious damage to people or equipment can be occurred. Warning [ General ] Do not modify this equipment without authorization of the manufacturer. -
Page 12: Warning Label Information
Diagnostic X-ray Unit USER MANUAL Warning Label Information Warning of ionized Radiation This label placed on the top of top case. The ionized radiation is dangerous for the operator if the appropriate safety measures are not strictly observed. Warning of dangerous voltage This label placed on the top of HV Tank. -
Page 13: Label Information
Diagnostic X-ray Unit USER MANUAL Label Information Beam Limiting Device This label placed on the side of collimator. This label explained Identification collimator information. This label placed on the bottom case. This label explained product information. Hand Switch This label placed on the side Hand switch. -
Page 14: Identification Label
Diagnostic X-ray Unit USER MANUAL Identification Label ① ② ③ Explanation General Information ① Electric Current Direct Current User must be fully aware of the manual before User Manual using. ② Disposal of this product must be handled according Disposal to local laws and regulations ③... -
Page 15: Proper Environment
Diagnostic X-ray Unit USER MANUAL Proper Environment Caution : Avoid the following environments for operation or storage ; Where the equipment is exposed to water vapor. Where the equipment is exposed to direct sunlight. Where the equipment is exposed to dust. Where the equipment is exposed to high humidity. -
Page 16: Accessories Composition
Battery Charger - Input : 100 – 240V~, 50/60 Hz, 1.3 A - Output : 58.8 VDC, 1.0 A - Manufacture : Ecoray Co., Ltd. - Voltage : 51.8 VDC Battery Pack - Charge Voltage : 58 VDC ± 0.05 VDC... -
Page 17: Dimension
Diagnostic X-ray Unit USER MANUAL Dimension (Unit : mm, Without accessories Weight : About 8.7 kg) -
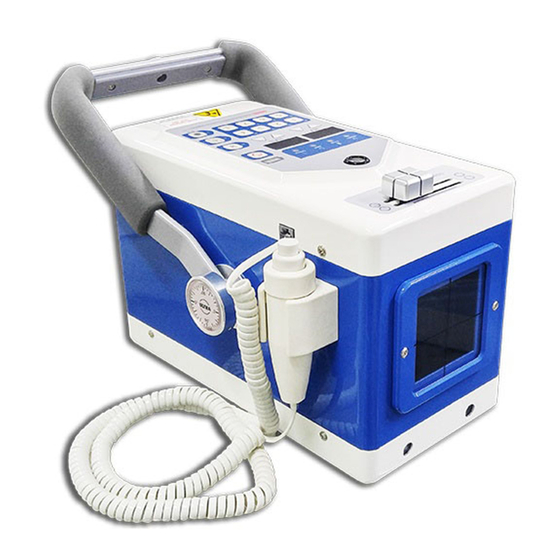
Page 18: Name Of Each Part
Diagnostic X-ray Unit USER MANUAL Name of Each Part ④ ⑤ ① ⑦ ⑥ ② ③ ⑧ ⑨ ⑩ ⑪ ⑫ ① ⑦ Handle Laser Beam Outlet ② ⑧ Operation Panel Hand Switch Connector ③ Main Body ⑨ Angle Meter ④... -
Page 19: Operation Panel
Diagnostic X-ray Unit USER MANUAL Operation Panel ④ ① ⑤ ② ⑥ ⑦ ③ ⑧ Name Performance This green lamp indicates unit ready exposure. This yellow lamp indicates the exposure is being made. ① System Indicate This lamp indicates wait time after exposure. -
Page 20: Specifications
Diagnostic X-ray Unit USER MANUAL Specifications ∎ Classification ∙Electrical classification External electrical source Class II ∙Electrical type No applied parts ∙IPX specification IPX 0 : Ordinary equipment Continuous operation with intermittent ∙Mode of operation (Time interval between 1 exposure : rest time 1 min) ∎... -
Page 21: X-Ray Tube Specification
Diagnostic X-ray Unit USER MANUAL X-ray Tube Specification Manufacture C.E.I OX/70 ● Type Stationary ● Focal spot 1.2 mm ● Target angle 19 degrees ● Target material Tungsten ● Inherent filtration At least 0.5 mm Al ● Voltage 90 kV ●... - Page 22 Diagnostic X-ray Unit USER MANUAL Rating Chart...
- Page 23 Diagnostic X-ray Unit USER MANUAL...
- Page 24 Diagnostic X-ray Unit USER MANUAL Section 2. Operation...
-
Page 25: Operation Conditions
Diagnostic X-ray Unit USER MANUAL Operation Conditions Power Source Battery : 51.8 VDC, 2,600 mAh (Lithium-Ion Polymer Battery) Battery Charger : 100 – 240 V~, 50/60 Hz, 1.3 A (Input) 58.8 VDC, 1.0 A (Output) Battery charging time : About 3.5 hrs Power consumption : Approximately 1.35 kW (Max.) The diagnostic x-ray unit has the technique selection function as follows. -
Page 26: Operation Instruction
Diagnostic X-ray Unit USER MANUAL Operation Instruction Collimation Practices 1) Positioning the object with the collimator. 2) Place the loaded cassette on the object backside. 3) Set SID using with the scale that is located the side of the collimator. 4) Turn on the collimator lamp and laser pointer by pushing the collimator/laser "ON"... -
Page 27: Normal Operation Check
Diagnostic X-ray Unit USER MANUAL Normal Operation Check 1) Please wear a lead apron while you make exposures. 2) Check the display of operation panel for confirming the battery's state. 3) If battery charging is completed, turn the main switch "ON". Then default value(kV : 40, mAs : 0.32) will be displayed on the panel with beep sound. -
Page 28: Apr Mode
Diagnostic X-ray Unit USER MANUAL APR Mode The 'APR Mode' is a function for user's convenience, that user can store an irradiation values of each exposure part in advance. In 'APR Mode', User can store twelve values at '12 Mode' and seven values at '7 Mode'. Mode APR Key 1+5, 1+6, 1+7 / 2+5, 2+6, 2+7... -
Page 29: Implementation Of Radiographs
Diagnostic X-ray Unit USER MANUAL n Implementation of Radiographs 1) Please wear a lead apron while performing an x-ray 2) Turn on the main switch. 3) If you need to warm up this unit, expose 3 times each following the 5) chart in page.27. -
Page 30: Error Code And Corrective Actions
Diagnostic X-ray Unit USER MANUAL Error Code and Corrective Actions Code Meanings of Error Corrective Action The ready contactor of the hand Reset main switch. If proper operation is Err01 switch is closed even it is not unavailable, change the hand switch. pushed. -
Page 31: Exposure Data Table
Diagnostic X-ray Unit USER MANUAL Exposure Data Table [CHART FOR EQUINE] High Contrast Mid Contrast ESD/Radiograph ESD/Radiograph ANATOMY VIEW (mGy) (mGy) 0.10 1.25 0.08 NAVICULAR 1.25 0.08 0.07 0.06 0.10 1.25 0.08 FETLOCK 1.25 0.08 0.07 AP/FLEX 0.10 1.25 0.08 KNEE LAT/OBI 1.25... -
Page 32: Designated Significant Zones Of Occupancy
Diagnostic X-ray Unit USER MANUAL Designated Significant Zones of Occupancy In case the operator brings x-ray unit out of designated place to object location, he must take free-radiation space before x-ray examination as following diagram indicates any significant zone of occupancy designated in accordance with this sub clause shall have a floor area of dimensions not less than 60 cm x 60 cm and a height of not less than 200 cm and wear appropriate lead apron(protective device) to protect himself from leakage radiation. - Page 33 Diagnostic X-ray Unit USER MANUAL Section 3. Service Manual...
-
Page 34: User Mode
Diagnostic X-ray Unit USER MANUAL User Mode In this mode, user can select the mode which they want among below table. 1. Press the 'Laser Key' for 2 second to access the User Mode. 2. Set the mode by pressing kV key(UP/DOWN). 3. - Page 35 Diagnostic X-ray Unit USER MANUAL Mode : U05 This is a function that Set the mAs to "01", automatically switches to then user can choose the power-saving mode if time by unit of 1 min, the operating of from 1 to 10. equipment is not work Sleep above the setting time.
-
Page 36: Calibration Mode
Diagnostic X-ray Unit USER MANUAL Calibration Mode Because this equipment uses battery power source, long-time use of battery can make some deviation of kV or mA value. Therefore once in year, should be measure the kV or mA periodically by kV or mA Meter. If deviation is found, calibrate it by using one of below Mode. -
Page 37: Default Mode
Diagnostic X-ray Unit USER MANUAL Default Mode This Mode will initialize the User Mode and APR Mode that user saved. 1. The way to access the Default Mode is same with Calibration Mode. 2. The saved values of User Mode or APR Mode will be initialized if you press the “APR Store Key”... -
Page 38: Diagnostic X-Ray Unit Stand Fixing
Diagnostic X-ray Unit USER MANUAL Diagnostic X-Ray Unit Stand Fixing 1. When installing diagnostic x-ray unit to the Stand, insert captive bolt (8 mm) through middle hole (8.5 mm) as below picture and make it stable by tighten the bolt. 2. -
Page 39: Battery Pack Exchange Procedure
Diagnostic X-ray Unit USER MANUAL Battery Pack Exchange Procedure In need of replacing the battery, please do pursuant to the followings 1. Power “OFF” the equipment 2. Turn over the equipment, and loosen the four bolts by using a regular screw- driver like "A". - Page 40 Diagnostic X-ray Unit USER MANUAL 4. After loosening the four bolt of "B", separate the existing battery pack lifted by a hand. 5. Please remove the "C" connector from the connector housing "J1", ahead of installing a new battery pack. (J1) Warning Whenever installing a new battery pack after separating the existing device, the...
-
Page 41: Fuse Exchange Procedure
Diagnostic X-ray Unit USER MANUAL order of the procedure 3. and assemble the "C" the connector at the connector housing "J1". At last, assemble the bottom cover in the reverse order of the procedure 2. Fuse Exchange Procedure In case of an unexpected occurrence of over current causing the disconnection of fuse, the equipment is unable to operate. -
Page 42: Collimator Led Lamp Exchange Procedure
Diagnostic X-ray Unit USER MANUAL Collimator LED Lamp Exchange Procedure In case of No-light of collimator's LED lamp by a damage, please replace according to the followings. 1. Turn "OFF“ the equipment 2. Place the collimator knob like the following photo, loosen the four bolts fixed with collimator knob by a regular screwdriver as indicated by "D". - Page 43 Diagnostic X-ray Unit USER MANUAL 5. It can be checked of heat sink equipped with LED lamp on the bottom side of laser module after separating the bottom case from the equipment. Separate the power connector of LED lamp from PCB. LED Lamp Heat Sink LED Lamp...
- Page 44 Diagnostic X-ray Unit USER MANUAL 7. Find the bracket located on the bottom of collimator mirror's left after laying the equipment like the right in the below photos. Then, separate the two bolts fixing the bracket by a regular screwdriver. 8.
- Page 45 Diagnostic X-ray Unit USER MANUAL Section 4. Schematics...
-
Page 46: Block Diagram
Diagnostic X-ray Unit USER MANUAL Block Diagram... -
Page 47: Power & Driver Board
Diagnostic X-ray Unit USER MANUAL Power & Driver Board... -
Page 48: Main Board (Cpu)
Diagnostic X-ray Unit USER MANUAL Main Board – CPU... -
Page 49: Main Board (Ep_Ip Fb)
Diagnostic X-ray Unit USER MANUAL Main Board – EP_IP FB...
Need help?
Do you have a question about the ULTRA 90BT and is the answer not in the manual?
Questions and answers