Advertisement
Part List Pack In Headboard &
Footboard
NO.
Descriptions
A
Headboard Panel
B
Headboard Leg Left (L)
C
Headboard Leg Right (R)
D
Footboard
E
Slat Cover
Drawer Slat
F
Drawer Slat Support
G
Drawer Slat Stopper
H
Bed Slat 3 Holes
I
Bed Slat 2 Holes
J
Bed Slat Support
K
Side Rail
L
Center Slat With Slat 3 Holes
M
Drawer
N
Hardware List Pack In Headboard
&Footboard
No
Descriptions
1
CSK M4 x 16mm
2
CSK M4 x 32mm
3
JCBC Screw M6 x 30mm
4
JCBC Screw M6 x 50mm
5
Spring Washer Ø1/4"
6
Flat Washer Ø1/4" x 13mm
7
L Key M4
8
L Key M5
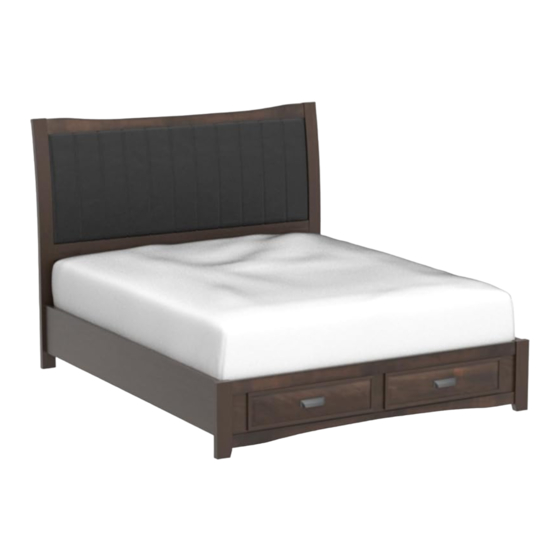
ASSEMBLY INSTRUCTION
ITEM NO. B179Q-QUEEN SIZE BED
Qty.
1
1
1
1
1
1
1
1
3
10
3
2
J
1
2
Qty
D
7
30
6
3
6
6
1
1
Page 1 of 6
B
I
E
N
A
M
K
C
L
H
F
G
Position :
at bottom of the drawer box
www.roundhillfurniture.com
Advertisement
Table of Contents

Related Manuals for Round Hill Furniture B179Q


Summary of Contents for Round Hill Furniture B179Q
- Page 1 ASSEMBLY INSTRUCTION ITEM NO. B179Q-QUEEN SIZE BED Part List Pack In Headboard & Footboard Descriptions Qty. Headboard Panel Headboard Leg Left (L) Headboard Leg Right (R) Footboard Slat Cover Drawer Slat Drawer Slat Support Drawer Slat Stopper Bed Slat 3 Holes...
- Page 2 ASSEMBLY INSTRUCTION ITEM NO. B179Q-QUEEN SIZE BED STEP 1.1: Align and fasten Headboard Leg (B) & (C) to Headboard Panel (A) using JCBC M6 x 30mm (1), Spring Washer Ø "(2) and Flat Washer Ø " x 13mm (3) and tighten with L Key M4 (7).
- Page 3 ASSEMBLY INSTRUCTION ITEM NO. B179Q-QUEEN SIZE BED STEP 2.1: Attach the Bed Rail (L) to Headboard Leg. STEP 2.2: Tighten SCREW on Headboard Leg by using L KEY M5 (8) & repeat the same step on Footboard (D). STEP 2.3: Move the bed to the desired position.
- Page 4 ASSEMBLY INSTRUCTION ITEM NO. B179Q-QUEEN SIZE BED STEP 3.1: Insert Drawer (N) to Footboard (D) until completely closed. STEP 3.2: Tighten 'T' Runner at Footboard (D) to Drawer Slat (F) with CSK M4 x 16mm (1). STEP 3.3: If Drawer (N) does not close properly,adjust the adjuster at the bottom of Drawer Slat Support (G) up or down until the Drawer (N) closes tightly.
- Page 5 ASSEMBLY INSTRUCTION ITEM NO. B179Q-QUEEN SIZE BED STEP 4.1: Attach the Center Slat (M), Bed Slat (I)&(H) to Bed Slat Support (K).Tighten with JCBC M6 x 50mm (4) by using L KEY M4 (7). STEP 4.2: Attach Bed Slat (I)&(H) Bed Slat Support (K) and tighten to Bed Rail (L) with CSK M4 x 32mm (2).
- Page 6 ASSEMBLY INSTRUCTION ITEM NO. B179Q-QUEEN SIZE BED STEP 5.1: Attach the Slat Cover (E) to top Bed Slat (I) & (J) . STEP 5.2: Close the distance Slat Cover (E) to Footboard (D).Tighten Slat Cover (E) to Wood at Footboard (D) with CSK M4 x 16mm (1).
Need help?
Do you have a question about the B179Q and is the answer not in the manual?
Questions and answers