Table of Contents
Advertisement
Quick Links
Advertisement
Table of Contents

Related Manuals for JensPrima innoCon 6501P


Summary of Contents for JensPrima innoCon 6501P
- Page 1 innoCon 6501 WALL MOUNTING...
-
Page 3: Table Of Contents
P030 Relay 1 parameter setting ........P040 Current output parameter setting ......P050 Offset parameter setting ........P060 Measurement parameter selection ......P070 Factory Reset ........... Calibration Mode ............pH Calibration ............ORP Calibration ............. Maintenance ............www.jensprima.com Page 1... -
Page 4: Safety
Sensor Please use sensors manufactured by JENSPRIMA; Damages to the instruments caused by the use of sensors not manufactured by JENSPRIMA within the warranty period will not be covered by the warranty. Only technicians authorized by jensprima can modify and update the instrument. -
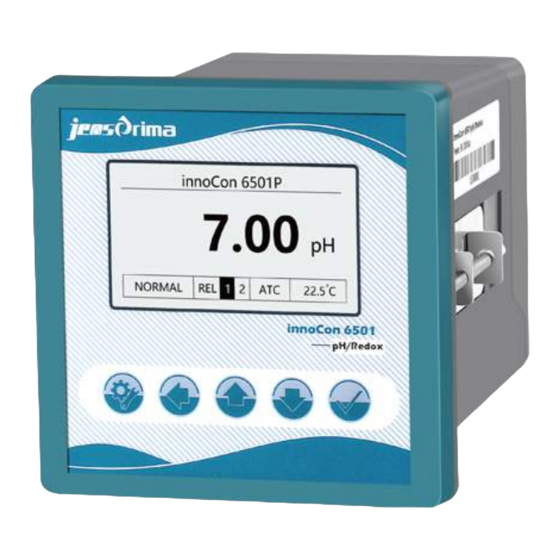
Page 5: Product Introduction
Product Introduction General Information The innoCon 6501P economical controller is designed for online monitoring of water treatment and industrial process, matching with innoSens pH / ORP electrodes for measuring pH / redox potential and temperature in water. Pt 1000 automatic temperature compensation, installation methods of panel/pipe way, standard with one line of 4-20mA output and two lines of relay output. - Page 6 6501 Monitor Manual Technical Parameters innoCon 6501P Controller Parameters: Parameters Temperature -2.00~16.00pH -2000~2000mV -10.0~120.0 C ° Measurement range Resolution 0.01pH 0.1 C ° ±0.01pH ±1mV ±0.2 C Accuracy ° Temp.Compensation Pt 1000 method Temp.compensation -10.0~120.0 C ° range Ambient Temp.
-
Page 7: Installation
90mm Cut Size Bracket Used for Panel Mounting Pipe Mounting Bracket U-tube from Pipe Mounting www.jensprima.com Page 5... - Page 8 6501 Monitor Manual Installation of Sensor JENSPRIMA has many types of industrial electrodes that have a specific connection function. The most common installation methods are: immersion type, pipe type, flow type, tank installation and live bolt assembly type electrode tube installation.
-
Page 9: Electrical Connection
Relay1 Cable Central Relay2 Axis ! 90-260VAC 50/60Hz ! pH/ORP Central axis connected Connect 90-260VAC Relay 1 Relay1 90-260VAC with cable 50/60Hz Ntework cable conntected with cable Probe connected with Pt1000 Relay 2 4-20mA Output Relay2 temperature www.jensprima.com Page 7... -
Page 10: Display
Press this button to switch measurement value and current Enter the setting mode with password 0011. Any time press can exit the calibration mode or go back to the previous menu. Press same key to the measuring mode. www.jensprima.com Page 8... - Page 11 When incorrect password is input, it will automatically leave and return to measurement mode. Any time press can exit the calibration mode or go back to the previous , you can also back to the measurement mode by pressing same key. www.jensprima.com Page 9...
-
Page 12: P010 Temperature Parameter Setting
Damping coefficient setting: setting range: 0~50. Press key to select, Press key to store and enter the next setting, Press key to choose not to store and exit the parameter setting. www.jensprima.com... - Page 13 Hysteresis setting of Relay 1: Press key to select the hysteresis amount of the relay. Press key to store and enter the next setting, Press key to choose not to store and exit the parameter setting. www.jensprima. com...
- Page 14 Hysteresis setting of Relay 2: Press key to Select the hysteresis amount of the relay. Press to store and enter next setting. Press key to choose not to store and exit the parameter setting. www.jensprima.com...
- Page 15 Main screen of pH offset setting: Press key enter P051. Press key exit the parameter setting. Press the key and select, range:±2.00pH. Press key to store and enter the next setting. Press key to choose not to store and exit the parameter setting. www.jensprima.com...
- Page 16 Main screen of restore factory setting: Press key and enter P071. Press key and exit the parameter setting. ress key and select YES or NO. Press key to execute and exit. Press key to choose not to execute and exit the parameter setting www.jensprima.com...
-
Page 17: Calibration Mode
It is recommended to replace the electrode when it is lower than 80%. Press the key to return to the measurement mode. Note: Wash and dry the sensor before adding each standard solution. www.jensprima.com Page 15... -
Page 18: Orp Calibration
3 minutes (the reading value cannot be stabilized or is not in the range of the standard solution), the calibration program will automatically jump out and return to the measurement mode. Less than the standard solution value Greater than the standard solution value www.jensprima.com Page 16... -
Page 19: Maintenance
Plug off the electrode cable and store the electrode in a special protective solution. Do not store the electrode in a dry environment or place the electrode in purified water. Store the glass electrode dow n in a not frozen indoor. www.jensprima.com Page 16... - Page 20 JENSPRIMA INSTRUMENTS LIMITED Web:www.jensprima.com Email: info@jensprima.com © 2017 JENSPRIMA INSTRUMENTS, all rights reserved...
Need help?
Do you have a question about the innoCon 6501P and is the answer not in the manual?
Questions and answers