
Related Manuals for JensPrima innoCon 6800D


Summary of Contents for JensPrima innoCon 6800D
- Page 1 6800D Online Luminescent Dissolved Oxygen Analyzer Opera�ng Instruc�on Dissolved Oxygen 7.69 mg/L NORMAL REL WASH 28.1 C jens WALL MOUNTING...
-
Page 3: Table Of Contents
6800 Monitor Manual Contents Safety ....................................................................Display ........................General ..............Analysis system ............Output ............... Interface .............. Diagnosis ................................. Clean sensor ............Change a fuse ........................(RS485) ........Page 1 www.jensprima.com... -
Page 4: Safety
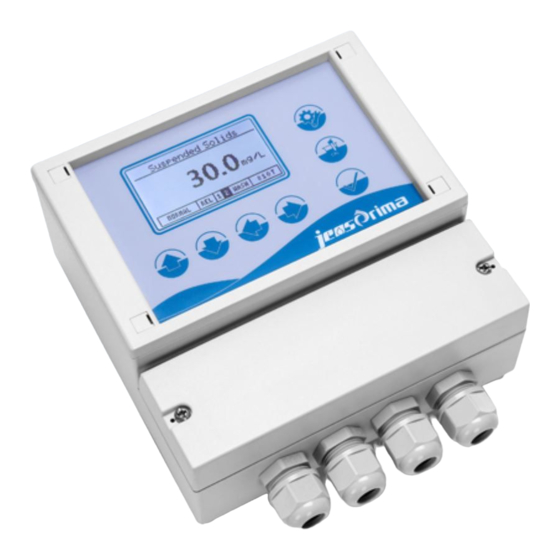
Sensor Please use sensors manufactured by jensprima; Damages to the instrument caused by the use of sensors not manufactured by jensprima with in the warranty period will not be covered by the warranty. Only technicians authorized by jensprima can modify and update the instrument. - Page 5 6800 Monitor Manual innoCon 6800D LDO Analyzer (Luminescent Dissolved Oxygen Analyzer) allows for easy specially designed to meet the demands of sewage and wastewater treatment plants. The enclosure of the controller is compliant with NEMA4X/IP65. It can display readings sewage and industrial wastewater treatment,fish...
- Page 6 2 sets of separated 4-20mA output, adjustable, Max.600Ω Digital output RS485 Modbus RTU 2 sets of ON/OFF relay and one set of Wash relay, Hi/Lo Relay alarm points can be set independently, with hysteresis Size 160x166x75mm Weight Page 4 www.jensprima.com...
- Page 7 Dimensions The enclosure of innoCon 6800 controller is specially designed to meet the requirements %-"" www.jensprima.com Page 5...
- Page 8 6800 Monitor Manual It is recommended that the sensor be mounted at a 45° angle, to eliminate the influence of air bubbles on the measurement of dissolved oxygen. Measuring Unit Probe holder Bracket innoSens 450 www.jensprima.com Page 6...
- Page 9 -- Black wire -- Relay 1 -- Red wire REL2 -- Relay 2 -- Yellow wire -- Washing Relay WASH -- Green wire Analog current output Temp. -- Temperature current output Measure -- Dissolved oxygen current output Page 7 www.jensprima.com...
-
Page 10: Display
28.1 C -- actual temperature Menu Backspace In measurement mode, press and hold this menu. Accept the figure input or the menu chosen. Enter In measurement mode turn on or off the backlight of the display. Arrows Press Page 8 www.jensprima.com... -
Page 11: General
General Language 2. Select “Language”, press “Enter” and you will get a list of available languages. Language English → 中文 → 3. Select a language, press “Enter”, and then all the menus will be in this language. www.jensprima.com Page 9... -
Page 12: Analysis System
3. Press upward and downward arrows to select YES or NO, and press “Enter”. Analysis System Temp.system 2. Select “Temp.system” and press “Enter”. Temp. system Temp. unit : ℃ ℃,℉ Temp. offset : +00.0 ℃,14.0-50.0℉ 3. Select your desired unit of temperature (℃ or ℉) and temperature offset (-10~10℃) www.jensprima.com... -
Page 13: Output
Analog current1 (for dissolved oxygen current output) 2. Select “Analog curent1” and press “Enter”. It is recommended to set Analog current 1 4.00mA as 000% and 4.00mA = 000% 20.00mA as 100%. 20.00mA= 100% previous menu. Analog current2 (for temperature current output) www.jensprima.com Page 11... -
Page 14: Interface
2. Select “Relay2” and press “Enter”. Relay2 Switch :ON/OF :High /Low Set Point 080% :0~200%,0.00~20.00pm Hysteresis :0~20%,0.00~2.00pm previous menu. Relay 3(washing relay) 2. Select “Relay3” and press “Enter”. Relay3 Period 0001 Hour 30Second previous menu. Interface RS485 Modbus previous menu. www.jensprima.com Page 12... -
Page 15: Diagnosis
1. Remove the sensor out of the water, wash it with clean water and dry it with a damp cloth. Or immerse the sensor in clean water for about 10 minutes and then take it out to dry in the air for 20-30 seconds. sensor in the water to be tested. reading. www.jensprima.com Page 13... -
Page 16: Clean Sensor
An aged sensor will lead to misreading. When the user forgets the password The default password of the instrument is 0022. If the user forgets the new password , please call our technical support department for supervisor password. www.jensprima.com Page 14... - Page 17 4.00 - 20.00mA Data * 0.01 0 = ppm Measurement unit signal 0003 0,1,2 1 = mg/L 2 = % 0004 Temperature measurement 0 - +60℃ Data * 0.1 0005 Temperature output current 4.00 - 20.00mA Data * 0.01 www.jensprima.com Page 15...
- Page 18 0-REALY1 release 1-RELAY1 closed 0-RELAY1 1-RELAY1 0-RELAY2 release 1-RELAY2 closed 0-REALY2 1-RELAY2 0-Relay3 release 1-RELAY3 closed B7:------------------------------------------------ 0-RELAY1 on 1-RELAY1 off 0-RELAY2 on 1-RELAY2 off B10: 0-RELAY3 on 1-RELAY3 off A total of 6 parts in this manual www.jensprima.com Page 16...
- Page 20 Jensprima Instruments (Shanghai) Co., Ltd Web: www.jensprima.com Email: info@jensprima.com © 2017 JENSPRIMA INSTRUMENTS, all rights reserved...
Need help?
Do you have a question about the innoCon 6800D and is the answer not in the manual?
Questions and answers