Table of Contents
Advertisement
Quick Links
Advertisement
Table of Contents

Related Manuals for Tenveo NV4K


Summary of Contents for Tenveo NV4K
- Page 1 HD Conference Camera User Manual Version V5.09...
-
Page 3: Product Description
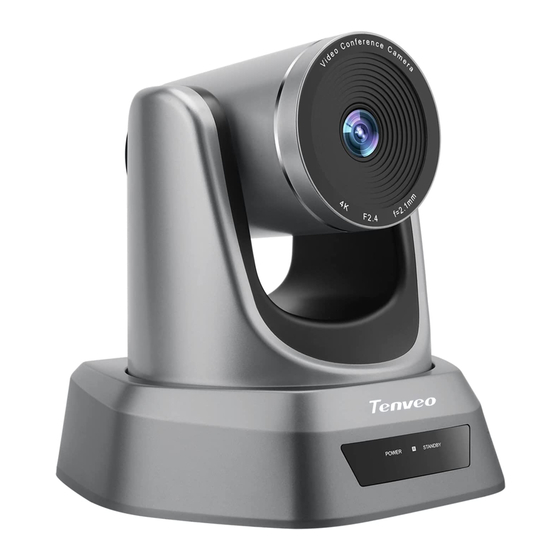
1. Product Description 1.1 USB version 1.1.1 USB Interface Definition Lens Pan&Tilt Standby Power indicator 1.1.2 USB Interface Diagram... - Page 4 1.2 USB+HDMI+SDI version 1.2.1 USB+HDMI+SDI Interface Definition Lens Pan&Tilt Standby Power indicator 1.2.2 USB+HDMI+SDI Interface Diagram...
-
Page 5: Packing List
2. Packing List HD conference camera DC 12V power supply Ceiling mount Mounting screws HD Conference Camera User Manual Version V5.09 User manual Remote control USB cable... -
Page 6: Performance Characteristics
3. Performance Characteristics Model NV4K NV400 NV3U NV10U NV20U NV10A NV20A 1/2.8″SONY 1/2.8″ SUNNY 1/2.9″ CMOS Sensor CMOS UHD CMOS 2.38 mega pixel Effective pixel 8.29 mega pixel 2.1 mega pixel 1080p/30/25, 4K/30/25, 4K/30/25, 1080p/30/25, 1080p/30/25, 1080p/30/25, 1080p/30/25, 2K/30/25, 2K/30/25,... -
Page 7: Remote Control Button Description
4. Remote Control Button Description The function of this key is reserved Camera rotates horizontally in regular installed direction Camera rotates horizontally in reversed installed direction PT RESET KEY ★Attentions for Remote Control 1. If the remote control doesn't work, please replace batteries. 2. -
Page 8: Camera Menu Setup
5. Camera Menu Setup When operating remote control, press【MENU】to enter main menu of the video camera. 5.1 Level I Menu - Main Menu Main Menu Exposure -> Color -> Image -> Information -> Language Chinese Exit Not Save Language: Support Chinese/English Exit Save Not Save... - Page 9 Contract: Set image contrast Dynamically, Default 50, 0-100. Hue: Set the relative brightness of the image, Default 50, 0-100. Saturation: Set image color effect, Default 50, 0-100. Sharpness: Set sharpness level, Default 50, 0-100. Color Temp: Set color temperature, Default 5600, 1500-15000. 5.4 Level II Menu-Image Image Flip...
- Page 10 6. Common Operation Instructions 6.1 Camera Select Refer to the dial-up at the bottom of the camera and choose camera address number that you want to control (1-3) . 6.2 Camera Direction Control Turning up Turning down Turning left Turning right Turning to default Note: Press the direction key when you need to adjust the angle.
- Page 11 6.4 Camera Zoom Control Press any one of the 4【ZOOM】to make the zoom functioning. These 4 keys are not applicable for fixed focus cameras. 6.5 Preset Setup, Call, Cancel (1) Reserve Preset: Press【PRESET】then press one of the numbers(0-9) to reserve a preset that correspond to the NUMBER. Note: you can setup 10 presets at most by the remote control.
- Page 12 6.7 Dial-up SW1 (1,2,3,4,5,6,) : Buad Rate Set 6.8 Dial-up SW2 (1/2/3) : Set Protocol 6.9 Dial 3 IR Transfer ( IR PASS) , DIP-4 Reserve 6.10 RS-232 Interface Distribution VISCA RS-232 IN 6.11 RS-485 Interface Distribution PIN NUM FUNCTION DTR IN+ (connect to RS-485) DSR IN-(connect to RS-485)
-
Page 13: Installation Instructions
7. Installation Instructions 7.1 Surface Installation Put the camera on the desk flatly, and make sure the camera is in a horizontal position. If you want to put the camera on an oblique surface, please make sure the angle of inclination is less than 15 degrees to ensure the camera pan and tilt work in normal operation. -
Page 14: Troubleshooting
8. Trouble Shooting Before requesting service to service engineer, please refer to the following methods to remove failures. If the failures still can’t be solved, please contact us for assistance. Q: The video of the camera cannot be displayed on the screen. A: Please check the connection between power cable, video cable, camera and monitor, fix the connector on each end. -
Page 15: Maintenance Services
9. Maintenance Services All products purchased from our company are guaranteed to keep in good repair for 36 months. If there are any quality problems during the guaran- tee period, we will maintain them for free. Under any of the following warranties, related maintenance costs will be collected: 1. -
Page 16: Warranty Card
Warranty Card Thank you so much for choosing our products. User's Info Name: Tel: Email: Post Code: Address: Product's Info Product Name: Factory Serial Number: Fault Description Attention 1. This card is considered as the protection to fix warranty, so please reserve it carefully.
Need help?
Do you have a question about the NV4K and is the answer not in the manual?
Questions and answers