Table of Contents
Advertisement
Advertisement
Table of Contents

Related Manuals for Tenveo VHD Series


Summary of Contents for Tenveo VHD Series
- Page 1 HD Conference Camera User Manual Version V3.22(English)
-
Page 2: Table Of Contents
Contents Product Description Foreword ------------------------------------ Notice ------------------------------------ Supplied Accessories ------------------------------------ Performance Characteristics Tech parameters ------------------------------------ Camera papameters ------------------------------------ Quick Start Interface definition ------------------------------------ Interface diagram ------------------------------------ Installation instructions ------------------------------------ Remote Control Button Description Remote control instructions ------------------------------------ Common Operation Instructions Common operation instructions ------------------------------------ Camera Menu Set... -
Page 3: Foreword
Attention 1. Foreword Thanks for choosing our VHD series conference cameras. Please read this manual carefully before using the product. 2. Notice ·To avoid damage from stress, violent vibration, soaking during tra- nsportation, storage and installation. ·Take care of each components of camera during installation, and install camera at where is affordable enough, to avoid drop or scra- tches of camera case. -
Page 4: Performance Characteristics
Performance Characteristics 1. Camera technical parameters Electric Communication Input Voltage DC12V Baud 38400/9600bps Power Protocol VISCA/PELCO-D /PELCO-P Decoder internal Address Set 0~64 Operation Surroundings Operating Horizontal Rotation ±170° 0°~+50° Environment Vertical Rotation 120° Operating Temp 0~95% Rotation Speed 100°/s non-condensing Physics Installation Method 9 remote controls... -
Page 5: Quick Start Interface Definition
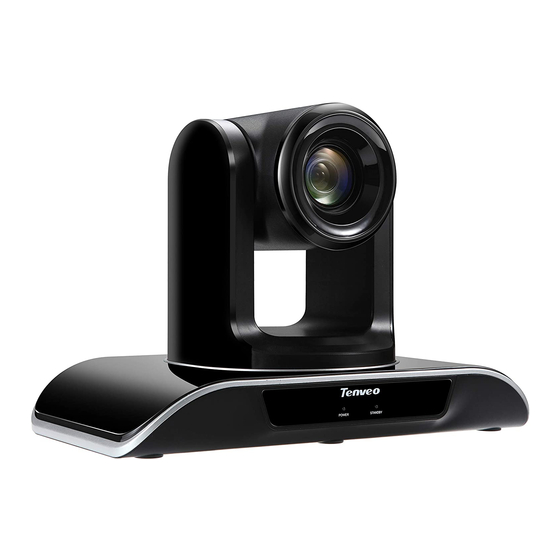
Quick Start 1. Interface definition 1.Lens 2.Pan&Tilt 3.Stand by indicator 4.Power indicator 5.IR remote indicator HDMI IN RS-232 OUT RS-485 DC 12V ① ② ③ ④ ⑤ ⑥ ⑦ 1.SDI 2.HDMI 3.IR Receiver 4.USB 5.RS232 6.RS-485 7.DC 12V... -
Page 6: Interface Diagram
2.Interface diagram HDMI VISCA OUT VISCA IN RS-485 DC 12V Output AC 220V Input HDMI IN RS-232 OUT RS-485 DC 12V 3.Installation instructions (1)Surface Installation Put the camera on the desk flatly, and make sure the camera in level. If want to put the camera on oblique surface, please m- ake sure the angle of inclination less than 15 degree for ensu- re camera pan and tilt working in normal operation. -
Page 7: Remote Control Button Description
Remote Control Button Description (1)Remote control launch window (2)【POWER】Standby button, pressing it, camera goes into standby mode; pressing again, camera go- CAMERA SELECT es power on. (3)【P/T Reset 】Camera pan/tilt reset function sa- me with⑧ (P/T RESET) (4)【CAMERA SELECT】Choose the camera number PRESET RESET that needed to control, to correspond the dial-up code... -
Page 8: Common Operation Instructions Common Operation Instructions
★Attentions for Remote Control 1. If remote control doesn't work, please replace batteries. 2. If there is an object between remote control and speci - alized remote control sensor, the camera will not work. Please make sure the remote control is aimed at the sen - sor which in front of the camera when controlling it. - Page 9 4. Camera Zoom Control Press any one of the 4 【ZOOM】 ZOOM ZOOM SLOW FAST to make the zoom functioning. 5. Back Light The subject will become dark when there is a light source behind it, press 【BACK LIGHT】 B-LIGHT to use back light shooting function.
-
Page 10: Camera Menu Set
Camera Menu Setup Menu Destription Operate remote control, press 【MENU】 to enter main menu of video camera; 1 .Level I Menu - MAIN MENU: Main Menu -> Image -> Diaplay -> Lens -> System 2. Level II Menu - Image: Image Exposure ImageE.n... - Page 11 (1)Level III Menu -Exposure Exposure Mode Shutter Exposure Mode: Support Auto/Manual mode. Shutter priority: adjust the shooting speed. (2)Level III Menu -WB Mode WB Mode : Support Auto / Manual mode. (3)Level III Menu -Image Enhancement Image Enhancement Denoise Sharpen Gamma Defog Col Tone...
- Page 12 Denoise: 2D noise reduction /3D noise reduction switch Sharpen: Sharpness adjustment function Gamma: Gamma adjust switch Defog: Defogging: the defogging strength is calculated automatically according to the manual/automatic specified strength coefficient. Sat: Adjust the image color effect. Col Tone: Color tone adjustment interface. The video output result is independent of the color temperature.
-
Page 13: Control Interface
Focus mode: Support auto and manual 2 modes Range of focus: Determined by the lens used in the model . Zoom save: When the camera is turned on, restarting the camera will initialize to the position which was shutdown in last time. 5.Level II Menu –... -
Page 14: Remote Control Match
2.Dial-up SW1(1,2,3,4,5,6): Baud rate set DIP-1 DIP-3 PTZ Add. DIP-2 DIP-4 DIP-5 DIP-6 ..3.Dial-up SW2(1/2/3): Protocol set Protocol DIP-1 DIP-2 Baud DIP-3 VISCA 9600 PELCO-D 38400 PELCO-P 4.Dial-up 3 IR transfer(IR PASS), DIP-4 reserve DIP-5 DIP-6 DIP-4 IR Add. RESERVE PS: RS-485 and RS232 Pins distribution 1、Control Interface... -
Page 15: Troubleshooting
Troubleshooting Before request service to serviceman, it can according to below methods to remove failures, if- still can’ t be solved, please contact us for help. Q:The video of camera cannot be displayed on the screen. A:Please check the connection between power cable,video cable, camera and monitor, fix the c- onnector on each end. -
Page 16: Warranty Card Warranty Card
Te n v e o Wa r r a n t y C a r d T h a n k y o u v e r y m u c h f o r c h o o s i n g o u r p r o d u c t s . U s e r ‘... - Page 17 C e r t i f i c a t e c o m p l i a n c e Q . A . QC PASSED...
- Page 18 Make any meeting better and easier...
Need help?
Do you have a question about the VHD Series and is the answer not in the manual?
Questions and answers
salve come si memorizza il preset una volta che esso è impostato ? grazie
To save a preset on the Tenveo VHD Series:
1. Press the 【PRESET】 button on the remote control.
2. Then press one of the number buttons (1–9) to save the current position to that number.
You can save up to 9 presets using the remote control.
This answer is automatically generated