Cisco Catalyst 3560 Getting Started Manual
Cisco systems switch getting started guide
Hide thumbs
Also See for Catalyst 3560:
- Hardware installation manual (168 pages) ,
- Getting started manual (20 pages) ,
- Software configuration manual (892 pages)
Table of Contents
Advertisement
Catalyst 3560 Switch Getting Started Guide
INCLUDING LICENSE AND WARRANTY
1
About this Guide
Taking Out What You Need
2
Running Express Setup
3
Managing the Switch
4
Installing the Switch
5
Connecting to the Switch Ports
6
In Case of Difficulty
7
8
Obtaining Documentation
Documentation Feedback
9
10
Cisco Product Security Overview
Product Alerts and Field Notices
11
12
Obtaining Technical Assistance
Obtaining Additional Publications and Information
13
14
Cisco Limited Lifetime Hardware Warranty Terms
Advertisement
Table of Contents

Related Manuals for Cisco Catalyst 3560


Summary of Contents for Cisco Catalyst 3560
- Page 1 Catalyst 3560 Switch Getting Started Guide INCLUDING LICENSE AND WARRANTY About this Guide Taking Out What You Need Running Express Setup Managing the Switch Installing the Switch Connecting to the Switch Ports In Case of Difficulty Obtaining Documentation Documentation Feedback...
-
Page 2: About This Guide
For additional installation and configuration information for Catalyst 3560 switches, see the Catalyst 3560 documentation on Cisco.com. For system requirements, important notes, limitations, open and resolved bugs, and last-minute documentation updates, see the release notes, also on Cisco.com. - Page 3 Shipping Box Contents (All Catalyst 3560 Switches Except the Catalyst 3560-8PC Switch) SYS T STA T DUP LX SPE ED MO DE Catalyst 3560 switch Console cable AC power cord Four rubber mounting feet Documentation Ca tal yst 35 60 G...
- Page 4 Shipping Box Contents (only the Catalyst 3560-8PC Switch) SY ST ST AT C O N S O DP LX SP D Po E MO DE Catalyst 3560 switch Console cable AC power cord (AC-powered switches only) Documentation C a ta ly s t 3...
-
Page 5: Running Express Setup
Running Express Setup When you first set up the switch, you should use Express Setup to enter the initial IP information. This enables the switch to connect to local routers and the Internet. You can then access the switch through the IP address for further configuration. - Page 6 Step 7 Connect a Category 5 Ethernet cable to any 10/100 or 10/100/1000 Ethernet port on the switch front panel. Connect the other end of the cable to the Ethernet port on your PC. Step 8 Verify that the LEDs on both Ethernet ports are green.
- Page 7 The VLAN ID range is 1 to 1001. • In the IP Address field, enter the IP address of the switch. In the IP Subnet Mask field, click the drop-down arrow, and select an IP Subnet Mask.
- Page 8 When you click Submit, the switch is configured and exits Express Setup mode. The PC displays a warning message and tries to connect with the new switch IP address. If you configured the switch with an IP address that is in a different subnet from the PC, connectivity between the PC and the switch is lost.
-
Page 9: Managing The Switch
Using the Device Manager You can manage the switch by using the device manager that is in the switch memory. This is a web interface that offers quick configuration and monitoring. You can access the device manager from anywhere in your network through a web browser. -
Page 10: Command Line Interface
Command-Line Interface You can enter Cisco IOS commands and parameters through the CLI. Access the CLI either by connecting your PC directly to the switch console port or through a Telnet session from a remote PC or workstation. Follow these steps: 1. -
Page 11: Installing The Switch
• Drill with a #27 drill bit (0.144-inch [3.7 mm]) Note A drill is required if you are securing the Catalyst 3560-8PC switch to a desk or a wall. Before You Begin When determining where to install the switch, verify that these guidelines are met: •... -
Page 12: Installation Warning Statements
Installation Warning Statements This section includes the basic installation warning statements. Translations of these warning statements appear in the Regulatory Compliance and Safety Information for the Catalyst 3560 Switch document that shipped with the switch. Warning Only trained and qualified personnel should be allowed to install, replace, or service this equipment. - Page 13 This equipment is intended to be grounded. Ensure that the host is connected to earth ground during normal use. Statement 39 Warning If a redundant power system (RPS) is not connected to the switch, install an RPS connector cover on the back of the switch. Statement 265 Warning...
- Page 14 Catalyst 3560-8PC switch, see “Securing the Switch on a Desk or Shelf (only the Catalyst 3560-8PC Switch)” section on page 17 and “Mounting the Switch with a Magnet Panel (only the Catalyst 3560-8PC Switch)” section on page 19.
-
Page 15: Attaching The Brackets
Attaching the Brackets Use four Phillips flat-head screws to attach the long side of the brackets to Catalyst 3560 switches in one of three mounting positions. SY ST RP S STA T DU PL X SP EE D MO DE... -
Page 16: Mounting The Switch In A Rack
Mounting the Switch in a Rack Use the black Phillips machine screw to attach the cable guide to the left or right bracket. Use the four number-12 Phillips machine screws to attach the brackets to the rack. Cable guide SYS T... - Page 17 To place the switch on a desk without using the mounting screws, simply attach the four rubber feet on the bottom panel of the switch. To secure the switch on top of or under a desk or a shelf, or on a wall, use the mounting template and three mounting screws. Follow these steps: 1.
- Page 18 4. Place the switch onto the mounting screws, and slide it forward until it locks in place. SY ST ST AT C O N S O DP LX SP D Po E MO DE C a ta ly st 3...
- Page 19 Mounting the Switch with a Magnet Panel (only the Catalyst 3560-8PC Switch) Note This section only applies to the Catalyst 3560-8PC switch. For installation information for all other Catalyst 3560 switches, see “Rack-Mounting the Switch (All Catalyst 3560 Switches Except the Catalyst 3560-8PC Switch)” section on page 14.
-
Page 20: Connecting To The Switch Ports
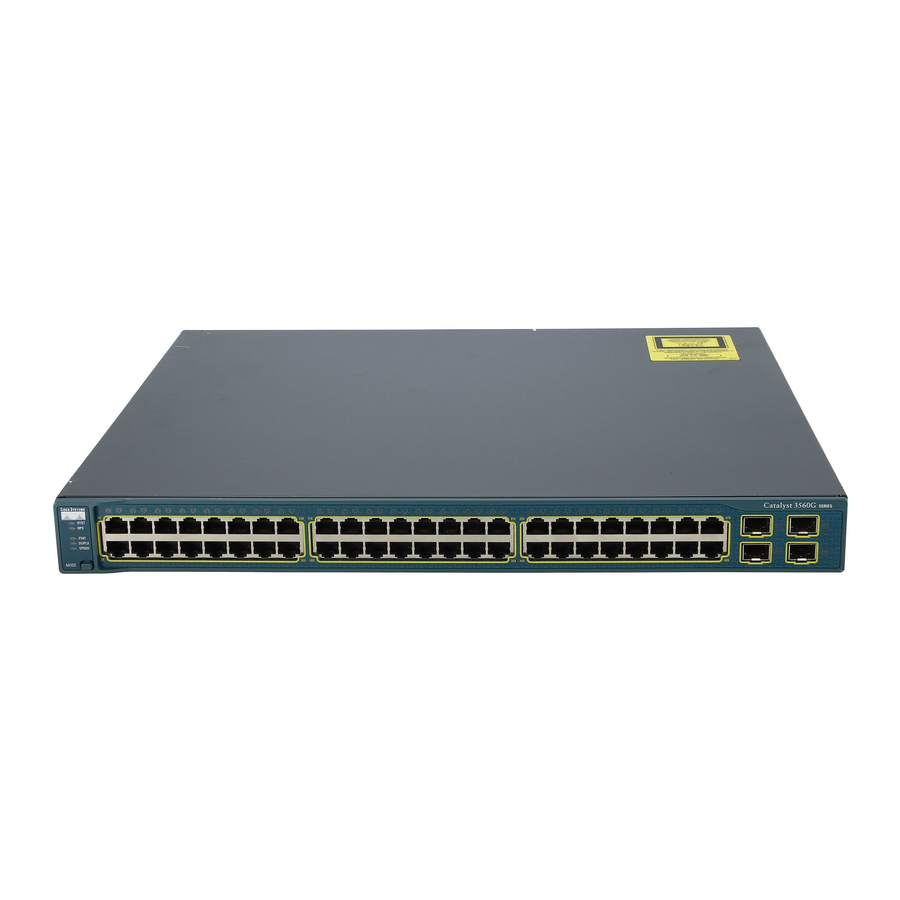
Each of the Catalyst 3560-24PS switch 10/100 ports or the Catalyst 3560G-24PS switch 10/100/1000 ports can deliver up to 15.4 W of PoE. On the Catalyst 3560-48PS or 3560G-48PS switches, any 24 of the 48 10/100 or 10/100/1000 ports can deliver 15.4 W of PoE, or any combination of the ports can deliver an average of 7.7 W of PoE at the same time, up to a maximum switch power output of... - Page 21 Installing an SFP Module and Connecting to a Module Port Follow these steps: Step 1 Grasp the module on the sides, and insert it into the switch slot until you feel the connector snap into place. Step 2 Insert an appropriate cable into the module port.
-
Page 22: Connecting To A Dual-Purpose Port
Insert the other cable end into the other device. Verifying Port Connectivity After you connect to the switch port, the port LED turns amber while the switch establishes a link. This process takes about 30 seconds, and then the LED turns green when the switch and the target device have an established link. -
Page 23: In Case Of Difficulty
In Case of Difficulty If you experience difficulty, help is available here and on Cisco.com. This section includes Express Setup troubleshooting, how to reset the switch, how to access help online, and where to find more information. Troubleshooting Express Setup If Express Setup does not run, or if the Express Setup page does not appear in your browser: •... -
Page 24: Resetting The Switch
Express Setup as described in the “Running Express Setup” section on page 5. Accessing Help Online First look for a solution to your problem in the troubleshooting section of the Catalyst 3560 Hardware Installation Guide or the Catalyst 3560 Software Configuration Guide on Cisco.com. You can also... -
Page 25: For More Information
1. Open your browser, and go to http://www.cisco.com/. 2. Click Technical Support. 3. Click Product Support > Switches > LAN and ATM Switches > Catalyst 3560 Series Switches > Troubleshooting. 4. Click the subject that addresses the problem that you are experiencing. -
Page 26: Obtaining Documentation
Obtaining Documentation Cisco documentation and additional literature are available on Cisco.com. This section explains the product documentation resources that Cisco offers. Cisco.com You can access the most current Cisco documentation at this URL: http://www.cisco.com/techsupport You can access the Cisco website at this URL: http://www.cisco.com You can access international Cisco websites at this URL: http://www.cisco.com/public/countries_languages.shtml... -
Page 27: Documentation Feedback
Documentation Feedback You can provide feedback about Cisco technical documentation on the Cisco Technical Support & Documentation site area by entering your comments in the feedback form available in every online document. Cisco Product Security Overview Cisco provides a free online Security Vulnerability Policy portal at this URL: http://www.cisco.com/en/US/products/products_security_vulnerability_policy.html From this site, you will find information about how to do the following: •... -
Page 28: Product Alerts And Field Notices
In an emergency, you can also reach PSIRT by telephone: • 1 877 228-7302 • 1 408 525-6532 We encourage you to use Pretty Good Privacy (PGP) or a compatible product (for example, GnuPG) to encrypt any sensitive information that you send to Cisco. PSIRT can work with information that has been encrypted with PGP versions 2.x through 9.x. -
Page 29: Cisco Technical Support & Documentation Website
Cisco Technical Support & Documentation Website The Cisco Technical Support & Documentation website provides online documents and tools for troubleshooting and resolving technical issues with Cisco products and technologies. The website is available 24 hours a day at this URL: http://www.cisco.com/techsupport Access to all tools on the Cisco Technical Support &... -
Page 30: Submitting A Service Request
Submitting a Service Request Using the online TAC Service Request Tool is the fastest way to open S3 and S4 service requests. (S3 and S4 service requests are those in which your network is minimally impaired or for which you require product information.) After you describe your situation, the TAC Service Request Tool provides recommended solutions. -
Page 31: Obtaining Additional Publications And Information
You can access the Internet Protocol Journal at this URL: http://www.cisco.com/ipj • Networking products offered by Cisco Systems, as well as customer support services, can be obtained at this URL: http://www.cisco.com/en/US/products/index.html •... -
Page 32: Cisco Limited Lifetime Hardware Warranty Terms
• “What’s New in Cisco Documentation” is an online publication that provides information about the latest documentation releases for Cisco products. Updated monthly, this online publication is organized by product category to direct you quickly to the documentation for your products. You can view the latest release of “What’s New in Cisco Documentation”... - Page 33 Click Go. The Cisco warranty page appears. Read the document online, or click the PDF icon to download and print the document in Adobe Portable Document Format (PDF). You can also contact the Cisco service and support website for assistance: http://www.cisco.com/public/Support_root.shtml.
- Page 36 Slovakia • Slovenia • South Africa • Spain • Sweden • Switzerland • Taiwan • Thailand • Turkey • Ukraine • United Kingdom • United States • Venezuela • Vietnam • Zimbabwe CCVP, the Cisco Logo, and the Cisco Square Bridge logo are trademarks of Cisco Systems, Inc.; Changing the Way We Work, Live, Play, and Learn is a service mark of Cisco Systems, Inc.;...
Need help?
Do you have a question about the Catalyst 3560 and is the answer not in the manual?
Questions and answers