
Related Manuals for Kidde ALARMLINE II


Summary of Contents for Kidde ALARMLINE II
- Page 1 Dual Zone Digital Location Control Unit Installation and Operation Manual P/N 20-8201-501-CU03-01 • ISS 08MAY18...
- Page 2 Copyright © 2018 UTC Fire & Security. All rights reserved. Trademarks and Alarmline II and Dual Zone Digital Location Control Unit are patents trademarks of UTC Fire & Security. Other trade names used in this document may be trademarks or registered trademarks of the manufacturers or vendors of the respective products.
-
Page 3: Table Of Contents
Content Important information ii Limitation of liability ii Advisory messages ii Product warnings and disclaimers iii Introduction 4 Overview 4 Regulatory information 5 Description 5 Technical specifications 6 Operating modes 7 Installation 12 Mounting the enclosure 12 Terminal connections 13 Interposing cable 14 Wiring diagrams 15 Configuration and operation 17... -
Page 4: Important Information
Important information Kidde Products Ltd. has taken every care to ensure that Alarmline II Digital Linear Heat Detection systems are as simple to install as possible but in case of difficulty, please contact our Help Line to ensure trouble free installation and operation. -
Page 5: Product Warnings And Disclaimers
Product warnings and disclaimers THESE PRODUCTS ARE INTENDED FOR SALE TO AND INSTALLATION BY QUALIFIED PROFESSIONALS. UTC FIRE & SECURITY CANNOT PROVIDE ANY ASSURANCE THAT ANY PERSON OR ENTITY BUYING ITS PRODUCTS, INCLUDING ANY “AUTHORIZED DEALER” OR “AUTHORIZED RESELLER”, IS PROPERLY TRAINED OR EXPERIENCED TO CORRECTLY INSTALL FIRE AND SECURITY RELATED PRODUCTS. -
Page 6: Introduction
Introduction Overview The Alarmline II Dual Zone Digital Location Control Unit is designed for monitoring Alarmline II Digital Sensor cables. Most Alarmline II Digital Linear Heat Detection (LHD) systems use a standard monitored circuit (such as a conventional detection zone) or an addressable input module to monitor the status of the sensor cable, but these monitoring methods provide only simple two state operation (alarm or no alarm). -
Page 7: Regulatory Information
AHJ’s (Authority Having Jurisdiction). Description Alarmline II Digital Sensor Cable has an insulation designed to soften at a particular temperature (the cable alarm temperature) – when the cable reaches this temperature, it short circuits and activates an alarm condition. -
Page 8: Technical Specifications
35 VDC max. Current 80 mA max. Power dissipation 150 mW max. Communications output Two-wire RS-485 Modbus RTU [1] For up to two class B zones of Alarmline II Digital Sensor Cable Dual Zone Digital Location Control Unit Installation and Operation Manual... -
Page 9: Operating Modes
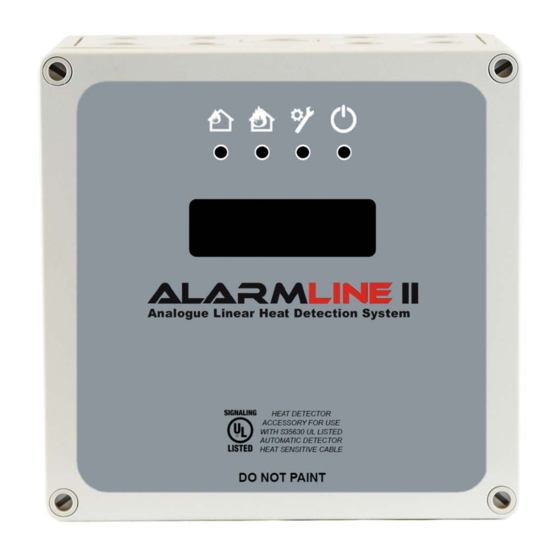
Physical and environmental Enclosure Plastic enclosure with clear plastic lid fitted with membrane label Material Polycabonate Colour Light grey (RAL 7035) Dimensions (H × W × D) 180 × 120 × 60.5 mm (7.1 × 4.72 × 2.38 in.) Cable entries [1] 2 ×... - Page 10 Fire Alarm control panel Status signals zone 1 RS-485 Modbus output Interposing cable Interposing cable 24 VDC Alarmline II Digital Alarmline II Digital sensor cable sensor cable Risk area Risk area Zone 2 Zone 1 This setup provides two independent zones covering two separate risk areas with each zone reporting its own status to the main fire alarm system.
- Page 11 1 RS-485 Modbus output 24 VDC Interposing cable Interposing cable Alarmline II Digital sensor cable Zone 1 Zone 2 In a large risk area the control unit can be used to create two sub zones to reduce the search area should an alarm be generated.
- Page 12 Protection of one risk area as one detection zone with two different temperature sensor cables providing a pre-alarm and alarm system Figure 5: Protection of one risk area as one detection zone with two different temperature sensor cables providing a pre-alarm and alarm system Status signals zone 2 Fire Alarm...
- Page 13 Caution: As the system uses one control unit, the total combined area coverage of both Digital LHD zones cannot exceed the maximum detection zone size as defined by local standards (refer to your local standards). Figure 6: Interlock mode Fire Alarm control panel Status signals zone 1...
-
Page 14: Installation
Installation This manual describes the installation of the Dual Zone Digital Location Control Unit. Refer to the sensor cable installation manual for help installing the Digital LHD sensor cable. Caution: This product must be installed and maintained by qualified personnel adhering to all local or national installation requirements and any other applicable regulations. -
Page 15: Terminal Connections
Terminal connections The control unit is provided with a number of fixed terminal connections to enable external wiring. Terminal connections are provided for power supply, LHD zones, zone alarms, zone faults, and Modbus. See the table below for more information on each. Table 1: Terminal connections Connector Description... -
Page 16: Interposing Cable
Interposing cable In many applications it is not possible to install the control unit close enough to the location of the digital sensor cable, therefore an electrical connection needs to be provided between them. An interposing cable can be used to provide an electrical connection between the control unit and the sensor cable. -
Page 17: Wiring Diagrams
The following section provides details of how to configure the wiring for the detection zone circuits and relay outputs. Connecting Alarmline II Digital Sensor Cable There are two LHD detection zones on the control unit, used to monitor two separate installations of sensor cable. These are monitored circuits which require an end-of-line monitoring resistor value 1 kΩ. - Page 18 Figure 9: Wiring configuration to monitor outputs LHD ZONE 1 Fault Alarm NC C NO Alarm resistor Detection zone of resistor conventional fire panel or addressable zone monitor/switch monitor interface of an addressable fire panel Note: The end-of-line (EOL) and alarm resistor values are not specified – these values are determined by the monitoring circuit.
-
Page 19: Configuration And Operation
On power up the control unit shows the start-up screen with the product description and firmware version. The firmware version is displayed as 4-digit number (for example, R1234). ALARMLINE II ADLCU RXXXX After a few seconds the main menu screen appears. There are three menu options (see “Menu options”... - Page 20 Menu options There are three menu options, as shown below. Press SELECT to scroll through the options and SET to confirm a selection. MAIN MENU MAIN MENU MAIN MENU LOAD CONFIGS NEW CONFIGS SELF TEST Load the current configuration settings Select LOAD CONFIGS to load the current configuration settings, and then press SET to confirm the selection.
-
Page 21: Configuring The Operating Mode
Configuring the operating mode This option configures the operating mode (independent or interlock). Press SELECT to toggle between Independent and Interlock, and then press SET to confirm the selection. OPERATING MODE: OPERATING MODE: INDEPENDENT INTERLOCK See “Operating modes” on page 7 for more information on the two operating modes. -
Page 22: Configuring Latching Outputs
Important: Before proceeding, place a short circuit across the end of the leader cable (where it connects to the sensor cable). 2. With the short circuit in place, press SET to start calibration. The screen then displays the voltage drop across the leader cable. ZONE 1 CAL: 109 MV 3. - Page 23 Once all of the above have been configured, the Modbus output is enabled for use. See “Modbus communications” on page 26 for more information on Modbus communications. Configuring the Modbus address Press SELECT to scroll through the available address range (1 to 247), and then press SET to confirm the selection.
-
Page 24: Restoring The Factory Default Settings
Configuring parity Press SELECT to scroll through the available options, and then press SET to confirm the selection. PARITY: EVEN Available options: Odd, Even, None. The selected parity must match that of the Modbus equipment that you are connecting to. Restoring the factory default settings To delete the current configuration and restore the factory default settings, press and hold SET and SELECT at the same time for 10 seconds. - Page 25 Interposing cable short circuit Caution: A short circuit on the interposing cable activates a fire condition. Ensure that this does not contravene any applicable local standards. Reduce the risk of a short circuit on the interposing cable by selecting a suitably robust cable or by providing additional protection (for example, a conduit).
- Page 26 Relay fault A relay fault is indicated when an alarm condition exists and the alarm relay state doesn’t change. ZONE 1: RLY FLT ZONE 2: OK Caution: A relay fault cannot be repaired. In the event of a relay fault, a replacement control unit will be required.
- Page 27 Testing Self Test simulates the functionality of the control unit during an alarm or fault condition, enabling the testing of the signalling to the main fire alarm system. WARNING: The zone or address for the control unit must be isolated at the main fire alarm control panel before initiating a test.
-
Page 28: Modbus Communications
Modbus communications The control unit includes a two-wire RS-485 Modbus output which (if enabled) provides status information to third party equipment. The Modbus RTU and ASCII protocols are both supported by the control unit. Communications use the instructions and format shown below. Function 4 code (Read Input Registers) Requests for reading the input registers are constructed as follows: •... - Page 29 Dual Zone Digital Location Control Unit Installation and Operation Manual...
Need help?
Do you have a question about the ALARMLINE II and is the answer not in the manual?
Questions and answers