Advertisement
Quick Links
Advertisement

Related Manuals for Synology USB Station 2


Summary of Contents for Synology USB Station 2
- Page 1 USB Station 2 User's Guide Based on DSM 3.2 Syno_UsersGuide_US2_20111027 Document ID...
- Page 2 Use Energy Saving Features ..........................21 Chapter 4: Manage External Disks Manage External Disks ............................22 Chapter 5: Access USB Station 2 from the Internet Use the EZ-Internet Wizard ........................... 23 Set Up Port Forwarding Rules for Router ......................23 Give USB Station 2 a DDNS Hostname ........................
- Page 3 Update DSM................................83 Receive Event Notification ............................ 85 Reset admin's Password ............................86 Restore USB Station 2 to Factory Defaults ......................86 Enable Terminal Services ............................. 86 Chapter 14: Communicate with Mobile Devices Use iOS and Android Apps ........................... 88 Use Other Mobile Devices ............................
- Page 4 One of Synology DiskStation Manager’s applications, File Browser, can make it possible for users to manage their files on USB Station 2 easily through a web interface. If you want to manage files through a customized port, File Station is also available. You can also access the files stored on USB Station 2 with a mobile device.
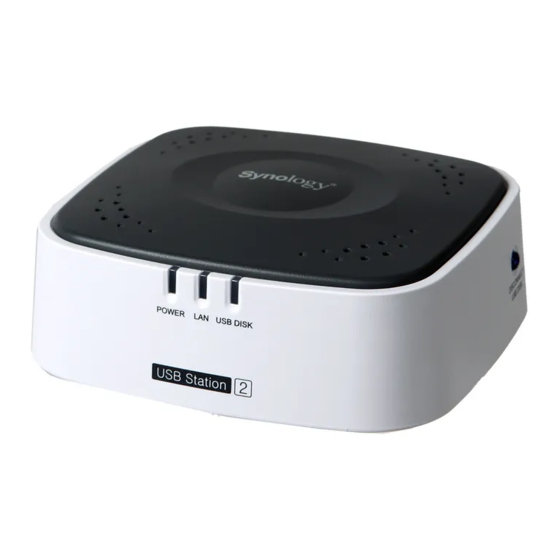
- Page 5 The LAN port is where you connect RJ-45 cable to USB Station 2. LAN Port Back Panel The power port is where you connect the AC adapter to USB Station 2. Power Port Back Panel The Eject button is where you disconnect all USB devices.
- Page 6 DSM settings and applications. Set up USB Station 2 For more information setting up USB Station 2, see the Quick Installation Guide that came with your installation disc. Log in to Synology DiskStation Manager You can log in to DSM with Synology Assistant or with a web browser.
- Page 7 1 Insert the installation disc into the optical drive of your computer, and then double-click the SynologyInstall icon on the desktop. 2 In the window that appears, double-click the MacOSX icon, and then double-click Synology Assistant- [number].dmg. 3 Double-click the Synology Assistant.app in the window that appears.
- Page 8 Linux (Ubuntu) User: 1 Insert the installation disc into the optical drive of your computer, and then double-click the SynologyInstall icon on the desktop. 2 In the File Browser window that appears, double-click the Linux folder, and then double-click Synology Assistant-[number].tar.gz. 3.2-1944.
- Page 9 http://Synology_Server_IP:5000 http://Synology_Server_Name:5000/ (or http://Synology_Server_Name.local:5000/ on a Mac) Synology_Server_Name should be replaced with the name you set up for USB Station 2. The default Synology_Server_Name will be USBStation. 2 Enter your user name and password, and click Login. The default password for admin is empty. If you want to...
- Page 10 Based on DSM 3.2 DiskStation Manager Appearance When you log in to Synology DiskStation Manager (DSM), you can see the desktop and the taskbar. Desktop and Shortcuts The desktop is where your application windows are displayed. You can also create desktop shortcuts to frequently used applications.
- Page 11 Manage DSM with the Main Menu Main Menu is where you can find all the applications and settings provided by Synology DiskStation Manager. Logout and Restart Click...
- Page 12 accounts. Network Services: Manage and edit the settings for network services and Internet connection. System: Edit the basic settings on your USB Station 2. Application Settings: Enable the services of built-in applications. Note: Control Panel is accessible only to admin.
- Page 13 USB Station 2 User's Guide Based on DSM 3.2 Manage Personal Options Click the Options button at the top-right corner of Main Menu to manage the following options for your DSM user account. Account Under Account, you can change your account's password and description.
- Page 14 USB Station 2 User's Guide Based on DSM 3.2 Others Under Others, you can customize other personal options. To decide whether to expand the application after login: 1 Tick Do not expand the Main Menu after login. 2 Click OK.
- Page 15 Modify System Settings Chapter 3: After you have connected to Synology DiskStation Manager (DSM) and learned how to access its functions and customize its appearance, you can begin to modify its basic settings. This chapter explains how to change the network settings, specify default languages, set up time, and use energy saving features.
- Page 16 Enhance browser compatibility by skipping IP checking. 2 Click OK. If you access USB Station 2 through a HTTP proxy and encounter random logouts, you can skip IP checking to avoid this problem. Nonetheless, skipping IP checking will lower the security level.
- Page 17 (assigned on your router) and the local port (assigned on your USB Station 2), you need to enter the router port number here to make sure USB Station 2 files you shared to Internet services (such as Google docs) can be accessed successfully.
- Page 18 USB Station 2 is connected to the Internet via PPPoE. Network Interface In this section, you can connect your USB Station 2 to the network via any of the following network interfaces. If your USB Station 2 is connected to a local area network, you can click on the left side to configure the network interface.
- Page 19 Click the PPPoE on the left side if your USB Station 2 is connecting to a DSL or cable modem, and your Internet Service Provider (ISP) uses PPPoE (Point to Point Protocol over Ethernet). To connect to the Internet via PPPoE:...
- Page 20 Codepage: USB Station 2 uses Unicode to avoid file inaccessibility from computers using different languages. But for the following devices or applications to use USB Station 2 services without problem, you need to choose the appropriate codepage for them: ...
Need help?
Do you have a question about the USB Station 2 and is the answer not in the manual?
Questions and answers