Advertisement
Quick Links
150.0 Lbs.
68.0 Kg.
IMPORTANT!
When calling or writing us, please
provide the OP number, here
highlighted, so we can offer the most
efficient response.
jlMPORTANTE!
Al llamar o escribirnos, por favor
darnos el numero de OP, aqui
resaltado, con el fin de ofrecerle la
respuesta mas eficiente.
-
ASSEMBLY INSTRUCTIONS AND WARRANTY
MANUALDEENSAMBLEYGARANTIA
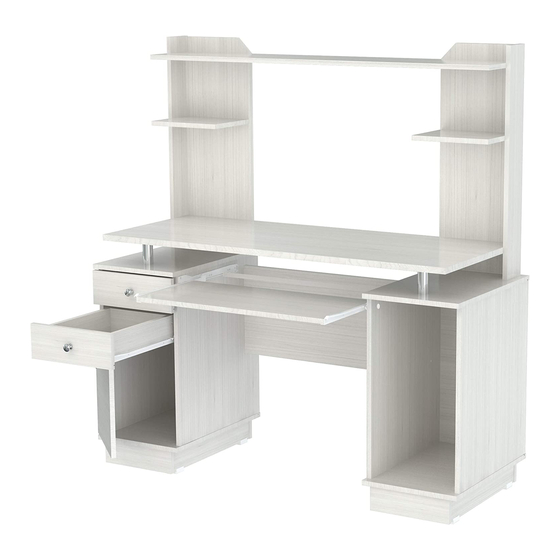
COMPUTER CREDENZA
WORKCENTER WITH HUTCH
This instruction manual contains important information. Follow the consecutive order.
Please read and keep for future reference.
Este Manual contiene informaci6n importante. Siga el 6rden consecutive de las instucciones.
Por favor IE'.lalo y guardelo para consultas en el futuro.
Two or more people are required to assemble and/or move this unit.
Se requiere de dos o mas personas para armar y mover este mueble.
Unpack and assemble this unit in an spacious area. Assemble the unit on top of the empty
box to prevent scratches.
Desempaque y arme este mueble en un area espaciosa. Arme el mueble sobre su caja,
para no rayarlo.
Protect furniture from water and moisture. This furniture must not be used outdoors.
Proteja el mueble del agua y de la humedad. No use este mueble al aire libre.
Do not expose it to heat.
No lo exponga al calor.
Do not hit or tap with a hammer, unless it is indicated.
No lo golpee ni lo martille.
Do not paint or use abrasive elements to clean this furniture.
No pinte ni use elementos abrasivos para limpiar este mueble.
Do not drag or climb on your furniture. If you need to move it, lift it.
No lo arrastre ni se suba al mueble. Si necesita moverlo, levantelo.
CENTRO
DE COMPUTO
Certf x:: ado N' sc 640-1
Pag. 1/10
Advertisement

Related Manuals for Inval CC5901


Summary of Contents for Inval CC5901
- Page 1 ASSEMBLY INSTRUCTIONS AND WARRANTY MANUALDEENSAMBLEYGARANTIA CENTRO COMPUTER CREDENZA DE COMPUTO WORKCENTER WITH HUTCH This instruction manual contains important information. Follow the consecutive order. Please read and keep for future reference. Este Manual contiene informaci6n importante. Siga el 6rden consecutive de las instucciones. Por favor IE'.lalo y guardelo para consultas en el futuro.
- Page 2 DO NOT RETURN TO STORE NO DEVUELVAESTE PRODUCTOALATIENDA NE PAS RETOURNER CE PRODUIT AU MAGASIN Si usted reside en porfavor no regrese o Ila me telef6nicamente a su vendedor para Ne pas contacter le magasin afin d'obtenir des pieces ou une assistance Do not contact store for parts or assembly assistance.
- Page 3 PARTS IDENTIFICATION / IDENTIFICACION DE PARTES EXPLODED VIEW/DESPIECE IDENTIFICACION DE HERRAJES � � PARTS QUANTITY HARDWARE IDENTIFICATION PIEZA CANTIDAD ® 0100 ijF§• � (# 2) (#1) (#3) (#4) 38 WOODEN DOWELS 30CAM STUDS 30 CAMS LOCKS SCAM CAPS 38TARUGOS 30 PERNOS 30TUERCAS 6 TAPAS TUERCA �-...
- Page 4 ASSEMBLY STEPS / PASOS PARA ENSAMBLAR PARTS SET UP / PREPARACION DE PIEZAS FURNITURE ASSEMBLY ARMADO DEL MUEBLE Fasten the glides (#10) to the inferior edges of parts T/S, with glider screws (#11). Asegure los deslizadores (#10) en los bordes inferiores de las partes T, S, con tornillos deslizador (#11 ).
- Page 5 ASSEMBLY STEPS / PASOS PARA ENSAMBLAR PARTS SET UP / PREPARACION DE PIEZAS :-:, Place a Drawer Slide Screw (#7) i n the hole i n dicated by the arrow , � ·• � - .;.,;,> place the other two screws to �...
- Page 6 ASSEMBLY STEPS / PASOS PARA ENSAMBLAR S(x4) FOR THIS STEP, YOU WILL NEED: EN ESTE PASO NECESITA: ©� SCREW HINGES/ � BRACKETS TORNILLO/ H A MMER/ PHILLIPS SCREWDRIVER/ DRYWALL SCREWS BISAGRA/ TORNILLOS MARTILLO ATORNILLADOR DE ESTRELLA PLATINA DRYWALL AFTER THE PARTS ARE CONNECTED, Pag.
- Page 7 ASSEMBLY STEPS / PASOS PARA ENSAMBLAR PARTS SET UP / PREPARACION DE PIEZAS (# 7, t (# 7) ' FOR THIS STEP, YOU WILL NEED: EN ESTE PASO NECESITA: a::w 1/2" 13mm 1---1 c� © [)\\\11\ b. ) � � �' �...
- Page 8 ASSEMBLY STEPS / PASOS PARA ENSAMBLAR FOR THIS STEP, YOU WILL NEED: EN ESTE PASO NECESITA: W en a::w © � � mmDHIHI ..1!:!:! �1)1 c� 0:::E � SUPPORTS TUBES a:� �� SCREWS DRYWALL SCREWS TORNILLO TUBO <(W TORNILLOS H A MMER/ PHILLIPS SCREWDRIVER/ SOPORTE ::c ::c...
- Page 9 ASSEMBLY STEPS / PASOS PARA ENSAMBLAR PARTS SET UP / PREPARACION DE PIEZAS ASSEMBLY DRAWER ARMADO DEL CAJON U(x2) X(x2 V(x2 W(x2 AFTER TH E PARTS ARE CONNECTED, SCREW AS SHOWN FOR THIS STEP, YOU WILL NEED: � EN ESTE PASO NECESITA: 111111 NAILS 9/16"...
- Page 10 ASSEMBLY STEPS / PASOS PARA ENSAMBLAR To level the Door Part "R", follow these steps: HEIGHT ADJUSTMENT: Allows part "R" to be raised or lowered to level it with part "A". Loosen the Hinge screw, as shown in the detail, to adjust the door to the desired position, and retighten the Hinge screws.
Need help?
Do you have a question about the CC5901 and is the answer not in the manual?
Questions and answers