
Subscribe to Our Youtube Channel
Related Manuals for MP GEARLESS maGO075.2.240


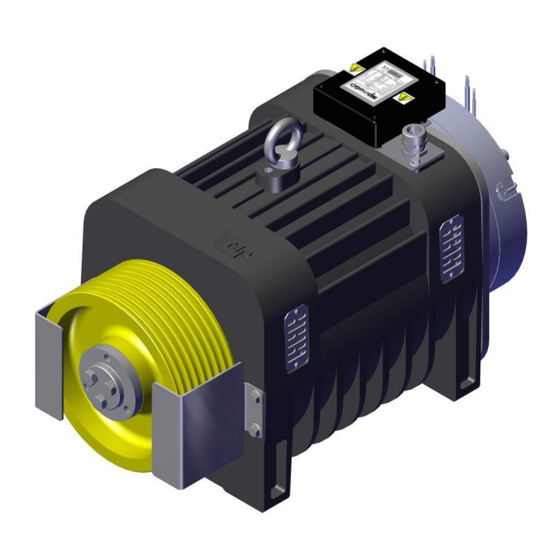
Summary of Contents for MP GEARLESS maGO075.2.240
- Page 1 Installation • Assembly • Commissioning Use • Maintenance • Repair GEARLESS maGO MACHINE Technical Manual V1101 – 09/2017 MTMECmaGO_1101_EN...
- Page 2 Gearless maGO machine SUMMARY OF MODIFICATIONS IN REGARD WITH THE PREVIOUS VERSION: MODIFICATION CONCERNING INDEX DESCRIPTION OF THE MODIFICATION SECTION Physical Functions Figures Writing Product Features 4.3., 6.3. A new model of encoder is added 6.2.2. Picture replacement V1101 - 09/2017 2/28 MTMECmaGO_1101_EN...
-
Page 3: Table Of Contents
Gearless maGO machine GENERAL INDEX Page 0. SAFETY INFORMATION ..........................4 0.1. Miscellaneous ............................4 0.2. Use of the Gearless maGO machine ......................4 0.3. Product Safety ............................4 0.4. Staff requirements ........................... 4 0.5. Commissioning ............................4 0.6. Electric power risks. Residual voltage ......................4 0.7. -
Page 4: Safety Information
MP Lifts. MP Lifts shall not be liable for any modification that has not been submitted to its express approval, neither for the damages this may cause. - Page 5 Gearless maGO machine WARNINGS • All operations mentioned in this manual must be carried out by people qualified to do so. • Before proceeding to install the machine, check that the model and the type received are in accordance with the conditions required.
-
Page 6: Technical Features
Gearless maGO machine 1. TECHNICAL FEATURES 1.1. maGO for suspension 2:1 Max. BRAKE Rated Rated Rated Rated Power Shaft Ø Pulley Voltage Weight MODEL Load Torque Volt. (Hz) Duty (kW) Load (mm) Poles (kg) Power Voltage (kg) (Nm) (m/s) (Nm) DC (V) maGO075.2.240 25000... -
Page 7: Mago For Suspension 1:1
Gearless maGO machine 1.2. maGO for suspension 1:1 Max. BRAKE Rated Rated Rated Rated Power Shaft Ø Pulley Voltage Weight MODELL Load Torque Volt. (Hz) Duty Power Voltage (kW) Load (mm) Poles (kg) (kg) (Nm) (m/s) (Nm) DC (V) 11.2 maGO100.1.160 25000 13.9... -
Page 8: Mago For Single-Phase Installation And Suspension 2:1
Data valid for: Efficiency 80% / Run 18 m 1.5. maGO nomenclature maGOxxx .240 Example → maGOxxx.2.240.T.63 MACHINE maGOxxx: MP Gearless Machine SUSPENSION .1: 1:1 .2: 2:1 DIAMETER TRACTION PULLEY .160: Pulley Ø 160 mm .240: Pulley Ø 240 mm .270: Pulley Ø... -
Page 9: Nr Of Ropes And Rope Diameters, According To Pulley
Gearless maGO machine 2.3. No. of ropes and rope diameters, according to the pulley Depending on the pulley diameter, on the width and on the pitch (Dimension P), the following table indicates the number of ropes required and their diameter: TRACTION PULLEY Ø... -
Page 10: Installation
Gearless maGO machine 3. INSTALLATION 3.2. Machine dimensions For pulley of Ø160 / Ø240 / Ø270: For pulley of Ø320 / Ø400: TYPES Ø D (mm) L1 (mm) L2 (mm) L3 (mm) L4 (mm) L5 (mm) maGO100/125 maGO150/175 maGO075/100/125 240 (6 grooves) 240 (6 grooves) maGO150/175/200 240 (8/10 grooves) -
Page 11: Assembly
Gearless maGO machine 4. ASSEMBLY 4.1. Security for machine handling During the handling and the installation of the machine on site, it is necessary to pay attention to all the security precautions indicated in the Complete Lift Assembly Technical Manual. 4.2. -
Page 12: Positioning Of The Traction Cables
Gearless maGO machine Encoder: INTERFACE: BISS-C (4 ÷ 30V) or EnDat (Heidenhain ECN 413) – (3.6 ÷ 14V). Absolute encoder resolution: 13 bits / Incremental encoder resolution: 2048. Electrical connection: with 15 pin SubD connector, in 2 rows DB15 CONNECTION SIGNAL CABLE COLOUR Data+... -
Page 13: Brake Test
Gearless maGO machine 5.2. Brake test Refer EN 81-20, 6.3.1 5.2.1. Test of the brake The electro-mechanical brake on its own is capable of stopping the machine when the car is travelling downwards at rated speed and with the rated load plus 25%. In these conditions the retardation of the car shall not exceed that resulting from operation of the safety gear or stopping on the buffer. -
Page 14: Maintenance And Repair
Gearless maGO machine 6. MAINTENANCE AND REPAIR 6.1. Brake This will be revised each time complete lift maintenance is carried out, checking that the opening control and the brake force are correct. This will be revised brake disk wear: check, with a gauge, when the brake is without voltage that the airgap is less than 0.6 mm. - Page 15 Gearless maGO machine • Brake Assembly Place the brake disk; check that it axially slides with a minimum radial clearance. Assemble the brake by using the tool F-00007268 to get the brake centred with regards to the axis. Fix the brake through tightening the fixing screws (M10-46 Nm for brakes of 2x200, 2x300 & 2x480; or screws M12–79 Nm for brake of 2x700).
-
Page 16: Microswitch Adjustment
Gearless maGO machine 6.1.2 Microswitch adjustment Remove the protection rubber of the brake. Check continuity on microswitch using a multimeter. Open the brake electrically. Insert a 0.15 mm thickness gauge, between the disk Ferodo and the shoes, as close as possible to the brake microswitch. -
Page 17: Traction Pulley
Gearless maGO machine 6.2. Traction pulley 6.2.1. Pulley check This will be checked each time that complete lift maintenance is carried out: State of the groove: If necessary, it should be replaced. Screw position markers (see photo): If there is an alteration, the tightening of the screws should be checked (M12-min 60 Nm). -
Page 18: Encoder Replacement
Gearless maGO machine 6.3. Encoder replacement Fasten the car on safety locking position and remove traction ropes. • Dismantling of the encoder Disconnect electrically. Remove the encoder protection and the DIN 912 M5 fastening screw (pictures 1 and 2). Loosen the screw on the encoder´s expandable clamp (picture 3). Extract the encoder using the DIN 912 M6 x 50 screw (extraction). -
Page 19: Appendix A. Mago Bedframe For Wmr Lifts
Gearless maGO machine APPENDIX A. maGO BEDFRAME FOR LIFTS WITH A MACHINE ROOM A.1. Bedframe type 0. Dimensions SECTION A-A’ A = maximum angle maGO MODELS Ø MACHINE PULLEY maGO 075/100/125 Ø 240 maGO 150/175/200 Ø 320 maGO 225/250/275 Ø 400 V1101 - 09/2017 19/28 MTMECmaGO_1101_EN... -
Page 20: Bedframe Type 1. Dimensions
Gearless maGO machine A.2. Bedframe type 1. Dimensions L-36 E (PULLEY Ø240) E (POL. Ø240) E (PULLEY Ø320/Ø400) E (POL Ø320 / Ø400) maGO MODELS maGO 075/100/125 maGO 150/175/200 maGO 225/250/275 Dimensional variants (mm) Machine with pulley Ø 400 Machine with pulley Ø 320 Machine with pulley Ø... -
Page 21: Assembly Of The Bedframe
Gearless maGO machine A.3. Assembly of the bedframe REFERENCE DESCRIPTION QUANTITY DRAWINGS SPARE PARTS OF DIVERSION PULLEY E-000001136 Set of bedframe type 1 structure E-000001138 Set of machine support E-000001137 Set of bedframe leg E-000001215 Set of diversion pulley C-00010643 Set of silent-block Hardware bag for fixing the legs to the bedframe structure... - Page 22 Gearless maGO machine SPARE PARTS OF DIVERSION PULLEY PROTECTION Diversion pulley protection (Ø 240 and Ø 320-pulley) E-000001325 Diversion pulley protection (Ø 400-pulley) Protection against outlet of ropes on diversion E-00010781 pulley (machined screws with locking pins are included) Protection rod outlet of ropes on diversion pulley Step 1: Assembly of the legs on the bedframe structure Levelling SCREW BAG BM1...
- Page 23 Gearless maGO machine Step 2: Assembly of the diversion pulley unit SCREW BAG BM3 DESCRIPTION QUANTITY DIN 933 M12 x 35 screw DIN 6923 M12 nut CAUTION NOTA ( L1=L2 M1=M2 FIRST LINE OF HOLES FOR FIXING THE DIVERSION PULLEY Admissible pulleys (Ø...
- Page 24 Gearless maGO machine Step 3: Assembly of the support on the bedframe structure SCREW BAG BM2 DESCRIPTION QUANTITY DIN 933 M16 x 35 screw DIN 6923 M16 nut DIN 125 Ø16 washer SCREW BAG BM2 DESCRIPTION QUANTITY DIN 933 M12 x 35 screw DIN 6923 M12 nut NOTA ( L4=L3=L2...
- Page 25 Gearless maGO machine Step 4: Assembly of the machine SCREW BAG BM5 DESCRIPTION QUANTITY DIN 933 M16 x 35 screw DIN 6923 M16 nut DIN 125 Ø16 washer Alignement MACHINE ALIGNMENT Step 5: Assembly of the diversion pulley protection 5a: Protection of the diversion pulley Rod protection (F-00005177) PROTECTION AGAINST CABLE OUTLET ON...
- Page 26 Gearless maGO machine 5b: Side protection on diversion pulley The protection shall be fitted as close as possible to the cable. Step 6: Assembly of the traction pulley protection Before starting the assembly of the traction pulley protection, assemble the sets shown here below. NB: The sets presented are viewed from the front and the diversion pulley is located on the right side.
- Page 27 Gearless maGO machine F-00010505/6 Adjustment of protection rod against outlet of cables Step 7: Assembly of Stop Option for mounting on the opposite side V1101 - 09/2017 27/28 MTMECmaGO_1101_EN...
- Page 28 Leonardo Da Vinci, 15 Isla de la Cartuja – 41092 Seville SPAIN +34 902 197 277 elevacion@mpascensores.com www.mplifts.com Technical Manual translated from the original in Spanish, available at MP website. Products constantly developed, the specifications can be modified without prior notice.
Need help?
Do you have a question about the GEARLESS maGO075.2.240 and is the answer not in the manual?
Questions and answers