Table of Contents
Advertisement
Quick Links
Digital HD Video Camera Recorder
Handycam Handbook
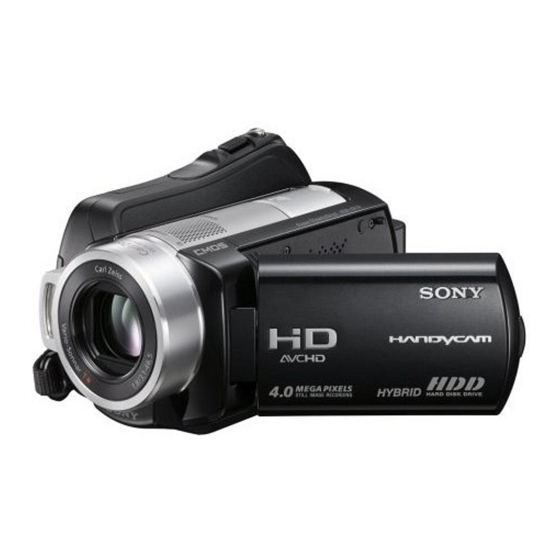
HDR-SR10E
© 2008 Sony Corporation
3-286-598-13(1)
Enjoying your
camcorder
Getting Started
Recording/Playback 25
Editing
Utilizing recording media
Customizing your
camcorder
Troubleshooting
Additional
Information
Reference
9
15
47
60
64
85
97
Quick
107
Advertisement
Table of Contents

Related Manuals for Sony Handycam DCR-SR10E


Summary of Contents for Sony Handycam DCR-SR10E
- Page 1 3-286-598-13(1) Enjoying your camcorder Digital HD Video Camera Recorder Getting Started Recording/Playback 25 Handycam Handbook Editing Utilizing recording media HDR-SR10E Customizing your camcorder Troubleshooting Additional Information Quick Reference © 2008 Sony Corporation...
-
Page 2: Read This Before Operating Your Camcorder
Read this before operating your camcorder Before operating the unit, please read this • “Memory Stick PRO Duo” and “Memory Handbook thoroughly, and retain it for Stick PRO-HG Duo” are both referred to future reference. as “Memory Stick PRO Duo” in this manual. - Page 3 • When connecting your camcorder to • Exposing the LCD screen or the lens to another device with a cable, be sure to direct sunlight for long periods of time insert the connector plug in the correct may cause malfunctions. way.
- Page 4 About the Carl Zeiss lens Your camcorder is equipped with a Carl Zeiss lens, which was developed jointly by Carl Zeiss, in Germany, and Sony Corporation, and produces superior images. It adopts the MTF measurement system for video cameras and offers a quality typical of a Carl Zeiss lens.
-
Page 5: Notes On Using The Hard Disk Drive Handycam
Notes on using the Hard Disk Drive Handycam Save all your recorded image data Note on using the camcorder at high altitudes • To prevent your image data from being lost, save all your recorded images on external media • Do not turn on the camcorder in a low-pressure periodically. -
Page 6: Table Of Contents
Table of Contents Read this before operating your Adjusting the exposure for backlit subjects ........33 camcorder ........2 Recording in mirror mode ... 33 Notes on using the Hard Disk Drive Recording fast action in slow-motion Handycam ........5 (SMTH SLW REC) ..... - Page 7 Preventing data on the hard disk of Additional Information the camcorder from being recovered ............. 62 Using your camcorder abroad ..97 Repairing the image database file File/folder structure on the camcorder ............. 63 hard disk and “Memory Stick PRO Duo” ..........99 Customizing your camcorder Maintenance and precautions ..100 About the AVCHD format ..
-
Page 8: Subject Examples And Solutions
Subject examples and solutions Checking your golf Getting a good swing shot of a ski slope or beach B SMTH SLW REC ....... 33 B Backlight ........33 B BEACH........82 B SNOW ........82 Capturing still A child on the images during stage under a spot movie recording light... -
Page 9: Enjoying Your Camcorder
Enjoying your camcorder Operation flow You can select the media (hard disk or “Memory Stick PRO Duo”) separately for movie recording and still image recording (p. 22). b Notes • When you select the media for movies, select the image quality (HD (high definition) or SD (standard definition)) as well. - Page 10 B Save recorded images. Dubbing images from the internal hard disk to a “Memory Stick PRO Duo” (p. 51) Dubbing to other devices (p. 56) The dubbing image quality (HD (high definition)/SD (standard definition)) varies depending on the connected device. For details, see page 56. Editing on a computer (p.
- Page 11 Recording time of movies (internal hard disk) HD (high definition) image quality AVCHD format Recording mode Approximate recordable time (hour minute) AVC HD 16M (FH) 4 h 50 m (highest quality)* AVC HD 9M (HQ) 9 h 40 m (high quality)** AVC HD 7M (SP) 11 h 50 m (standard quality)**...
-
Page 12: Home" And " Option" - Taking Advantage Of Two Types Of Menus
Enjoying your camcorder “ HOME” and “ OPTION” - Taking advantage of two types of menus “ HOME MENU” - the starting point for operations with your camcorder (HELP) Displays a description of the item (p. 13) Category Categories and items of the HOME MENU (CAMERA) category Item Page... - Page 13 Using the HOME MENU Touch the desired item. Example: [EDIT] While pressing the green button, turn the POWER switch in the direction of the arrow to turn on the power. Follow the guide on the screen for further operation. To hide the HOME MENU screen Touch (HOME) A (or B).
- Page 14 Touch the item you want to learn more about. When you touch an item, its explanation appears on the screen. To apply the option, touch [YES], otherwise, touch [NO]. To deactivate the HELP (HELP) again in step 2. Touch Using the OPTION MENU Just a touch on the screen during shooting or playback displays the functions available at that moment.
-
Page 15: Getting Started
Getting Started Step 1: Checking supplied items Make sure that you have the following Wireless Remote Commander (1) (p. 111) items supplied with your camcorder. The number in the parentheses indicates the number of that item supplied. AC Adaptor (1) (p. 16) A button-type lithium battery is already installed. -
Page 16: Step 2: Charging The Battery Pack
Step 2: Charging the battery pack /CHG (charge) lamp Battery pack DC IN jack POWER switch DC plug To the wall outlet (wall socket) AC Adaptor Power cord (Mains lead) You can charge the “InfoLITHIUM” Attach the battery pack by sliding battery pack (H series) (p. - Page 17 To remove your camcorder from the To remove the battery pack Handycam Station Turn the POWER switch to OFF (CHG). Slide the BATT (battery release) lever and Turn off the power, then remove the remove the battery pack. camcorder from the Handycam Station holding both your camcorder and the Handycam Station.
- Page 18 After a while, the approximate recordable Continuous Typical time and battery information appear for Battery pack recording recording about 7 seconds. You can view the battery time time* information for up to 20 seconds by Image quality pressing DISP/BATT INFO again while the NP-FH100 information is displayed.
- Page 19 • The /CHG (charge) lamp flashes during charging, or Battery Info (p. 17) will not be correctly displayed under the following conditions: – The battery pack is not attached correctly. – The battery pack is damaged. – The battery pack is worn-out (For Battery Info only).
-
Page 20: Step 3: Turning The Power On And Setting The Date And Time
Step 3: Turning the power on and setting the date and time Set the date and time when using this camcorder for the first time. If you do not Select the desired geographical set the date and time, the [CLOCK SET] area with , then touch screen appears every time you turn on your... -
Page 21: Changing The Language Setting
Step 4: Making setting adjustments before recording • It takes a few seconds for your camcorder to be ready to shoot after the power is turned on. You cannot operate your camcorder during this time. Adjusting the LCD panel • The lens cover opens automatically when the power is turned on. -
Page 22: Step 5: Selecting The Media
Step 5: Selecting the media • Touch (HOME) t (SETTINGS) t You can select the hard disk or “Memory [SOUND/DISP SET] t [LCD BRIGHT] Stick PRO Duo” as the recording/playback/ (p. 73), and adjust the brightness of the LCD editing media on your camcorder. Select the screen. - Page 23 Inserting a “Memory Stick PRO Touch [YES] t Duo” The media for movies is changed. Prepare a “Memory Stick PRO Duo” if “Memory Stick PRO Duo” has been selected as the media. For types of “Memory Stick” you can use in Selecting the media for still your camcorder, see page 2.
- Page 24 PRO Duo,” be careful so that the “Memory • Numbers in the table are based on using a Stick PRO Duo” does not pop out and drop. “Memory Stick PRO Duo” made by Sony Corporation. The recordable time may vary depending on the recording and subject conditions, [REC MODE] (p.
-
Page 25: Recording/Playback
Recording/Playback Recording and playback with ease (Easy Handycam operation) Easy Handycam operation makes nearly all settings automatic so that you can perform recording or playback operation without detailed settings. It also makes the screen font size larger for easy viewing. The images are recorded on the selected media (p. 22). If the POWER switch is set to OFF (CHG), turn it while pressing the green button. - Page 26 Playing back recorded movies/still images Turn the POWER switch G to turn on your camcorder. Press (VIEW IMAGES) A (or E). The VISUAL INDEX screen appears on the LCD screen (It may take some seconds). Appears with the image on each of the tab that was lastly played back/recorded (B for the still image recorded on a “Memory Stick PRO Duo”) HOME MENU Searches for images...
- Page 27 Start playback. Movies: Touch the tab, then select the desired movie to play back. Toggles Play or Pause as you touch Returns (to the VISUAL INDEX screen) Beginning of the movie/previous Next movie movie The recording date/ Stops (goes to the time* VISUAL INDEX screen)
- Page 28 To cancel Easy Handycam operation Press EASY I again. disappears from the LCD screen. Menu settings during Easy Handycam operation Press (HOME) C (or B) to display the menu items available for setup changes (p. 12, 64). b Notes • Most of the menu items automatically return to the default settings.
-
Page 29: Recording
Recording The images are recorded on the media selected in the media setting (p. 22). In the default setting, both movies and still images are recorded on the hard disk. (HOME) D Lens cover (HOME) A Opens automatically PHOTO E when the power is switched on. - Page 30 Recording movies Recording still images Turn the POWER switch C in the Turn the POWER switch C in the direction of the arrow until the direction of the arrow until the (Movie) lamp lights up. (Still) lamp lights up. Press START/STOP F (or B). Press PHOTO E lightly to adjust the focus A (a beep sounds), then press it fully B (a shutter...
-
Page 31: Zooming
Zooming Recording sound with more presence (5.1ch surround You can magnify images up to 15 times the recording) original size with the power zoom lever or the zoom buttons on the LCD frame. Dolby Digital 5.1ch surround sound can be recorded with the Built-in microphone. -
Page 32: Starting Shooting Quickly (Quick On)
z Tips Starting shooting quickly • When the POWER switch is set to (Movie), (QUICK ON) the size of still images becomes [ 3.0M] (16:9 wide) or [2.2M] (4:3). • You can record still images during recording standby in the same way as when the (Still) lamp is turned on. -
Page 33: Adjusting The Exposure For Backlit Subjects
(HOME) t 1 Touch (CAMERA) Adjusting the exposure for t [SMTH SLW REC]. backlit subjects 2 Press START/STOP. A 3-second movie (approx.) is recorded as a 12-second-slow-motion movie. To adjust the exposure for backlit subjects, [Recording...] disappears, when recording press . (back light) to display . on the is finished. - Page 34 • During Easy Handycam operation, the [SMTH SLW REC] function cannot be used. Cancel Easy Handycam operation.
-
Page 35: Playback
Recording/Playback Playback You can play back the images on the media selected in the media setting (p. 22). In the default setting, the images on the hard disk are played back. Lens cover Closes when an INDEX screen appears. Power zoom lever D POWER switch E (HOME) A (HOME) B... - Page 36 z Tips • The number of the images on the VISUAL INDEX screen can be changed 6 y 12 by moving the power zoom lever D. To fix this number, press (HOME) B (or A) t (SETTINGS) t [VIEW IMAGES SET] t [ DISPLAY] (p.
-
Page 37: Searching For Desired Scene By Pinpoint (Film Roll Index)
z Tips z Tips • You can switch the playback mode by touching • You can display the [Film Roll Index] screen by (HOME) B (or A) t (HOME) t (VIEW touching (VIEW IMAGES) t [VISUAL INDEX]. IMAGES) t [ INDEX]. -
Page 38: Searching For Desired Images By Date (Date Index)
b Notes Touch date on the screen. • Faces may not be detected depending on recording conditions. The recording dates of images are Example: People wearing glasses or hats, or displayed on the screen. who do not face towards the camera. •... -
Page 39: Playing Back A Series Of Still Images (Slide Show)
Playing the image on a TV 1 Play back the still image you want to Connection methods and quality of the magnify. image (HD (high definition)/SD (standard definition)) viewed on the TV screen differ 2 Magnify the still image with T depending on what type of TV is connected, (Telephoto). - Page 40 Selecting the most advantageous connection - TV CONNECT Guide Your camcorder will advise you of the most advantageous way of connecting your TV. Turn on your camcorder, and touch (HOME) t (OTHERS) t [TV CONNECT Guide]. If the item is not on the screen, touch to change the page.
- Page 41 Connecting to a high definition TV Images recorded with HD (high definition) image quality are played back with HD (high definition) image quality. Images recorded with SD (standard definition) image quality are played back with SD (standard definition) image quality. t (p.
- Page 42 : Signal flow Type Camcorder Cable HOME MENU setting HDMI HDMI cable (optional) b Notes • Use an HDMI cable with the HDMI logo. • Use an HDMI mini Connector on one end (for the camcorder), and a plug suitable for connection to your TV on the other end.
- Page 43 b Notes • When you play back a movie recorded with SD (standard definition) image quality on a 4:3 TV that is not (HOME) t (SETTINGS) t [MOVIE SETTINGS] t compatible with the 16:9 signal, touch [WIDE SELECT] t [4:3] on your camcorder when recording an image (p. 67). : Signal flow Type Camcorder...
- Page 44 On “PhotoTV HD” Your camcorder is compatible with “PhotoTV HD.” “PhotoTV HD” allows for highly-detailed, photo-like depiction of subtle textures and colors. By connecting Sony’s PhotoTV HD-compatible devices using an HDMI cable* or a component A/V...
- Page 45 Operate the remote commander of the TV. You can do the following operations. – Display (VIEW IMAGES) of (HOME) by pressing the SYNC MENU button – Display an INDEX screen, such as the VISUAL INDEX screen, by pressing up/ down/left/right/enter buttons on the remote commander of your TV, and play back the desired movies or still images b Notes...
-
Page 46: Saving Images
Saving images The images are recorded on the media selected in the media setting (p. 22). Due to the limited capacity of the media, make sure that you save the image data to some type of external media such as a DVD-R or a computer. z Tips •... -
Page 47: Editing
Editing (OTHERS) category TV CONNECT Guide This category enables you to edit the images on the media. Also, you can enjoy Your camcorder helps you select the your camcorder by connecting to other appropriate connection for your device devices. (p. 39). (OTHERS) category Item list DELETE... -
Page 48: Deleting Images
Deleting images You can delete images recorded on the media using your camcorder. Touch the movie to be deleted. b Notes • You cannot restore images once they are deleted. • Do not remove the battery pack or the AC Adaptor from your camcorder while deleting the images. - Page 49 To delete all the still images recorded b Notes on the same day at one time • If the deleted movie is included in the Playlist (p. 54), the movie added to the Playlist is This function is available only when the deleted also from the Playlist.
-
Page 50: Capturing A Still Image From A Movie
Capturing a still image from a movie To finish capturing You can save a selected frame from a recorded movie as a still image. Touch Select the media which contains movies, and the media where you want to save still b Notes images before the operation (p. -
Page 51: Dubbing/Copying Images To A "Memory Stick Pro Duo" With Your Camcorder
Dubbing/copying images to a “Memory Stick PRO Duo” with DUB]: To dub the movies with SD (standard definition) your camcorder image quality Dubbing movies Touch the type of dubbing. You can dub movies recorded on the [DUB by select]: To select movies and dub internal hard disk of your camcorder to a [DUB by date]: To dub all movies of a “Memory Stick PRO Duo.”... - Page 52 Touch t [YES]. Select the still image to be copied. Dubbing starts. [COPY by select]: Touch the still image to be copied. The selected still image is marked with . You can select multiple z Tips still images. • To check the dubbed movies after dubbing is finished, select [ MEMORY STICK]/[ MEMORY STICK] on [MOVIE MEDIA SET]...
-
Page 53: Dividing A Movie
Dividing a movie • Do not remove the battery pack or the AC Select the media which contains the movie Adaptor from your camcorder while dividing you want to divide before the operation the movie. It may damage the media. Also, do (p. -
Page 54: Creating The Playlist
Creating the Playlist To add all the movies recorded on the The Playlist is a list showing thumbnails of the movies that you have selected. same day at one time The original movies are not changed even if 1 In step 2, touch [ ADD by date]/ you edit or delete the movies added to the ADD by date]. - Page 55 Press and hold the movie on the LCD Playing the Playlist screen to confirm the movie. Touch to return to the previous Select the media you want to create, play, screen. or edit a Playlist before the operation (p. 22). 4 Touch t [YES] t To change the order within the Playlist...
-
Page 56: Dubbing To Other Devices
Editing Dubbing to other devices Connecting with the A/V connecting cable You can dub images played back on your camcorder to other recording devices, such as VCRs or DVD/HDD recorders. Connect the device in either of the following ways. Connect your camcorder to the wall outlet (wall socket) using the supplied AC Adaptor for this operation (p. - Page 57 • To hide the screen indicators (such as a counter, etc.) on the screen of the monitor device When dubbing is finished, stop connected, touch (HOME) t the recording device, and then (SETTINGS) t [OUTPUT SETTINGS] t your camcorder. [DISP OUTPUT] t [LCD PANEL] (the default setting) on the HOME MENU (p.
-
Page 58: Printing Recorded Still Images (Pictbridge Compliant Printer)
Printing recorded still images (PictBridge compliant printer) Touch [ USB CONNECT] or You can print out still images using a USB CONNECT] according to PictBridge compliant printer, without the media on which the movie you connecting the camcorder to a computer. want to dub is recorded. - Page 59 You can select a still image on the b Notes screen. • We can guarantee the operation of only models that are PictBridge compatible. • Refer also to the instruction manual of the printer to be used. Touch the still image to be •...
-
Page 60: Utilizing Recording Media
Utilizing recording media (MANAGE MEDIA) Checking the media category information This category enables you to use the hard You can check the remaining recordable disk or a “Memory Stick PRO Duo” for time for each recording mode of the media various purposes. -
Page 61: Deleting All Images (Formatting)
Deleting all images (Formatting) Formatting deletes all the images to recover Formatting the “Memory Stick recordable free space. PRO Duo” Connect your camcorder to the wall outlet (wall socket) using the supplied AC Adaptor for this operation (p. 16). Insert the “Memory Stick PRO b Notes Duo”... -
Page 62: Preventing Data On The Hard Disk Of The Camcorder From Being Recovered
Preventing data on the hard disk of the camcorder from being recovered EMPTY] allows you to write unintelligible data onto the hard disk of the Press and hold . (back light) for camcorder. In this way, it may become a few seconds (p. 109). more difficult to recover any original data. -
Page 63: Repairing The Image Database File
Repairing the image database file • The image database files of the hard disk and This function checks the management the “Memory Stick PRO Duo” are repaired information and the consistency of movies separately. and still images in the media, and repairs any inconsistencies found. -
Page 64: Customizing Your Camcorder
Customizing your camcorder What you can do with the (SETTINGS) category of the HOME MENU You can change the recording functions and the operating settings for your convenience. Touch the desired setup item. If the item is not on the screen, touch Using the HOME MENU to change the page. -
Page 65: List Of The (Settings) Category Items
Items Page List of the (SETTINGS) CONVERSION LENS category items MOVIE SETTINGS (p. 66) VIEW IMAGES SET (p. 72) Items Page Items Page REC MODE DATA CODE AUDIO MODE DISPLAY NIGHTSHOT LIGHT WIDE SELECT SOUND/DISP SET** (p. 73) DIGITAL ZOOM Items Page STEADYSHOT... -
Page 66: Movie Settings
MOVIE SETTINGS (Items for recording movies) GENERAL SET (p. 76) Items Page DEMO MODE REC LAMP CALIBRATION Touch 1, then 2. A.SHUT OFF If the item is not on the screen, touch QUICK ON STBY to change the page. REMOTE CTRL How to set DROP SENSOR (HOME MENU) t page 64... - Page 67 B SD SP ( • The maximum shooting distance using [NIGHTSHOT LIGHT] is about 3 m (10 feet). Records in standard quality mode (SD 6M (SP)). WIDE SELECT SD LP ( Increases the recording time (Long Play) When recording with SD (standard definition) image quality, you can select the (SD 3M (LP)).
- Page 68 180 × z Tips Up to 15 × zoom is performed optically, • Positioning the subject at the cross point of the and after that, up to 180 × zoom is guide frame makes a balanced composition. performed digitally. ZEBRA STEADYSHOT Diagonal stripes appear in portions of the You can compensate for camera shake (the...
- Page 69 b Notes • If you use the flash in bright places such as when shooting a backlit subject, the flash may • When the remaining recordable time for movies not be effective. is less than 5 minutes, the indicator stays on the screen.
-
Page 70: (Items For Recording Movies) Photo Settings
PHOTO SETTINGS (Items for recording still images) Face detection frame Touch 1, then 2. If the item is not on the screen, touch Face detection mark to change the page. ON[NO FRAMES] ( How to set Detects a face without showing a frame. The detected face image is optimized (HOME MENU) t page 64 automatically. - Page 71 FLASH LEVEL • You can record up to 9,999 still images on the hard disk. See page 69. • The unique pixel array of Sony’s ClearVid CMOS sensor and image processing system REDEYE REDUC (BIONZ) allows for still image resolution equivalent to the sizes described.
-
Page 72: (Items For Recording Still Images)
VIEW IMAGES SET (Items to customize the display) CAMERA DATA Movie Touch 1, then 2. If the item is not on the screen, touch to change the page. How to set Still image (HOME MENU) t page 64 (OPTION MENU) t page 78 The default settings are marked with B. -
Page 73: Sound/Disp Set
SOUND/DISP SET (Items to adjust the sound and the screen) 6IMAGES Displays thumbnails of 6 images. 12IMAGES Displays thumbnails of 12 images. * You can also operate with the zoom buttons on the LCD frame or on the Remote Commander. Touch 1, then 2. -
Page 74: (Items To Adjust The Sound And The Screen) Output Settings
OUTPUT SETTINGS (Items for when connecting other devices) LCD BL LEVEL (LCD back light level) You can adjust the brightness of the LCD screen’s backlight. B NORMAL Standard brightness. Touch 1, then 2. If the item is not on the screen, touch BRIGHT to change the page. -
Page 75: (Items For When Connecting Other Devices) Clock/ Lang
CLOCK/ LANG (Items to set clock and language) DISP OUTPUT B LCD PANEL Shows displays such as the time code on the LCD screen. V-OUT/PANEL Shows displays such as the time code on Touch 1, then 2. the TV screen and LCD screen. If the item is not on the screen, touch to change the page. -
Page 76: (Items To Set Clock And Language) General Set
GENERAL SET (Other setup items) A.SHUT OFF (Auto shut off) B 5 min The camcorder is automatically turned off when you do not operate your camcorder for more than approximately 5 minutes. Touch 1, then 2. NEVER If the item is not on the screen, touch The camcorder is not automatically turned to change the page. - Page 77 b Notes • Set the drop sensor to [ON] when you use the camcorder. Otherwise, if you drop the camcorder, you may damage the internal hard disk. • In a non-gravity situation, the drop sensor activates. When you record images during an activity such as roller-coasting or skydiving, you can set [DROP SENSOR] to [OFF] ( so as not to activate the drop sensor.
-
Page 78: Activating Functions Using The
Activating functions using the OPTION MENU (OPTION) MENU appears just like the pop-up window that appears when you Change the setting, then touch right-click the mouse on a computer. Various available functions are displayed. Using the OPTION MENU b Notes •... -
Page 79: Recording Items On The Option Menu
Recording items on the OPTION Viewing items on the OPTION MENU MENU Items Page Items Page FOCUS DELETE – SPOT FOCUS DELETE by date – TELE MACRO DELETE ALL – EXPOSURE – SPOT METER – SCENE SELECTION DIVIDE – WHITE BAL. ERASE ALL –... -
Page 80: Functions Set In The Option Menu
Functions set in the OPTION MENU Items you can set only on the (OPTION) SPOT FOCUS MENU will be described below. You can select and adjust the focal point to The default settings are marked with B. aim it at a subject not located at the center of the screen. - Page 81 EXPOSURE SCENE SELECTION You can fix the brightness of a picture You can record images effectively in manually. Adjust the brightness when the various situations. subject is too bright or too dark. B AUTO Select to automatically record images effectively without the [SCENE SELECTION] function.
- Page 82 LANDSCAPE*( • Even if you set [TWILIGHT PORT.] while the (Still) lamp is lit, the setting changes to Select to shoot distant subjects clearly. [AUTO] once the (Movie) lamp lights up. This setting also prevents your camcorder from focusing on glass or metal mesh in WHITE BAL.
- Page 83 b Notes NIGHTSHOT switch (p. 32) is also set to • Set [WHITE BAL.] to [AUTO] or adjust the appears on the screen. color in [ONE PUSH] under white or cool white fluorescent lamps. To cancel, touch [OFF]. • When you select [ONE PUSH], keep framing white objects while is flashing quickly.
- Page 84 B NORMAL D.EFFECT (Digital effect) Records various surround sounds, converting them into the appropriate level. When you select [OLD MOVIE], appears and you can add an old movie LOW ( effect to images. Records surround sound faithfully. This To cancel [D.EFFECT], touch [OFF]. setting is not suitable for recording conversations.
-
Page 85: Troubleshooting
• During repair, we may check a minimum turn on your camcorder. amount of data stored on the hard disk in order to investigate the problem. However, your Sony dealer will neither Buttons do not work. copy nor retain your data. • During Easy Handycam operation, the following buttons/functions are not available. - Page 86 – [FILE NO.] (OPTION) button is not – [ DISPLAY] displayed. – [VOLUME] – [BEEP] • The OPTION MENU cannot be used – [TV TYPE] during Easy Handycam operation. – [COMPONENT] – [CLOCK SET] The menu settings have changed – [AREA SET] automatically.
- Page 87 (p. 16). If the problem persists, • Adjust the touch panel ([CALIBRATION]) disconnect the AC Adaptor from the wall (p. 104). outlet (wall socket) and contact your Sony dealer. The battery pack may be damaged. “Memory Stick PRO Duo” The remaining battery time indicator You cannot operate functions using does not indicate the correct time.
- Page 88 The data file name is not indicated The ACCESS lamp remains lit or correctly or flashes. flashing even when you stop recording. • The file is damaged. • Your camcorder is recording the scene you • The file format is not supported by your have just shot on the media.
- Page 89 • If you keep applying vibration on the The color of the image is not camcorder, recording may stop. correctly displayed. • Set the NIGHTSHOT switch to OFF There is a time difference between (p. 32). the point where you press START/ STOP and the point that the The screen image is bright, and the recorded movie starts/stops.
- Page 90 Playing back images Left and right sound will be heard unbalanced when playing back on Images cannot be played back. computers or other devices. • Select the media and the image quality of a • This happens when sound recorded in 5.1ch movie you want to play back by touching surround is converted to 2ch (normal stereo (HOME) t...
- Page 91 • You cannot add still images in the Playlist. Dubbing/Connecting to other devices A movie cannot be divided. You cannot dub correctly. • A movie that is too short cannot be divided. • A movie protected on another device • You cannot dub images using the HDMI cannot be divided.
- Page 92 Because of following Because of following Cannot use Cannot use settings settings [FADER] [COLOR SLOW [MICREF [BLT-IN ZOOM MIC] SHTR], [SUPER LEVEL] NIGHTSHOT], [D.EFFECT], [CANDLE], [FIREWORKS] [D.EFFECT] [COLOR SLOW SHTR], [SUPER NIGHTSHOT], [FADER], [SCENE SELECTION], [PICT.EFFECT] [OLD MOVIE] [SCENE SELECTION], [PICT.EFFECT] [PICT.EFFECT] [OLD MOVIE]...
-
Page 93: Self-Diagnosis Display/Warning Indicators
If the problem persists even after you have tried to fix a couple of times, contact your (Warning on the hard disk of the Sony dealer or local authorized Sony service camcorder)* facility. Fast flashing •... - Page 94 (Warning indicator pertaining to (Warning indicator pertaining to “Memory Stick PRO Duo”) camera-shake warning) • The amount of lights is not sufficient, Slow flashing so camera-shake easily occurs. Use the • Free space for recording images are flash. running out. For the type of “Memory •...
- Page 95 x Media • The Image Database File is damaged, and you cannot record movies or still images. Touch [YES] to repair. HDD format error. • You can record still images on a “Memory Stick PRO Duo.” • The hard disk of the camcorder is set differently from the default format.
- Page 96 x Other • Format the “Memory Stick PRO Duo” (p. 61), or delete them using your computer. No further selection is possible. • You can select only 100 images at one Cannot save still picture. time for: • When using the Dual Rec function, do –...
-
Page 97: Additional Information
Additional Information Using your camcorder abroad Power supply On TV color systems You can use your camcorder in any Your camcorder is a PAL-system-based countries/regions using the AC Adaptor camcorder. If you want to view the supplied with your camcorder within the playback image on a TV, it must be a PAL- AC 100 V to 240 V, 50/60 Hz range. - Page 98 Setting to the local time You can easily set the clock to the local time by setting a time difference when using your (HOME) t (SETTINGS) t [CLOCK/ LANG] t camcorder abroad. Touch [AREA SET] and [SUMMERTIME] (p. 75). World time difference Time-zone Time-zone Area setting...
-
Page 99: File/Folder Structure On The Camcorder Hard Disk And "Memory Stick Pro Duo
File/folder structure on the camcorder hard disk and “Memory Stick PRO Duo” The file/folder structure is shown below. You do not usually need to acknowledge the file/ folder structure, when recording/playing back images on the camcorder. To enjoy still images or movies by connecting to a computer, see “PMB Guide,”... -
Page 100: Maintenance And Precautions
Maintenance and precautions *2: 720p specification About the AVCHD format A high definition specification which utilizes 720 effective scanning lines and the progressive What is the AVCHD format? system. *3: Data recorded in AVCHD format other than The AVCHD format is a high definition the above mentioned cannot be played on your digital video camera format used to record camcorder. -
Page 101: About The "Infolithium" Battery Pack
On a “Memory Stick PRO Duo” – If you use the “Memory Stick PRO Duo” near magnets or magnetic fields • The maximum memory capacity of a “Memory • It is recommended you make a back-up of Stick PRO Duo” that can be used with your important data on the hard disk of a computer. -
Page 102: About X.v.color
• Do not expose the battery pack to water. The • x.v.Color is a more familiar term for the xvYCC battery pack is not water resistant. standard proposed by Sony, and is a trademark of Sony. • xvYCC is an international standard for color space in video. -
Page 103: About Handling Of Your Camcorder
(or vice versa) or when you use checked by a Sony dealer before operating it your camcorder in a humid place as any further. - Page 104 How to prevent moisture condensation 3 Touch “×” displayed on the screen with the corner of the “Memory Stick PRO Duo” or When you bring your camcorder from a the like 3 times. cold place into a warm place, put your camcorder in a plastic bag and seal it Touch [CANCEL] to cancel.
- Page 105 • “x.v.Colour” is a trademark of Sony rechargeable battery is not charged, the Corporation. camcorder operation will not be affected as • “BIONZ” is a trademark of Sony Corporation. long as you are not recording the date. • “BRAVIA” is a trademark of Sony Corporation. Procedures •...
- Page 106 COLORADO 80206. downloading the source code, select DCR- DVD810 as the model for your camcorder. THIS PRODUCT IS LICENSED UNDER THE http://www.sony.net/Products/Linux/ AVC PATENT PORTFOLIO LICENSE FOR We would prefer you do not contact us about the THE PERSONAL AND NON-COMMERCIAL contents of source code.
-
Page 107: Quick Reference
Quick Reference Identifying parts and controls The numbers in ( ) are reference pages. A Power zoom lever (31, 38) B PHOTO button (30) C QUICK ON button (32) D /CHG (charge) lamp (16) E ACCESS lamp (Hard disk) (29) F DC IN jack (16) G Hook for a shoulder belt Attach a shoulder belt (optional). - Page 108 A Active Interface Shoe C Camera recording lamp (76) The Active Interface Shoe supplies Lights up in red during recording. power to optional accessories such as a Flashes when remaining hard disk space video light, a flash, or a microphone. or battery power is low.
- Page 109 A Speaker Playback sounds come out from the speaker. For how to adjust the volume, see page 36. (VIEW IMAGES) button (35) C NIGHTSHOT switch (32) (HOME) button (13, 64) E Zoom buttons (31, 38) F START/STOP button (30) G LCD screen/touch panel (21) H RESET button Initializes all the settings, including the setting of the date and time.
- Page 110 Handycam Station A Built-in microphone (31) (DISC BURN) button (46) An Active Interface Shoe compatible B Interface connector microphone (optional) will take Connects your camcorder to the precedence when connected. Handycam Station. B Flash (69) (USB) jack (58) C Lens (Carl Zeiss Lens) (4) D A/V OUT jack (41) D Interface connector E DC IN jack (16)
- Page 111 Remote Commander may not function properly. In this case, replace the When you press any button on the [VISUAL battery with a Sony CR2025 lithium battery. INDEX]/[Film Roll Index]/[Face Index]/ Use of another battery may present a risk of fire Playlist screen, the orange frame appears on the LCD screen.
-
Page 112: Indicators Displayed During Recording/Playback
Indicators displayed during recording/playback A HOME button (13) Recording movies B Remaining battery (approx.) (17) C Recording status ([STBY] (standby) or [REC] (recording)) D Recording quality (HD/SD) and recording mode (FH/HQ/SP/LP) (66) E Recording/playback media F Counter (hour/minute/second) G Approximate recording time remaining Recording still images H OPTION button (14) I FACE DETECTION (69) - Page 113 Upper right Indicators when you made changes Indicator Meaning Fader (83) Following indicators appear during LCD backlight off (21) recording/playback to indicate the settings of your camcorder. Drop sensor off (76) Drop sensor activated Upper left Upper right Center (76) Media for still images (23) Bottom...
- Page 114 Data code during recording The recording date and time is recorded automatically on the media. They are not displayed while recording. However, you can check them as [DATA CODE] during playback (p. 72).
-
Page 115: Glossary
Quick Reference Glossary x 5.1ch surround sound x MPEG-4 AVC/H.264 A system that plays back sound on 6 speakers, 3 at The latest image coding format standardized the front (left, right and center) and 2 at the rear jointly by two international standardization (right and left) with an additional low-pass organizations, the ISO-IEC and the ITU-T, in subwoofer counted as a 0.1 channel for... -
Page 116: Index
Quick Reference Index Numeric CAMERA DATA ....72 Dolby Digital 5.1 Creator..31 CANDLE ......81 DROP SENSOR ....76 1080i/576i......75 Charging the battery..... 16 Dual Rec....... 32 16:9........74 Battery pack....16 D.EFFECT (Digital effect) 16:9 WIDE ......67 ........84, 92 Pre-installed rechargeable 21-pin adaptor.......44 battery ...... - Page 117 Hard disk......5, 99 LCD BRIGHT...... 73 HD movie management file LCD COLOR ....... 74 OLD MOVIE......92 ..........99 LCD panel ......21 ONE PUSH.....82, 91 HD (high definition) image LCD BL LEVEL... 74 Operation confirmation beep quality ........9 LCD BRIGHT....73 .........
- Page 118 Remaining SUB-T DATE (Subtitle date) Wide TV ....... 42 ..........69 Battery ......17 World time difference ..98 SUNRISE&SUNSET... 81 Hard disk .......60 SUPER NIGHTSHOT ... 83, 91 “Memory Stick PRO Duo” ........60 X.V.COLOR....68, 102 Remaining battery ....17 REMAINING SET (movie) TELE MACRO ....
- Page 119 Additional information on this product and answers to frequently asked questions can be found at our Customer Support Website. http://www.sony.net/...
Need help?
Do you have a question about the Handycam DCR-SR10E and is the answer not in the manual?
Questions and answers