
Related Manuals for i-Vac S30 Ultra Pets Plus


Summary of Contents for i-Vac S30 Ultra Pets Plus
- Page 1 Ultra Pets Plus Stick Vacuum Brushless motor Superior suction Cordless convenience...
-
Page 3: Specifications
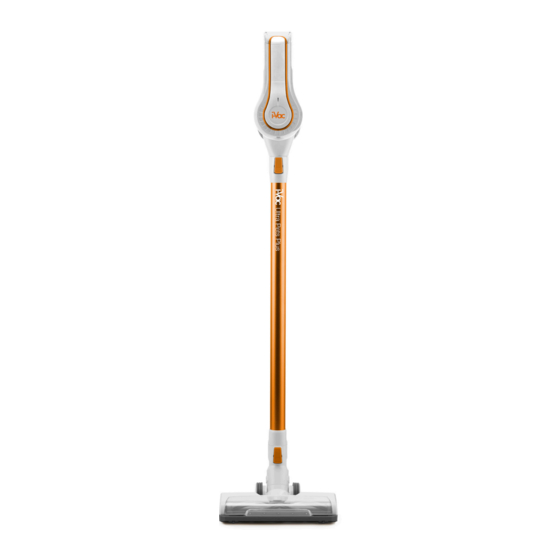
S30 Ultra Pets Plus Congratulations on the purchase of your new i-Vac vacuum cleaner. There are many useful features built into your cleaner and we recommend that you carefully read this instruction manual to take the best advantage of these features. Features: 1. Exhaust filter release button 7. Dust bin lid release button Charging port 8. Rod release button 3. On/off button 4. Battery release button (not shown) 10. Power head release button Continuous mode switch 11. Power head 6. Dust bin... -
Page 4: Before You Begin
Before You Begin This cleaner must be operated in accordance with these instructions and used only for domestic household cleaning to remove DRY dirt and dust from household carpets, flooring, walls and fabrics. This cleaner is not fit to be used as an industrial cleaner and will void the manufacturer’s warranty if used inappropriately. Please read these instructions thoroughly This will ensure you obtain full benefit from your new cleaner. Keep this instruction manual in a handy place for future reference. Important Always switch off the vacuum cleaner before cleaning, attempting any maintenance task, fitting or removing accessories, or when not in use. The charger must only be connected to an AC power supply at the voltage shown on the rating label. This cleaner should only be charged with the charger provided. This cleaner should only be used for its intended purpose as described in these instructions. Precautionary measures: Do not operate the vacuum cleaner too close to heaters, radiators or other hot surfaces. Before inserting the plug into the wall, make sure your hands are dry. -
Page 5: Safety Precautions And Warnings
Safety Precautions & Warnings IMPORTANT! Always switch off the vacuum cleaner before cleaning, when not in use or attempting any maintenance task. The charger must only be connected to an AC power supply at the voltage shown on the rating label. This cleaner should only be used for its intended purpose as described in this instruction manual. - Page 6 16. Before vacuuming, remove any large or sharp 2. Only charge the battery inside the product and objects from the floor or cleaning surface in only use the specifically designated charger to order to prevent damage to the filter. charge the product. 17. If the air inlet or floor head is blocked, switch When vacuum cleaner is not in use, keep it away off the cleaner straight away. Clear the blocked from other metal objects, like paper clips, coins, object before attempting to start the vacuum keys, nails, screws or other small metal objects cleaner again. that can make a connection from one terminal to another.
-
Page 7: Installing And Removing The Battery
Assembly IMPORTANT! Always remove the battery from the vacuum cleaner before fitting or removing accessories. 1. Insert the power head into the rod. You will hear a “click” sound when it is securely in place. 2. Insert the opposite end of the rod into the air inlet of the cleaner. You will hear a “click” sound when it is securely in place. Installing and removing the battery 1. Insert the battery into the cleaner (as shown) until it clicks into place. 2. To remove the battery, press the battery release button and gently pull the battery from the cleaner. -
Page 8: On/Off Button
Instructions for Use On/off button Press the on/off button to turn the cleaner on or off. Continuous mode switch 1. The cleaner can be operated without constantly holding down the on/ off button. To enable continuous mode, push the continuous mode switch (as shown) until it clicks into place. 2. To disable continuous mode, push the continuous mode switch in the opposite direction until it clicks into place. ATTENTION: After each use, ensure that the continuous mode switch is disabled. - Page 9 Charging the vacuum cleaner NOTE: When the charging indicator light is flashing blue during use, the vacuum cleaner battery is running low and requires charging. Insert the charger into the charging port of the vacuum cleaner. Charging indicator light: When the charging indicator light is flashing blue, the vacuum cleaner is being charged. When the charging indicator light turns off, the vacuum cleaner is fully charged.
-
Page 10: Power Head
Accessories CAUTION! Always switch off the vacuum cleaner and remove the battery before fitting or removing accessories. NOTE: As a safety precaution, the power head and mini motorised pet brush will not switch on if inserted into the cleaner while it is operational. Power head Ideal for daily cleaning on carpets and hard floors. -
Page 11: Crevice Tool
2-In-1 brush Ideal for gentle dusting without scratching surfaces. Crevice tool Ideal for cleaning in crevices, corners and hard to reach places. Flexible adaptor Ideal for cleaning at unconventional angles. Mini motorised pet brush Ideal for picking up pet hair from furniture and upholstery. IMPORTANT! Keep hair, hands and feet away from rotating parts while the motorised brush is running. Do not run the motorised brush over electrical cables or strings. Do not use the motorised brush on pets. -
Page 12: Maintenance
Maintenance IMPORTANT! Always remove the battery from the vacuum cleaner before performing any maintenance tasks. It is recommended to clean the dust bin after each use or when dust reaches the max fill line. Storage 1. Installing wall bracket 2. Place the vacuum cleaner onto the wall storage bracket (as shown). NOTE: If the vacuum cleaner will not be used for a long period of time, it is recommended to remove the battery from the machine during storage to maintain battery life. - Page 13 Cleaning the cyclone separator 1. Press the dust bin lid release button to open the lid and access the cyclone separator. 2. Turn the cyclone separator clockwise to release it from the dust bin (as shown). 3. Gently pull the cyclone separator from the dust bin to clean it, then reverse the process to place it back in the dust bin. NOTE: Do not use water to clean the cyclone separator. Cleaning or replacing the exhaust filter 1. 1. Press the exhaust filter release buttons and gently pull the exhaust filter from the cleaner. 2. Carefully clean the exhaust filter or replace it with a new one, sliding it back into place in the cleaner. NOTE: It is recommenced to replace the exhaust filter every six months.
-
Page 14: Spare Parts
Spare Parts Please contact Godfreys customer support and service hotline Australia on 1800 815 270 or New Zealand on 0800 282 288 to find your local spare parts provider. Part Part Number Dust Bin Filter Cone 32201846 Battery 33202085 Charger 33202086 Roller Brush 33788193 Exhaust Filter 32201847... -
Page 15: Troubleshooting
Troubleshooting Problems and solutions If you come across a problem, please use the checklist of troubleshooting tips before contacting Godfreys Customer Care. Fault Cause Solution Cleaner doesn’t start - F lat battery - Charge the vacuum cleaner Reduced suction - T he dust bin is full of dust - E mpty the dust bin - Dust bin filter is blocked - C lean or replace the dust bin filter - T he air way is blocked - Clear the air way The charging indicator light flashes - The charging adaptor is not correctly - Reinsert the charging adaptor into... - Page 16 Ultra Pets Plus Stick Vacuum WARRANTY Conditions of warranty* Your cleaner, in the case of domestic use, has a two year parts and Electrical Home-Aids Pty. Limited is unable to accept responsibility labour warranty against product defects and failures when the under this warranty for any repair work not carried out by an product is used in accordance with the terms and conditions of this authorised Service Agent or from the use of non-genuine parts. warranty statement.
Need help?
Do you have a question about the S30 Ultra Pets Plus and is the answer not in the manual?
Questions and answers
how to change intake filter
The context does not provide specific instructions for changing the intake filter on the i-Vac S30 Ultra Pets Plus. However, it does mention replacing or cleaning the dust bin filter if suction is reduced. For intake filter replacement, refer to the vacuum manual or contact support.
This answer is automatically generated
head brushes and lights are not rotating lights on head not lighting vac works ok we have ivac ultra **** plus and its the main vac head
The head brushes and lights on the i-Vac S30 Ultra Pets Plus vacuum may not be working because the roller brush is jammed or the suction inlet is blocked. To resolve this, turn off the cleaner, remove the battery, and follow the maintenance procedures to clean the roller brush or clear the blockage.
This answer is automatically generated
can u wash the filter
No, the cyclone separator should not be cleaned with water. The exhaust filter can be cleaned carefully, but there is no mention of washing it with water. It is recommended to replace the exhaust filter every six months.
This answer is automatically generated