Table of Contents
Advertisement
Quick Links
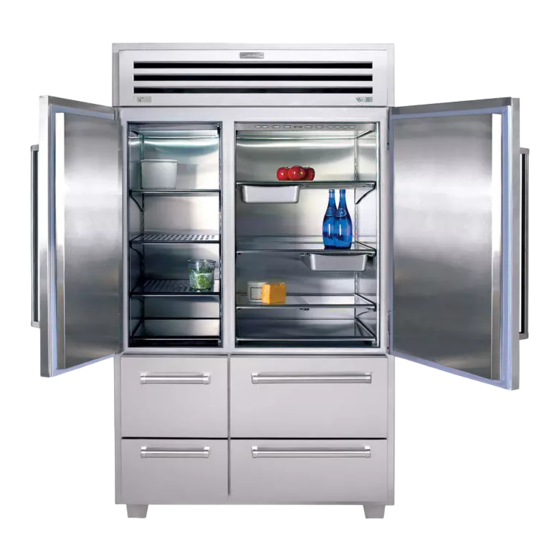
Installation Information
INSTALLATION CONSIDERATIONS:
This section covers some of the more common installa-
tion issues seen by a service technician. An improper
installation, though not a valid service issue, has the
potential to lead to a customer placing a call for service.
Installation related customer complaints could include,
but are not limited to: Unit leveling, unit movement,
door misalignment, doors and drawers not sealing,
internal frost or condensation, warm compartment tem-
peratures, exterior condensation, etc.
UNIT COULD TIP FORWARD UNDER CERTAIN
LOAD CONDITIONS. FAILURE TO INSTALL ANTI-
TIP COMPONENTS AND EXTEND FRONT LEVEL-
ERS TO FLOOR ACCORDING TO INSTALLATION
MANUAL CAN RESULT IN SERIOUS INJURY OR
DEATH.
NOTE:
Always refer to the Installation Manual whenev-
er installation related concerns arise, or contact the
Sub-Zero Customer Service Department.
Unit Leveling (Model 424)
Unlike the other 400 Series units, the model 424 must
be leveled before it is installed into the rough-in open-
ing.
(See WARNING
above). To level the model 424,
place it in front of the rough-in opening. Then, turn
each of the four leveling legs clockwise to raise the unit,
counterclockwise to lower the unit.
An adjustable wrench or pliers may be needed.
NOTE:
If removing a 424 from its installation, an anti-
tip bracket and a countertop bracket may have been
used to make a solid installation.
the brackets were not used, shims may have been
wedged along the sides and top.
Unit Leveling (Models 427 & 427R)
NOTE:
The unit must be in the correct installation posi-
tion before leveling.
(See WARNING
plate/grille must be removed before leveling.
Figure 2-3)
If the unit has already been anchored to
the cabinets, the side molding strips must be removed
and the anchor screws must be extracted from the unit
to cabinet brackets before leveling.
These components must be reinstalled after leveling.
To level the unit, turn the front leveling legs counter-
clockwise to raise the front or clockwise to lower it. To
assist in turning the front leveling legs up or down, use
(See Figure 2-1)
(See Figures 2-2)
If
above). The kick-
(See
(See Figure 2-4)
2-2
400 Series
400 Series
Leveling Legs
Clockwise to raise, Counterclockwise to lower
Figure 2-1. Model 424 Leveling Legs
Figure 2-2. Model 424 Countertop Bracket
Figure 2-3. Model 427, 427R
Kickplate/Grille Removal
Unit to Cabinet
Bracket
Side Molding
Figure 2-4. Model 427, 427R
Molding Strip & Bracket
Countertop Bracket
Kickplate/ Grille
Screw
Advertisement
Table of Contents

Related Manuals for Sub-Zero 400 Series


Summary of Contents for Sub-Zero 400 Series
- Page 1 Sub-Zero Customer Service Department. Figure 2-2. Model 424 Countertop Bracket Unit Leveling (Model 424) Unlike the other 400 Series units, the model 424 must be leveled before it is installed into the rough-in open- ing. (See WARNING above).
- Page 2 400 Series 400 Series Installation Information Rear Leveler Figure 2-5. Model 427, 427R, 430 Front Leveling Leg Adjusting Screw Adjusting Front Leveling Legs (427 Shown) Rear Leveling Leg a standard screwdriver blade and place it in the foot of Figure 2-6. Model 427, 427R the front leg.
- Page 3 400 Series 400 Series Installation Information Door Adjustment (Model 424) NOTE: The unit must be level before adjusting the door. Cabinet Hinge If the unit is properly installed, blocked and leveled, it may still be necessary to adjust the door(s) from left to right and/or in &...
- Page 4 400 Series 400 Series Installation Information Door Stop Adjustment (Models 427 & 427R) The models 427 and 427R have a 90° door stop cam built into the hinge system. The 90° door stop cam is located in the center portion of the hinge. To adjust it, use a standard straight-blade screwdriver to rotate the cam until you reach the stop point.
- Page 5 400 Series 400 Series Installation Information NOTE: If removing a model 424 from its installation, an Door Frame Door Gasket anti-tip bracket and a countertop bracket may have been used to make a solid installation. (See Figures 2- If the brackets were not used, shims may have been Poly Tape wedged along the sides and top.
- Page 6 400 Series 400 Series Installation Information 427 and 427R using screws passing through the door frame from the rear, into the panel. The handle is attached to the panel. To remove a door panel, open the door and locate the Poly-tape under the gasket which covers the panel mounting screw holes.
- Page 7 400 Series 400 Series Installation Information Door closer is spring loaded and may recoil quickly when detached. Screw NOTE: The screwdriver inserted in the holes of the door closer arm and the bottom cabinet hinge will be used to pry the door closer arm back into position when Door reattaching the door closer to the bottom door hinge.
- Page 8 400 Series 400 Series Installation Information mounting screw holes, and possibly the handle mounting screw holes. Remove the tape, then extract the panel mounting screws, and possibly the handle mounting screws. Now, you should be able to slide the panel towards the handle side, and out from under the door trim.
Need help?
Do you have a question about the 400 Series and is the answer not in the manual?
Questions and answers