Table of Contents
Advertisement
Available languages
Available languages
Quick Links
INSTALLATION AND CARE GUIDE
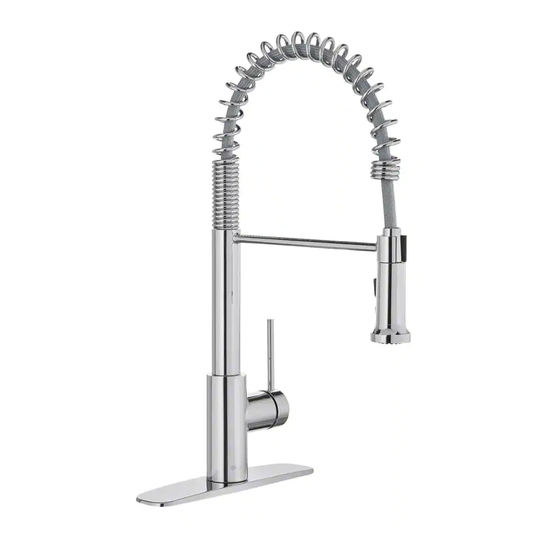
PULL-DOWN KITCHEN FAUCET
Before returning to the store, call Glacier Bay Customer Service
We appreciate the trust and confidence you have placed in Glacier Bay through the purchase of this kitchen
faucet. We strive to continually create quality products designed to enhance your home. Visit us online to see
our full line of products available for your home improvement needs. Thank you for choosing Glacier Bay!
Questions, problems, missing parts?
8 a.m. - 7 p.m., EST, Monday - Friday
9 a.m. - 6 p.m., EST, Saturday
1-855-HD-GLACIER
HOMEDEPOT.COM/GLACIERBAY
THANK YOU
Model#
FP4AF263CP
1001-616-363
FP4AF263SS
1001-616-364
FP4AF263BL
1001-616-365
SKU#
Advertisement
Chapters
Table of Contents

Related Manuals for Glacier bay FP4AF263CP


Summary of Contents for Glacier bay FP4AF263CP
- Page 1 HOMEDEPOT.COM/GLACIERBAY THANK YOU We appreciate the trust and confidence you have placed in Glacier Bay through the purchase of this kitchen faucet. We strive to continually create quality products designed to enhance your home. Visit us online to see our full line of products available for your home improvement needs. Thank you for choosing Glacier Bay!
-
Page 2: Table Of Contents
Glacier Bay products are manufactured with superior quality standards and workmanship and are backed by our limited lifetime warranty. Glacier Bay products are warranted to the original consumer purchaser to be free of defects in materials or workmanship. We will replace FREE OF CHARGE any product or parts that prove defective. -
Page 3: Package Contents
Pre-Installation (continued) PACKAGE CONTENTS NOTE: *Items come pre-assembled. Part Description Quantity Part Description Quantity Faucet assembly Weight Pull-down spray Weight clip Deck plate Outlet hose Putty plate Water supply line FastMount™ Pull-down spray hose Quick connector HOMEDEPOT.COM/GLACIERBAY Please contact 1-855-HD-GLACIER for further assistance. -
Page 4: Installation
Installation Installing the faucet assembly □ WITH DECK PLATE: Place a bead of clear silicone CAUTION: Always turn off the water supply before sealant (not included) around the base of the removing an existing faucet or replacing any part of a faucet. - Page 5 Installation (continued) Securing the faucet assembly Installing the weight □ □ From underneath the sink, secure the faucet Install the weight (G) through the pull-down spray assembly (A) to the sink with the FastMount™ hose (K). (E). □ Insert the weight clip (H) at the weight sticker on □...
- Page 6 Installation (continued) Attaching the quick connector Connecting supply lines □ Remove the cap (L) from the outlet hose (I). CAUTION: Ensure the supply lines do not kink, twist or □ bend into a “V” or “L” shape during installation. Do not use Attach the quick connector (F) to the outlet hose if there are visible signs of damage.
-
Page 7: Operation
Operation Checking for leaks □ Ensure the handle is in the off position. Turn the hot and cold water supplies on and check all connections for leaks. If leaks are discovered, check the connections to ensure they are tight and properly secured. □... -
Page 8: Care And Cleaning
Care and Cleaning □ To clean, wipe down with a damp cloth and towel dry. □ Do not use abrasive cleaners, steel wool, or harsh chemicals when cleaning this faucet, or the warranty will be voided. Troubleshooting NOTE: Refer to the service parts section in this manual for a detailed drawing showing the location of the parts listed below. -
Page 9: Service Parts
Service Parts NOTE: Many replacement cartridges, aerators, and drain assemblies can be purchased at your local The Home Depot store or online at HOMEDEPOT.COM. Product ID tag can be found DO NOT REMOVE DATE CODE: 1-888-328-2383 on the hot supply line. Part Description Part No. - Page 10 Questions, problems, missing parts? Before returning to the store, call Glacier Bay Customer Service 8 a.m. - 7 p.m., EST, Monday - Friday 9 a.m. - 6 p.m., EST, Saturday 1-855-HD-GLACIER HOMEDEPOT.COM/GLACIERBAY Retain this manual for future use.
- Page 11 HOMEDEPOT.COM/GLACIERBAY MERCI Nous apprécions la confiance que vous avez placée dans Glacier Bay par l’achat de ce robinet de cuisine. Nous nous efforçons continuellement de créer des produits de qualité conçus pour améliorer votre maison. Visitez-nous en ligne pour voir notre gamme complète de produits disponibles pour vos besoins de rénovation. Merci d’avoir choisi Glacier Bay!
-
Page 12: Information Importante
GARANTIE À VIE LIMITÉE Les produits Glacier Bay sont fabriqués avec des normes de qualité supérieure et sont soutenus par notre garantie à vie limitée. Les produits Glacier Bay sont garanties à l’acheteur original d’être exempt de vices de matériaux ou de fabrication. -
Page 13: Contenu De L'emballa
Pré-installation (suite) CONTENU DE L’EMBALLAGE NOTA: *Les articles sont préassemblés. Pieza Descripción Cantidad Pieza Descripción Cantidad Corps du robinet Poids Douchette rétractable Bague du poids Plaque décorative Boyau d’évacuation Conduite d’alimentation en eau Plaque de mastic (préassemblé) FastMount Tuyau de douchette rétractable Raccord rapide Capuchon HOMEDEPOT.COM/GLACIERBAY... -
Page 14: Installation
Installation Installation du robinet □ AVEC PLAQUE DÉCORATIVE : Placer une bille de PRÉCAUTION : Couper toujours l’alimentation en eau scellant à la silicone transparent (non inclus) avant d’enlever le robinet existant ou de remplacer des pièces. Ouvrir le robinet pour réduire la pression d’eau et autour de la base de la plaque de mastic (D). - Page 15 Installation (suite) Fixation du corps du robinet Installation du poids □ □ Sous l’évier, fixer le corps du robinet (A) à l’évier Installer le poids (G) sur le tuyau de douchette à l’aide du dispositif FastMount (E). rétractable (K). □ □...
- Page 16 Installation (suite) Installation du connecteur Raccordement des conduites rapide d’alimentation en eau □ Retirez le capuchon du boyau d’évacuation (I). MISE EN GARDE: Assurez les tuyaux d’alimentation □ ne sont pas tordus, déformés ou pliés en V ou en L lors Attachez le connecteur rapide (F) au flexible (I).
-
Page 17: Opération
Opération Recherche de fuites □ S’assurer que la manette est en position fermée. Ouvrez l’alimentation en eau chaud et froid pour vérifier qu’il n’y a pas de fuite aux raccordements. En cas de fuite, vérifiez les raccords pour s’assurer qu’ils sont bien serrés et correctement attachés. -
Page 18: Entretien Et Nettoyage
Entretien et nettoyage □ Pour nettoyer, essuyer avec un chiffon humide, puis sécher avec un linge. □ Ne pas utiliser de nettoyants abrasifs, de laine d’acier ou de produits chimiques puissants pour nettoyer ce robinet, sinon la garantie est annulée. Dépannage REMARQUE: Se reporter à... -
Page 19: Pièces De Rechange
Pièces de rechange REMARQUE: Plusieurs des cartouches de rechange,des et des assemblages de vidange sont en vente magasin Home Depot local ou en ligne à HOMEDEPOT.COM. Les étiquettes d’identité du robinet se trouvent sur la ligne d’alimentation à DO NOT REMOVE DATE CODE: 1-888-328-2383 l’eau chaude. - Page 20 Questions, problèmes, pièces manquantes? Avant de retourner au magasin, appelez le service à la clientèle de Glacier Bay de 8h à 7h, heure normale de l’Est, du lundi au vendredi de 9h à 6h, heure normale de l’Est, samedi 1-855-HD-GLACIER HOMEDEPOT.COM/GLACIERBAY...
Need help?
Do you have a question about the FP4AF263CP and is the answer not in the manual?
Questions and answers