
Related Manuals for MSA GALLET F2XR


Summary of Contents for MSA GALLET F2XR
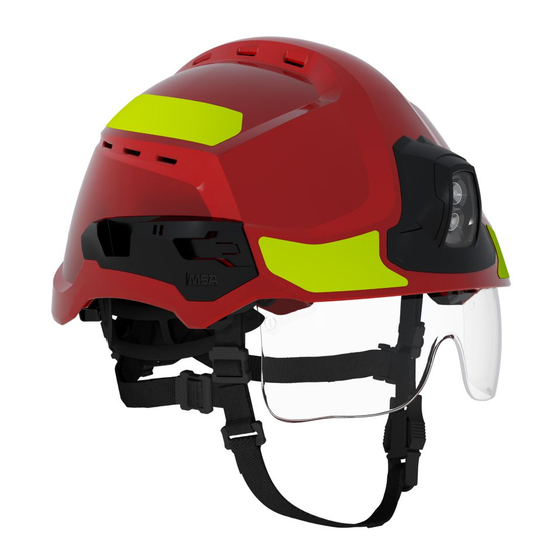
- Page 1 Care and Maintenance Manual GALLET F2XR Multi-Purpose Helmet Order No.: PQ120202/01 MSAsafety.com...
- Page 2 MSA is a registered trademark of MSA Technology, LLC in the US, Europe and other Countries. For all other trademarks visit https://us.msasafety.com/Trademarks. MSA Europe GmbH Schlüsselstrasse 12 8645 Rapperswil-Jona Switzerland For your local MSA contacts, please go to our website www.MSAsafety.com...
-
Page 3: Table Of Contents
Replacement Instructions for Spare Parts Helmet Shell Suspension and Headband Assembly Chinstrap Rear Plate Front Plate Neck Pad Suspension Padding Nape Strap with Ratchet Knob Goggle Mask Elastic Band Adapters (Pair) Replacement Instructions for Accessories Ocular visor (Option) Nape neck curtain (Option) GALLET F2XR... -
Page 4: Introduction
1 Introduction Introduction This document details care and maintenance instructions for the GALLET F2XR helmet. It contains information on the following aspects: • Preventive Care of the helmet (by individual user, including routine inspection, cleaning and storage) • Recommended Service and Maintenance schedule •... -
Page 5: Preventive Care
MSA. • Use only MSA-approved parts. Do not alter, modify or substitute parts without the approval of MSA. Do not deviate from the maintenance and repair procedures contained herein unless approved in writing by MSA. -
Page 6: Cleaning After Use
Clean the helmet after each use as dirt / fumes are easier to remove immediately than after a long storage period (as they can migrate into the upper paint/varnish layer). Detailed cleaning instructions are available in the GALLET F2XR Cleaning, decontamination and disinfection guidelines. It includes: •... - Page 7 • Helmet with ocular visor: Ocular visor must be stored inside the helmet (out of use position). Ocular visors and face shields bought separately from helmet should be kept in their original packaging until they are mounted on the helmet. GALLET F2XR...
-
Page 8: Recommended Service And Maintenance Schedule
Regular inspection and adapted maintenance must be performed to ensure the proper condition of the equipment for its intended use and protection levels. For normal use (regular with non-impacting exposure to fire conditions), MSA recommends that the helmet be inspected at least every 2 years. -
Page 9: Advanced Inspection And Conformity Criteria
• Inspection and Maintenance operation listed in this manual must be performed only by personnel who have been trained and certified by MSA. • Use only genuine MSA replacement parts. Using non MSA parts will not only void warranty on the helmet, but also may reduce the protection level provided by the helmet. -
Page 10: Suspension / Headband Assembly
Buckle is not operating any more (blocked, not closing properly, opening Locking Buckle without pressing). Discarding Straps, chinstrap Damaged strap/cushion (torn, burned, stiff, missing stitches, etc.). criteria cushion Broken clip (preventing secured attachment to the helmet), broken Clips and adjusters GALLET F2XR... -
Page 11: Ocular Visor (Option)
Visible cracks, holes that could impact mechanical structure of Non vision area criteria the visor. Attachment module Mechanism not operating (too loose or blocked), broken clip. Views of possible Impacts and scratches on the damages Visor ocular area GALLET F2XR... -
Page 12: Neck Curtain (Option)
Fabric on the upper part of the neck curtain and > 4 cm on the lower part of the neck curtain Views of Broken clip possible Hole on the fabric damages Suggested replacement Not required unless damaged schedule GALLET F2XR... -
Page 13: Replacement Instructions For Spare Parts
GA3713-NA (Black) GA3713-XX Unvented Shell GA3713-YP (Hi-Viz Yellow PL) GA3713-OP (Hi-Viz Orange PL) GA3713-IM (Blue) GA3713-VA (Green) GA3713-NM (Grey) Unit of Sale Specifications Includes suspension holders (Lateral and rear) GA3718 and accessory interface (pair) GA3717 Weight 520 g GALLET F2XR... - Page 14 STEP 1: Rear plate → 5.4 Rear Plate STEP 2: Front plate → 5.5 Front Plate Installation STEP 3: Chinstrap → 5.3 Chinstrap STEP 4: Suspension & headband → 5.2 Suspension and Headband Assembly STEP 5: Ocular visor (optional device) →6.1 Ocular visor (Option) GALLET F2XR...
-
Page 15: Suspension And Headband Assembly
1. Mount the suspension on the slide (starting with the rear) and move it down up to the clip of the yellow tab. Installation 2. Follow the same instruction for the left and right parts. GALLET F2XR... -
Page 16: Chinstrap
1. On each side: insert the clip in its slot and fully push it inside the slot until it clicks Installation 2. On the rear: Insert first the straps in between the rotative nape strap and the neck pad. Then follow the same instruction than on the sides GALLET F2XR... -
Page 17: Rear Plate
5 Replacement Instructions for Spare Parts Rear Plate Replacement Parts Part No. GA3706 Colour Black with MSA printed logo Unit of Sale Weight 19 g / piece Replacement Instructions Tools required: None 1. Place the helmet upside down. Removal 2. Press both black locking tabs simultaneously with your 2 thumbs as shown, to release the rear plate. -
Page 18: Front Plate
1. Place the helmet upside down. Removal 2. Push both black locking tabs simultaneously with your fingers, as shown, to release the front plate. 1. Slide the front plate with your thumbs until you hear Installation the “click“ sound. GALLET F2XR... -
Page 19: Neck Pad
1. Gently twist the neck pad from the nape strap to release it. Removal 2. Follow the same instruction on the other side. 1. Insert the neck pad on the nape strap notch. Installation 2. Follow the same instruction on the other side. GALLET F2XR... -
Page 20: Suspension Padding
Replacement Instructions Tools required: None 1. Pull the 2 Velcro straps located on the front part of the headband and suspension assembly. Removal 2. Pull the suspension padding towards you to release it from the headband and suspension assembly. GALLET F2XR... - Page 21 Installation 2. Attach the 2 Velcro straps on the front part of the headband and suspension assembly. 3. Attach the padding on each light grey attachment dot. Make sure there is no fold left. GALLET F2XR...
-
Page 22: Nape Strap With Ratchet Knob
Rotative nape strap, ratchet wheel included Weight 29 g / piece Replacement Instructions Tools required: None 1. Rotate the nape strap inside the helmet to Removal approx. 180° so that both plastic tabs are aligned. Then pull gently to release the nape strap. GALLET F2XR... - Page 23 5 Replacement Instructions for Spare Parts 2. Follow the same instruction on the other side. 1. Align and insert both pieces together. Installation 2. Rotate the parts together to attach them. 3. Follow the same instruction on the other side. GALLET F2XR...
-
Page 24: Goggle Mask Elastic Band Adapters (Pair)
Flame retardant elastic bands with plastic clips to attach them to the helmet Specifications Set of 2 pieces (pair) Weight 40 g / pair Replacement Instructions Tools required: None 1. Twist and pull the elastic band adapters Removal 2. Follow the same instruction on the other side GALLET F2XR... - Page 25 1. Hook the elastic band adapter on the black metallic bar. NOTE: The elastic band adapters are marked L for Installation LEFT side and R for RIGHT side. Make sure you install them on the correct side 2. Follow the same instruction on the other side GALLET F2XR...
-
Page 26: Replacement Instructions For Accessories
2C-1.2: UV filter (EN 170) Weight 100 g (+/- 10 g) Replacement Instructions Tools required: None 1. Unclip the side attachment module on the right side, then on the left side. Removal 2. Gently pull the visor out of the helmet. GALLET F2XR... - Page 27 6 Replacement Instructions for Accessories 1. Position the attachment modules into the dedicated slots. Installation 2. Push the ocular visor and secure the side attachment clips on each side. GALLET F2XR...
-
Page 28: Nape Neck Curtain (Option)
Installation 2. Insert the central clip. 3. Insert left and right clips. Some of the images shown in this document are 3D visuals. They are for illustrative purposes only and may differ from the actual product. GALLET F2XR... - Page 29 6 Replacement Instructions for Accessories Notes GALLET F2XR...
- Page 30 For local MSA contacts, please visit us at MSAsafety.com...
Need help?
Do you have a question about the GALLET F2XR and is the answer not in the manual?
Questions and answers