
Subscribe to Our Youtube Channel
Related Manuals for Verizon One Talk CP965


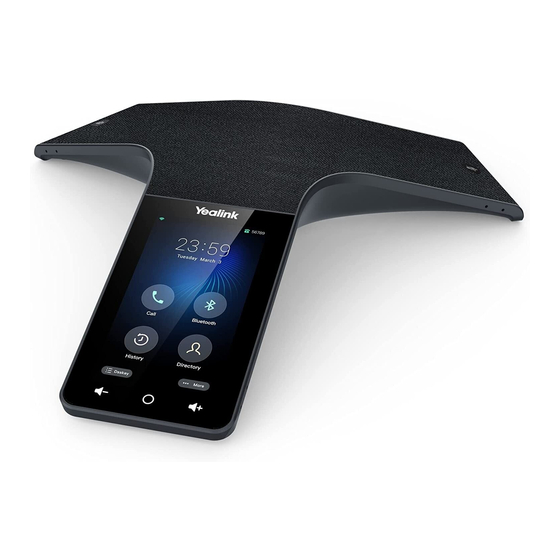
Summary of Contents for Verizon One Talk CP965
- Page 1 One Talk CP965 conference phone user guide verizon.com/support/one-talk/ verizon.com/support/yealink/ CP965...
-
Page 2: Table Of Contents
User guide Table of contents Table of contents ..........................2 Before you begin ..........................5 Getting started ..........................6 Hardware Overview ......................................6 Screen and icons ......................................7 Control center ........................................ 7 Idle Screen ........................................9 The DSSkey screen ......................................10 Calls screen ...................................... - Page 3 User guide Performing a direct transfer ..................................25 Performing a consultative transfer ................................25 Conference calls ......................................26 Conference....................................... 26 Initiating a conference by dialing multiple numbers ..........................26 Initiating a conference by inviting participants ............................27 Merging multiple calls into a conference call ............................27 Holding/resuming a conference call ................................
- Page 4 User guide System applications........................41 Recorder ........................................41 Recording audio ....................................... 42 Playing a recorded call ..................................... 42 Pause/resuming a playback ..................................42 Fast forwarding/rewinding a playback ..............................42 Stopping a playback ....................................43 Copying recorded audio to USB flash drive ............................. 43 Copying all recorded audio to USB flash drive ............................
-
Page 5: Before You Begin
User guide Muting or unmuting the CPW65 ................................57 Viewing CPW65 information ................................... 59 Finding the CPW65 ....................................59 Connecting a mobile phone via Bluetooth ..................59 Activating the Bluetooth mode ................................59 Pairing and connecting the Bluetooth-enabled mobile phone ....................... 60 Syncing the mobile contacts to the phone .............................. -
Page 6: Getting Started
User guide Getting started Before you use your phone, take some time to get familiar with its features and user interface. Hardware Overview Understanding the phone hardware helps you easily use the phone's features. Item Description Mute key • Toggles mute feature •... -
Page 7: Screen And Icons
User guide • Wireless Microphone CPW65 Security slot • Allows you to connect a universal security cable to your phone so you can lock down your phone. The phone will not be removed after locked Mute touch key LED indicators The Mute touch key LED indicators indicate the call and phone status. - Page 8 User guide...
-
Page 9: Idle Screen
User guide Idle Screen The idle screen mainly displays the registered account, time and date and programmable keys. You can access the DSSkey screen and the control center. Name Description Status Bar Displays the label of the current account and icons. Icons Icons are displayed on the left of the status bar. -
Page 10: The Dsskey Screen
User guide The DSSkey screen The DSSkey screen displays phone’s line keys. Application Description Tap to add a line key. Line key list Shows the line key labels. You can customize the line keys. Page keys Tap to turn to the corresponding page. Calls screen All of your active and held calls are displayed on the calls screen. -
Page 11: Icons In The Status Bar
User guide You can tap the Previous/Next to switch between multiple calls. Icons in the status bar By viewing the icons in the status bar, you can easily get the current phone status, such as call and Bluetooth status. Icons Description Icons Description... - Page 12 User guide Icon indicator (associated with line key features): Icons Description Icons Description Hold Voice Mail Forward DPickup Group Pick Up SpeedDial Recall Record Recording in process (Record) Paging List Hot Desking Phone Lock Directory Icon indicator (associated with line) Icons Description Icons...
-
Page 13: Navigating Menus And Fields
User guide Icon indicator (associated with Intercom) Icons Description Icons Description Intercom idle state Intercom ringing state Intercom callout state Intercom talking state Talking Callout Intercom failed state Navigating menus and fields You can use different gestures on the touch screen to perform various operations. Procedure To operate your phone using gestures, follow these tips: Gesture... -
Page 14: English Input Method
User guide When you use the onscreen keyboard, the following things you need to know: If you want to Action Position the cursor. Tap to the position. Select all characters. Long tap the entered character(s) Do one of the following: •... - Page 15 User guide • Long tap point key (.) then slide to choose one of the options to enter an alternate character Space Key • Tap to enter spaces • Long tap to change the input method • Tap to switch to the numeric & symbolic input mode •...
-
Page 16: Using The Dial Pad
User guide Item Description Special characters • Tap to enter special characters • Long tap a key then slide to choose one of the options to enter an alternate character Delete key • Tap to delete the entered characters one by one •... -
Page 17: Call Features
User guide Call features You can use the phone to place and answer calls, ignore incoming calls, transfer a call to someone else, conduct a conference call and perform other basic call features. Placing calls You can use your phone like a regular phone to place calls in many ways. Placing a call from the dialer The Dialer enables you to enter a number to place a call, and it displays a list of previously placed calls or contacts in your directory. -
Page 18: Redialing A Number
User guide Procedure Tap DSSkey Long tap the desired line key Select Speed Dial from the Type field Select the desired line from the Account ID field Do one of the following: • (Optional) Enter the string that will appear on the phone screen in the Label field. Enter the contact number you want to dial out directly in the Value field •... -
Page 19: Answering Calls
User guide Procedure If the contact was added to a specified contact group, you can tap Local Directory to select the desired contact group If the selected contact has multiple numbers, tap the desired number to dial out Answering calls When you receive a call, you can choose to answer it manually or automatically. -
Page 20: Disabling Call Waiting
User guide Disabling call waiting If the call waiting feature is disabled, when there is already a call, the new incoming call will be rejected automatically. Before you begin Check with your system administrator if the call waiting off code is required. If required, get it from your system administrator. Procedure Ask your Admin to Enable or Disable the Call Waiting for your line. -
Page 21: Rejecting Anonymous Calls
User guide Rejecting anonymous calls You can reject incoming calls from the callers who have hidden their identities. As a result, your phone will not ring and you will not be notified of an attempted call. Before you begin Check with your system administrator if the anonymous call rejection on code or off code is required. If required, get it from your system administrator. - Page 22 User guide...
-
Page 23: Call Muting And Unmuting
User guide Call muting and unmuting You can mute the microphone during an active call so that the other party cannot hear you. Procedure During a call, tap the Mute touch key or select Mute Tap the Mute touch key or select Mute again to unmute the microphone Swipe down on the Idle display Tap on MIC Turn ON/Off the Standalone mode to Enable/Disable microphone Mute... -
Page 24: Resuming A Held Call
User guide Note: When you have multiple calls on the phone and the current call is held, you can select Previous/Next to swap to the active call. Resuming a held call You can view and resume a held call on the phone. Procedure Select Resume If multiple calls are placed on hold, select the desired call first... -
Page 25: Deactivating Call Forward
User guide Do one of the following: • Enter the contact number you want to forward incoming calls to in the Forward to field • Select and select the desired contact If you select the No Answer Forward option, select the desired ring time to wait before forwarding from the After Ring Time field (Optional) Enter the always/busy/no answer forward on code or off code respectively in the On Code or Off Code field The call forward icon appears in the status bar. -
Page 26: Conference Calls
User guide Procedure Select > Transfer during a call Do one of the following: • Enter the number you want to transfer the call to. Select Transfer > Send to dial out • Select ( ), and select the desired entry to dial out Do the following: •... -
Page 27: Initiating A Conference By Inviting Participants
User guide Select to call all intended parties at the same time The conference is set up after the intended parties answer the call Note: The value under the icon indicates the number of parties you have added and the maximum number of the parties you can add. For example, indicates you can add up to 4 parties and you have added 1 party. -
Page 28: Enabling/Disabling The Dnd Mode For A Conference Call
User guide Select Mute again to unmute the conference Enabling/disabling the DND mode for a conference call You can enable the DND mode for a conference call, as a result, the conference call will not be disturbed by the incoming calls. Procedure Select DND to enable the DND mode... -
Page 29: Checking Storage Space
User guide Procedure Do one of the following: • Select Stop The recording icon and recording duration disappears. The screen prompts a message that the call is recorded successfully • Select The recording icon and recording duration disappears, and the phone returns to the idle screen. The screen prompts a message that the call is recorded successfully Checking storage space You can check the total space or available space of the phone or connected USB flash drive. -
Page 30: Picking Up A Group Call Directly
User guide Before you begin The target phone receives an incoming call. Your system administrator has enabled the directed call pickup and set the directed call pickup code. Procedure Select The DPickup (Pick Up) appears on the phone screen Select DPickup (Pick Up) on your phone Enter the phone number which is receiving an incoming call Select DPickup (Pick Up) again The call is answered on your phone... -
Page 31: Intercom
User guide Procedure During a call, select > DSSkey Select the call park key If you want to retrieve the parked call, dial the call park retrieve code If the parked call is not retrieved within a period of time assigned by the system, the phone performing call park will receive a call back. Intercom Intercom is a useful feature in an office environment to quickly connect with the operator or the secretary. -
Page 32: Answering An Intercom Call
User guide Procedure Tap DSSkey Drag the Intercom key to the Edit field Enter the directed call pickup code in the Extension field Select When the target extension receives an incoming call, the Intercom key icon of the target extension will change to . -
Page 33: Leaving Voice Mails
User guide Procedure Go to More > Message > Set Voice Mail Code Enter the voice mail code (for example, *4) in the desired account field Select Leaving voice mails You can leave a voice mail to someone who is busy or inconvenient to answer the call. Procedure Follow the voice prompts to leave a voice mail Hang up to complete the voice mail... -
Page 34: Managing The Local Directory Contacts
User guide Editing contact groups You can change or add the group's information. Procedure Go to Local Directory Tap the Local Directory drop-down Add a new group Edit the group name Select OK Deleting contact groups When you delete a contact group, the contacts in the group will not be deleted. You can view the contacts in All Contacts (Local Directory) list. Procedure Go to Local Directory... -
Page 35: Moving A Local Directory Contact To Blacklist
User guide Editing contacts You can update your contacts' information. Procedure Select If you want to view a contact to the specified contact group, select Local Directory to select the desired contact group Tap the desired contact and select Edit the contact information Select Deleting a contact You can delete any contact from the Local Directory. -
Page 36: Searching For Contacts
User guide Procedure Select If you want to select a contact to the specified contact group, select Local Directory to select the desired contact group Tap the desired contact Select Blacklist The phone prompts you to move this contact to the Blacklist or not Select OK Searching for contacts In the Local Directory, you can enter search criteria to find your desired contact quickly. -
Page 37: Viewing Blacklist Contacts
User guide Enter the Blacklist contact’s information Select Done Viewing Blacklist contacts You can view the Blacklist contacts from the Blacklist on your phone. Procedure Go to > Local Directory > Blacklist Editing a Blacklist contact You can update your Blacklist contacts' information. Procedure Go to >... -
Page 38: Moving A Blacklist Contact To The Local Directory
User guide Moving a Blacklist contact to the local directory You can move a Blacklist contact to a Local Directory. Incoming calls from this contact will not be rejected automatically. Procedure Go to. Local Directory > Blacklist Tap the desired Blacklist contact and select Select Local Directory from the Group field Select Remote phone book... - Page 39 User guide...
-
Page 40: Call History
User guide Saving a remote phone book contact to the Blacklist You can save any remote phone book contact to the Blacklist on the phone, to prevent this contact from calling you. Procedure Select > Local Directory > Remote Phone Book Select the desired remote phone book Tap the desired contact and select at the right corner of the screen... -
Page 41: Deleting History Records
User guide Procedure Tap All Calls to select the desired list Select > Blacklist Edit the contact information Select Done Deleting history records You can delete one or all call records from the call history list. Deleting a call record You can delete any call record from the call history list. -
Page 42: Recording Audio
User guide Recording audio By default, the recorded audio is saved in the internal SD card. You can connect a USB flash drive to your phone, and save the recorded audio to it. Note: For more information on how to attach a USB flash drive, please refer to the Quick Start Guide for your phone. Procedure Go to More >... -
Page 43: Stopping A Playback
User guide Procedure Drag the slider to skip forward the playing or rewind the playing If you have set marks for the recorded audio, you can drag the slider to the position with a red flag to listen to the marked moments Stopping a playback While a recording plays, you can stop playing it at any time. -
Page 44: Uploading A Recording To The Server
User guide Procedure Go to More > Recorder If you want to rename the recorded audio saved in USB flash drive, tap USB after the desired recording Tap Rename Enter the desired file name Tap OK Uploading a recording to the server You can upload the local recording file to the server designated by the administrator. - Page 45 User guide...
-
Page 46: Checking Storage Space
User guide Checking storage space You can check the total space or available space of the phone or connected USB flash drive. Procedure Select More > Recorder to launch the Recorder application If you want to check the storage space of the USB flash drive, select USB Customizing your phone You can make your phone more personalized by customizing various settings. -
Page 47: Screen Saver
User guide Procedure Go to More > Basic > Display > Wallpaper Select the desired image Select Set wallpaper Screen saver The screen saver starts automatically when your phone has been idle for the preset waiting time. You can stop the screen saver by touching the screen or tapping any key. -
Page 48: Changing The Language
User guide – 30min, 1h, 2h, 4h, 6h, 8h or 12h: Backlight is changed when the phone is inactive after the designated time Procedure Swipe down from the top of the screen Do one of the following: Drag the backlight slider When dragging the slider, the control center (except the backlight slider) and notification center will be hidden. -
Page 49: Time & Date
User guide Procedure Go to More > Settings > Basic > Language & Input > Current Input Select the desired input method You can also long tap the space key on the onscreen keyboard to change the input method Time & date You can set the time and date manually. -
Page 50: Setting A Phone Lock Key
User guide Select Select Enabled from the Lock Enable field Enter the desired interval (0– 3600 seconds) in the Auto Lock field Select Note: Ask your system administrator for the password if you cannot access Advanced/Advanced Settings menu. Setting a phone lock key You have to set a phone lock key manually to lock your phone. -
Page 51: Line Keys
User guide Enter your old and new unlock PIN respectively. The unlock PIN length must be within 15 digits Select Line keys Line keys allow you to quickly access features such as recall and speed dial. The line key can indicate the monitored status when the line keys are assigned with particular features, such as BLF. - Page 52 User guide...
-
Page 53: Audio Settings
User guide Procedure Drag the desired line key to the Delete field The phone prompts you to delete the DSS key or not Select OK Audio settings You can change the basic audio settings on your phone. Adjusting the volume You can adjust the volume of the ringer, media, and audio during a call. -
Page 54: Disabling The Key Tone
User guide Procedure Select > Local Directory Select after the desired group, and then select Ring Select the desired ring tone If Auto is selected, this group uses the ring tone according to the default priority If a specific ring tone is selected, this group uses the ring tone according to the priority: Contact ring tone > Group ring tone Select OK Setting a ring tone for a contact... -
Page 55: Enabling Silent Mode
User guide Procedure Go to More > Settings > Basic > Sound Tap the desired notification sound from the Notification Sound field Select OK Select Enabling silent mode If you turn on the silent mode, your phone won't produce a ring tone/key tone/touch sound/notification sound from phone's speaker. Procedure Do one of the following: Go to More >... -
Page 56: Charging The Cpw65
User guide Solid red The CPW65 is being charged. Fast flashing red 3 times and then off The battery capacity is too low to turn on the CPW65. Slowly flashing red The battery capacity is less than 10%. If you tap the mute button, the battery LED indicator on the CPW65 is still off, it means the CPW65 is turned off. -
Page 57: Registering The Cpw65 With Another Phone
User guide phone screen prompts the CPW65 information: battery, work time and standby time Registering the CPW65 with another phone When you no longer want to register with the current phone, you can register the CPW65 with another phone. CPW65 can only be registered with one phone at a time, if you register the CP65 to another phone, the CPW65 will deregister from the previous phone automatically. - Page 58 User guide...
-
Page 59: Viewing Cpw65 Information
User guide Procedure to mute the call The mute LED indicator glows red. And the icon appears in the status bar of the phone again to unmute the call The mute LED indicator glows green. And the icon disappears from the status bar of the phone Viewing CPW65 information When the CPW65 is registered with the phones, you can view CPW65 status on the phone. -
Page 60: Pairing And Connecting The Bluetooth-Enabled Mobile Phone
User guide Pairing and connecting the Bluetooth-enabled mobile phone After pairing and connecting the Bluetooth-enabled mobile phone, you can use the sync feature. You can pair with countless mobile phones with your IP phones but only one mobile phone can be connected at a time. Before you begin Make sure that the Bluetooth-enabled mobile phone is discoverable. -
Page 61: Configuring The Phone Audio Feature
User guide You can handle a mobile phone call on your phone, the phone acts as a hands-free device for your mobile phone. The call information appears on both your phone and mobile phone screen. You can control the call’s audio to go through the mobile phone or phone on your mobile phone. -
Page 62: Disabling Bluetooth Device Discovery
User guide Procedure Go to More > Settings > Basic > Bluetooth Select after the connected mobile phone name Enter the desired device name in the Rename field Select The configured mobile phone name will display in the Paired devices list on your phone. The mobile phone name displayed in the scanning list of other devices will not be changed Disabling Bluetooth device discovery After the Bluetooth is activated, the phone is automatically placed in Open Discover mode to make it visible to other Bluetooth devices. -
Page 63: Disconnecting The Bluetooth-Enabled Mobile Phone
User guide Disconnecting the Bluetooth-enabled mobile phone You can disconnect your Bluetooth-enabled mobile Phone from your phone and still keep it paired. When you disconnect a Bluetooth device, it remains paired so that you can reconnect it to your phone. Procedure Do one of the following: •... -
Page 64: Viewing The Wireless Network Information
User guide Connecting to an available wireless network manually When you enable the Wi-Fi mode, the phone is automatically connected to the saved wireless network, you can also connect it manually. Before you begin Get the password of the wireless network from your system administrator. Make sure that the Wi-Fi mode is activated. Procedure Go to More >... -
Page 65: Deactivating The Wi-Fi Mode
User guide Go to More > Settings > Basic > Wi-Fi Tap the connected SSID (the top one) Select Forget Tip: You can also disconnect the wireless network when deactivating the Wi-Fi mode. Deactivating the Wi-Fi mode You should deactivate the Wi-Fi mode when you need to connect your phone to the wired network. Procedure Do one of the following: •... -
Page 66: Rebooting Your Phone
User guide Rebooting your phone The improper operation may cause malfunction. If the malfunction occurs, your system administrator may ask you to reboot your phone. Procedure Go to More > Settings > Basic > Reboot > Reboot The phone prompts you to reboot the phone or not Select OK Resetting to factory settings When some issues occur on your phone and you have tried all troubleshooting suggestions but still do not solve the problem, you can reset... -
Page 67: Weee Warning
Neither Verizon Wireless nor any of its affiliates shall be liable for any service outage and/or inability to access emergency service personnel, nor shall Verizon Wireless or any of its affiliates be responsible for the acts or omissions of emergency response center personnel. -
Page 68: Ce Mark Warning
User guide Hereby, Yealink Network Technology CO., LTD., declares that this phone is in conformity with the essential requirements and other relevant provisions of the Conformité Européene (CE) and the Federal Communications Commission (FCC). You can find the CE and FCC information from the label on the back of the IP phone. -
Page 69: Danger-Electric Shock And Fire
Danger–electric shock and fire Electric current from power, telephone and communication cables is hazardous and could result in electric shock and/or fire. Learn more For more information, visit www.onetalk.com. Network details & coverage maps at vzw.com. © 2022 Verizon. VZUG3570722...
Need help?
Do you have a question about the One Talk CP965 and is the answer not in the manual?
Questions and answers