Table of Contents
Advertisement
Available languages
Available languages
Quick Links
Advertisement
Table of Contents

Related Manuals for universalblue UVP1200-20


Summary of Contents for universalblue UVP1200-20
- Page 1 MANUAL DE INSTRUCCIONES INSTRUCTION MANUAL UVP1200-20 / UVP1201-20 Ventilador de pie con display negro/blanco Display stand fan black/white www.universalblue.es P.I. Media Legua C/Decenio,1 30565 Las Torres de Cotillas (Murcia)
-
Page 2: Table Of Contents
Ventilador de pie display negro/blanco Display stand fan black/white ÍNDICE ESPAÑOL 1. INSTRUCCIONES DE SEGURIDAD ..........3 2. PARTES DEL PRODUCTO Y CARACTERISTICAS ......6 3. MONTAJE ..................7 4. FUNCIONAMIENTO ............... 9 5. CONTROL REMOTO ..............14 6. LIMPIEZA Y MANTENIMIENTO ..........14 7. -
Page 3: Español
ESPAÑOL Felicidades por haber adquirido este producto. recomendamos dedique algún tiempo leer cuidadosamente este Manual de Instrucciones / Instalación con el fin de hacer un buen uso del mismo. Lea cuidadosamente todas las instrucciones de seguridad antes de utilizar el aparato y conserve este Manual de Instrucciones / Instalación para poder consultarlo en el futuro. - Page 4 clasificación que se indica en la placa de identificación del producto. No deje el ventilador en funcionamiento sin vigilancia. No utilice el producto si se cae, se daña o muestra signos de mal funcionamiento del producto. No utilice el producto con un enchufe o cable dañado. Acuda al lugar de compra para inspección, reembolso o reemplazo.
- Page 5 Antes de montar o desmontar las piezas y antes de limpiarlo, desconecte y desenchufe el aparato. Monte completamente el ventilador antes de encenderlo. Evite el contacto con piezas móviles. No introduzca dedos u objetos a través de la rejilla cuando el ventilador esté...
-
Page 6: Partes Del Producto Y Caracteristicas
Los niños no deben jugar con este aparato. La limpieza y el mantenimiento no deben ser realizados por niños si no están bajo supervision. 2. PARTES DEL PRODUCTO Y CARACTERISTICAS Cubierta decorativa de la rejilla Rejilla delantera Tornillos de sujeción Tuerca de sujeción del aspa Aspas... -
Page 7: Montaje
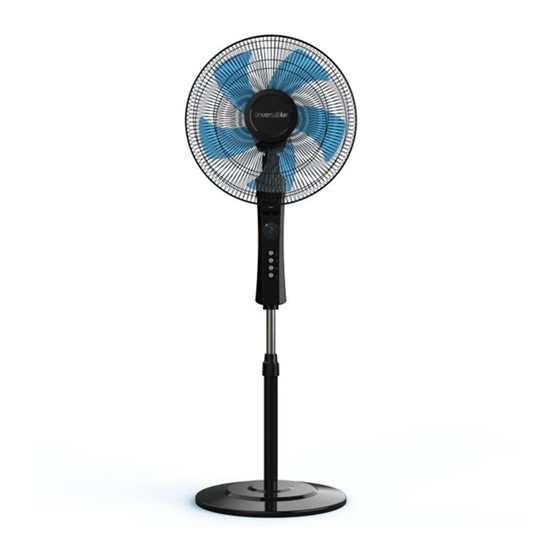
UVP1200-20 Ventilador de pie con display Potencia máxima 50 W Temporizador 7.5 horas 3 modos 3 velocidades Dimensiones del producto (AxAxF): 130 x 43 x 43 cm Aspas: 5 aspas Con control remoto Color: negro UVP1201-20 Ventilador de pie con display Potencia máxima 50 W... - Page 8 Coloque la pesa de la base junto con la cubierta y las tuerca de fijación de la base. Atornille las piezas haciendo uso de los tornillos de fijación provistos con este aparato. Coloque el tubo de extension sobre la base y apriete la tuerca de bloqueo de ajuste de altura.
-
Page 9: Funcionamiento
4. FUNCIONAMIENTO NOTA: Antes de insertar el enchufe en una toma de corriente, asegúrese de que el voltaje se corresponde con lo indicado en la etiqueta del producto, y que el enchufe tiene una conexión a tierra. A la hora de utilizar su aparato y sacarle el mayor partido posible, le recomendamos que dedique unos minutos a familiarizarse con la correcta forma de uso y funciones del ventilador. - Page 10 Coloque el ventilador en una superficie plana y estable y conéctelo a la toma de corriente. Pulse ‘ENCENDIDO / VELOCIDAD’ en el cuerpo del ventilador o en el control remoto para encender el ventilador. Pulse ‘APAGADO’ en el cuerpo del ventilador o bien en el control remoto para apagar el aparato.
- Page 11 Como observará en la pantalla LCD, se irán encendiendo diferentes luces (pilotos) según vaya seleccionando el modo, la oscilación y el tiempo. Para conocer cual es el tiempo que ha programado, le rogamos que se fije en la pantalla LCD, verá que al pulsar 1 vez el botón de‘TEMPORIZADOR’, se activará...
- Page 12 Número de veces Tiempo programado Pilotos pulsadas encendidos 30min 1h y 30min 2h y 30min 3h y 30min...
- Page 13 4h y 30min 5h y 30min 6h y 30min...
-
Page 14: Control Remoto
7h y 30min Cuando no esté siendo utilizado, rogamos desenchufe el ventilador de la corriente. 5. CONTROL REMOTO Este aparato incluye control remoto, para un uso más cómodo y eficaz. Para usar el control remoto del aparato, retire la película protectora de la batería y apunte hacia el ventilador. -
Page 15: Servicio Postventa
Para hacer uso de la garantía acuda al centro donde compró este producto o bien contacte con nosotros de cualquiera de las siguientes formas: A través del email sat@universalblue.es, adjuntando la factura de compra e indicando sus datos de contacto y brevemente qué problema presenta su termo eléctrico. -
Page 16: Informacion Inherente Al Medioambiente
8. INFORMACION INHERENTE AL MEDIOAMBIENTE Este aparato se ha marcado de acuerdo con la Directiva Europea 2012/19/EU referente eliminación de los Desperdicios de Aparatos Eléctricos y Electrónicos (RAEE). El símbolo del que consta en el aparato indica que el producto al final de su vida útil no se debe tratar como basura doméstica normal, sino que se debe llevar a los centros de recogida diferenciada de desperdicios eléctricos y electrónicos o bien entregar al vendedor... - Page 17 Puedes descargar este manual en nuestra página web: www.universalblue.es...
-
Page 18: English
ENGLISH Congratulations on the purchase of your product. We recommend you to spend some time to read this Instruction Manual in order to fully understand how to use it correctly.. Read all the safety instructions carefully before use and keep this Instruction / Installation Manual for future reference. - Page 19 If it does not work properly, contact a qualified electrician to review and fix your appliance. Please do not try to fix it by yourself. Do not immerse or expose the product or cable to rain, moisture or any other liquid. ...
-
Page 20: Product Parts & Main Features
The use of accessories not recommended or sold by the product's distributor may cause personal or material risks or injuries. Make sure that the fan is on a stable surface when operating to prevent overturning. Do not immerse in water. ... - Page 21 Extension tube Extension tube fixing screws Base Base feet Base fixing nuts Remote control UVP1200-20 Display stand fan Maximum power 50 W Timer 7.5 hours 3 modes 3 speeds Product dimensions (HxDxW): 130 x 43 x 43 cm Blades: 5 blades...
-
Page 22: Assembly
Timer 7.5 hours 3 modes 3 speeds Product dimensions (HxDxW): 130 x 43 x 43 cm Blades: 5 blades With remote control Colour: White 3. ASSEMBLY Before use, remove all packaging and inspect the appliance for any damage. If there appears to be any damage, please take the unit back to place of purchase for a replacement. -
Page 23: Using Your Appliance
Attach the front grill to the rear grill, fastening it with the clamping ring by using a screwdriver and tighten to screw to secure it. 4. USING YOUR APPLIANCE NOTE: Before inserting the plug into a power outlet, make sure that the voltage corresponds to that indicated on the product label, and that the plug has a ground connection. - Page 24 Remote control Place the fan on a flat, stable surface and connect it to the power outlet. Press 'ON / SPEED' on fan’s body or on the remote control to turn on the fan. Press ‘OFF’ on fan’s body or on the remote control to turn off the fan.
- Page 25 Mode setting, by pressing the 'MODE' button on the supplied remote control: o NORMAL mode: the fan will work normally. o NATURAL mode: The fan will automatically change speed, going from mild wind gusts to air gusts with greater speed. SLEEP mode: The fan is simulating a softer wind mode by cycling one speed higher.
- Page 26 programmed for 1 hour and a half. This process can be repeated until 7 hours and 30 minutes are programmed, adding the amount indicated by the light pilots. How many times Programmed time Pilots lights on pressed? 30min 1h & 30min 2h &...
- Page 27 3h & 30min 4h & 30min 5h & 30min 6h & 30min...
-
Page 28: Remote Control
7h & 30min When the fan is not being used, please unplug the fan. 5. REMOTE CONTROL For an easy and more efficient use, this appliance includes a remote control . In order to use the remote control, please remove the film covering the bateries and point the remote control to the fan. -
Page 29: After Sale Service
To make use of the guarantee go to the store where you purchased this product or contact us by: By email, sat@universalblue.com. Please, attach the invoice, add your contact details and explain briefly what the issue is. -
Page 30: Environmental Information
By phone, calling us to (0034) 968 893691. In the following address: UNIVERSAL FOR ENGINEERING INDUSTRIES SPAIN, SL C/ Decenio N1, Polígono Industrial Media Legua. 30565. Las Torres de Cotillas (Murcia) 8. ENVIRONMENTAL INFORMATION This appliance is labelled in compliance with European directive 2002/96/EC for Waste Electrical and Electronic Equipment (WEEE). - Page 31 Please go to the nearest recycling bin in your location or common store. Please comply with your legal obligations and contribute protecting our environment. Download this manual in our web site: www.universalblue.es...
- Page 32 www.universalblue.es...
Need help?
Do you have a question about the UVP1200-20 and is the answer not in the manual?
Questions and answers