Table of Contents
Advertisement
Quick Links
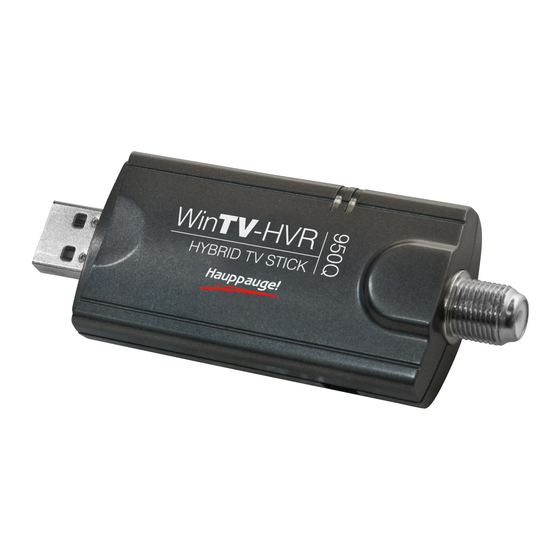
WinTV-HVR-950
Quick Installation Guide for Windows XP
and Windows Vista (all versions)
© Hauppauge Computer Works, Inc. 2006-2007 · QI-WINTV-HVR-950-V1.3A-ENG · 4/27/2007
Hauppauge Computer Works, Inc.
Telephone:
91 Cabot Court
Fax:
Hauppauge, NY 11788
Tech Support: 631-434-3197
techsupport@hauppauge.com
1. Contents of the WinTV-HVR-950
package
WinTV-HVR-950 Hybrid
●
NTSC/ATSC stick
USB extension cable
●
Portable TV antenna
●
WinTV-HVR-950
●
Installation CD-ROM
including the WinTV application with SoftPVR™and the
WinTV-Scheduler
2. What is ATSC digital TV, and how does
the WinTV-HVR-950 work?
ATSC digital TV is a over-the-air digital TV for North
America. ATSC digital TV typically requires an antenna for
reception, and is currently broadcast in 200 cities, with over
1500 TV stations. Note: ATSC digital TV is NOT digital
cable TV or digital satellite TV. The WinTV-HVR-950 cannot
receive digital cable TV or digital satellite TV.
ATSC digital TV is transmitted in several resolutions, from
"standard definition" which is similar to cable TV, up to high
definition which has about 16 times the resolution of normal
cable TV. In any resolution, ATSC digital TV gives sharper
pictures than analog cable TV and near CD quality sound.
WinTV-HVR-950 has a built-in analog cable TV and digital
ATSC TV tuner. It uses your PC or laptop's CPU for displaying
both analog and digital TV programs on your PC screen.
The decoding of high definition ATSC is very processor
intensive, and the smoothness of high definition TV pro-
grams depends upon how fast your PC or laptop system is.
Other PC activities that consume CPU resources might
affect the display of ATSC digital TV. Slow video, jerky video
and momentary pausing of video are all results of a CPU
which is temporarily being used by other activities.
Page 1
6. Running WinTV
®
2000 for the first time
To start the WinTV 2000 application, double click on the
WinTV 2000 icon on your desk top. When you run
WinTV2000 for the first time, a message says Would you
like to scan for channels now? Click YES .
Click the Scan button and WinTV2000 will automatically
scan for both analog and ATSC digital TV channels. The
scanning process takes about 10 minutes. The scanning
process for ATSC will scan from channels 2 to 68.
The ATSC digital channels that are found will appear in the
channel listing box. The Name is the name as defined by
the broadcaster. The Channel number is created by the
WinTV application. For ATSC digital channels, since each
primary channel might have several subchannels, the chan-
nel number is calculated so that channel 22.2 would be list-
ed as 1222. Channel 7.2 would be listed as 1072.
Note: if you have attached an antenna and do not receive
any ATSC digital TV channels, either use a stronger anten-
na (a roof top antenna is recommended for best reception)
or reposition your portable antenna. Then rescan for ATSC
channels (see below for instructions on rescanning and the
Troubleshooting section for information on choosing an
ATSC antenna).
Note: When initially installed, WinTV-HVR-950 uses a set-
ting which does not take advantage of graphics accelera-
tion. If you experience problems when watching ATSC digi-
tal TV channels, see the Troubleshooting section.
Rescanning TV channels
If you want to rescan for TV channels, click Menu / Suite
Manager. To scan analog cable TV channels, under
Sources, highlight Analog source and click Auto scan .
To scan for digital ATSC channels, under Input
Sources, highlight ATSC source and click Auto scan .
During the scan for ATSC digital TV channels, the Signal
Status will show a quality level and the locked box will be
checked if a channel is detected.
ATSC
source
Page 4
The supplied portable antenna is designed primarily for
ATSC digital TV reception, and will work within 10 miles of
an ATSC transmitter (reception might be limited by obstruc-
tions such as steel buildings).
For the best ATSC digital TV reception, a roof top
'Wideband or Highgain' antenna is recommended. In the
U.S., a good ATSC digital antenna selector can be found at
TitanTV.com under Resources.
3. Installing the WinTV-HVR-950 device
631-434-1600
631-434-3198
Turn on your Windows XP PC or laptop, and boot into
Windows.
Locate a free USB 2.0 port (normally located at the side or
back on the laptop or desktop). Plug the WinTV-HVR-950
stick into the USB 2.0 port. You can use a USB extender
cable to locate the WinTV-HVR-950 a short distance from
your USB slot.
Note: if you plug the device into a different USB socket,
you will need to reinstall the WinTV-HVR-950 driver, but you
will not need to reload any WinTV applications.
Note: Due to power and bandwidth requirements, we do
not recommend connecting WinTV-HVR into a USB Hub.
Plug an antenna for ATSC digital TV reception, or either
cable TV or a TV antenna for analog TV reception, into the
TV connector on WinTV-HVR-950. It is recommended to
connect to a roof top aerial during the first time installation.
This will provide better signal quality then the provided
portable antenna.
4. Installing the WinTV-HVR-950 driver
N
ote: the latest WinTV-HVR-950 software can be found at
www.hauppauge.com/pages/support/support_hvr950.html
N
ote: You may need to disable your antivirus programs during the
installation only.
Installing the WinTV-HVR-950 Windows XP driver
Turn on your PC. When it is completely booted, the Found
New Hardware Wizard will appear. Insert the Hauppauge
Installation CD-ROM into
your CD-ROM drive.
Select No, not at this
time.
Click Next .
Select Install software
automatically.
Click Next .
Other changes to channel listings
If you want to add names or fine tune an analog channel,
click Menu / Suite Manager / Sources . Choose Analog
Source . You will see a list of your analog channels. Click
on the desired channel . Click the Tune button to change
channel. You can change the Name to the name of the sta-
tion. To fine tune an analog channel, unclick AFT and then
use the Finetune slide bar . When finished, click Close .
Analog
Source
WinTV
®
2000
Full screen TV
Volume adjust
Always on Top
PREF
Configuration
Setup Menu
CFG
Configure Snapshot
Snapshot view:
Double click on
each "thumbnail"
to see image full
size.Click and hold
your right mouse
button to see
image options.
Changing channels
You can change channels by clicking the Channel Up or
Channel Down buttons on the WinTV2000. You can also
type a channel number (for example: 27 or 1021) and
WinTV2000 will tune to that channel. If the entered channel
does not exist, you will see a black window. You can also
right click in the Current TV channel box, where you will
see a list of channels.
Changing the TV window size
You can change the size of the WinTV window by grabbing
any corner and dragging the video window to the desired
size.
Displaying TV full screen
When you click the Full screen TV button, TV will appear
Page 2
Tune
button
Full screen TV
Channel up
Remove toolbars "no title"
Channel down
Minimise
Channel Surf
Last channel recall
Click your right mouse button in the
TV window to remove toolbars.
Click again to restore toolbars.
Freeze picture
Current TV channel
Click your right mouse
One Touch Pause
button here to see
Snapshot
(no function)
channel selector
Still capture
One Touch Record
TV-Mode
Pause TV
(No function)
Page 5
Once the driver component is installed, click the Finish but-
ton.
Installing the WinTV-HVR-950 Windows Vista driver
After installing the WinTV-HVR-950 in your PC, boot
Windows Vista. The Found New Hardware window will
appear.
Insert the WinTV-HVR Installation CD-ROM in your PC's
CD-ROM drive.
Click Locate and
install driver soft-
ware (recom-
mended) .
Then click Don't
search on-line .
Click Next .
When the driver is
installed, click
Close .
5. WinTV Software Installation
In Windows XP: Click Start / Run then type your CD-
ROM drive letter (for example: D:\) and then Setup.exe
In Vista: Click the Start button, then click Computer,
(you can find Computer halfway down the right hand col-
umn) then locate your CD-ROM drive. You should see the
contents of the WinTV Installation CD. Double click on
Setup.
Choose a language, and click Next . Click Install . The
Setup program will automatically install all necessary WinTV
software.
Once the installation procedure is finished you will see the
WinTV2000 Icon on your
Desktop. It is also listed in
the Start menu under the
Program files and
Hauppauge WinTV folder.
The main applications
installed are the WinTV2000
application for TV watching
and recording, and the
WinTV Scheduler for schedul-
ing your TV recordings.
full screen on your PC monitor. When finished watching TV
full screen, right click your mouse button .
If you see video with a black box around it, click the Pref
button then click TV mode tab. Check the box which says
"Allow resolution change".
"Always-on-Top" mode
With Always on Top, WinTV will always be visible on your
Windows desktop on top of any applications. To turn on,
click the Always on top button . It will turn green. To turn
off, click this button again. A convenient way to use Always-
on-Top is to make the TV window in the no-title mode small,
and to make the TV window in the title mode larger. Then
you can switch very quickly from a small window to a larger
one by clicking the right mouse button.
To hide the WinTV toolbar (No-title mode)
Click your right mouse button in the WinTV's video window
for the no-title mode. To restore the toolbars (the title
mode), once again click your right mouse button in the
video window. You can set the size of the window differently
in each mode.
Pref button: Click the Pref button to open the Preferences
menu:
Close
WinTV
View : These are the settings for the On Screen
Display of the TV channel and Audio Volume plus con-
trols for the Toolbar mode (Title mode), NoToolbar
mode (No Title) and Full Screen (TV mode).
Movies : Here is where you configure the video and
audio setting for SoftPVR
record directory (DVCR Record File Path), the MPEG
Quality settings, and the Audio settings.
Snapshot : Set the size of your captured image, and
settings for capturing motion or still images. Note:
VMR must be the graphics setting to enable snapshot.
Audio : Your audio settings are configured here.
Color : Adjust the color of your TV picture here.
Menu button: Click the Menu button to open the TV setup
menu. Here is the main control bar for TV channels, and
duplicate controls for other functions:
Suite Manager : Configure the TV tuner (scanning,
naming, channel preset,etc) setting up 'favorite chan-
nel lists')
Configuration : Duplicate configuration menus for
colour, audio, MPEG settings, etc.
View : For setting an exact TV window size: 320x240,
640x480 etc.
Page 3
TM
. You can set the movie
Page 6
Advertisement
Table of Contents

Related Manuals for Hauppauge WinTV-HVR-950Q


Summary of Contents for Hauppauge WinTV-HVR-950Q
- Page 1 WinTV-HVR-950 Quick Installation Guide for Windows XP and Windows Vista (all versions) © Hauppauge Computer Works, Inc. 2006-2007 · QI-WINTV-HVR-950-V1.3A-ENG · 4/27/2007 Hauppauge Computer Works, Inc. Telephone: 631-434-1600 91 Cabot Court Fax: 631-434-3198 Hauppauge, NY 11788 Tech Support: 631-434-3197 techsupport@hauppauge.com 1.
- Page 2 ATSC digital TV on your PC. A 1.6GHz AMD Sempro laptop computer tested in the Hauppauge lab used 50% of the CPU for playing ATSC 640i format, and 90% of the CPU when playing ATSC 1080i, the highest definition ATSC format.
Need help?
Do you have a question about the WinTV-HVR-950Q and is the answer not in the manual?
Questions and answers