
Related Manuals for Cooper & Hunter AIR MASTER INVERTER CH-S07FTXP2-NG


Summary of Contents for Cooper & Hunter AIR MASTER INVERTER CH-S07FTXP2-NG
- Page 1 CH-S07FTXP2-NG CH-S09FTXP2-NG CH-S12FTXP2-NG CH-S18FTXP2-NG CH-S24FTXP2-NG For proper operation, please read and keep this manual carefully.
-
Page 2: Explanation Of Symbols
Explanation of Symbols WARNING This symbol indicates the possibility of death or serious injury. This symbol indicates the possibility of injury or damage to CAUTION property. Indicates important but not hazard-related information, used to indicate risk of property damage. Exception Clauses Manufacturer will bear no responsibilities when personal injury or property loss is caused by the following reasons. -
Page 3: Safety Operation Of Flammable Refrigerant
The refrigerant This appliance is not intended for use by persons Before install the Appliance filled (including children) with reduced physical, sensory appliance, read with flammable or mental capabilities, or lack of experience an d the installation gas R32. knowledge, unless they have been given superv- manual first. -
Page 4: Maintenance Notes
Safety operation of flammable refrigerant Installation notes Check whether there is fire source or potential fire source in the maintenance area. The air conditioner must be installed in a room - The naked flame is prohibited in the mainte- that is larger than the minimum room area. The nance area;... -
Page 5: Safety Precautions
Safety precautions WARNING Installation Installation or maintenance The grounding resistance must be performed by qua- should comply with nation- lified professionals. al electric safety regula- The appliance shall be in- tions. stalled in accordance with Air Conditioner should be national wiring regulations. properly grounded. - Page 6 Safety precautions CAUTION Installation Instructions for installation For the air conditioner with- and use of this product are out plug, a circuit breaker provided by the manufac- must be installed in the turer. line. Select a location which is The yellow-green wire in out of reach for children air conditioner is ground- and far away from animals...
-
Page 7: Operation And Maintenance
Safety precautions WARNING Operation and Maintenance tioner to multi-purpose soc- This appliance can be used ket. Otherwise, it may cau- by children aged from 8 se fire hazard. years and above and per- Do disconnect power supp- sons with reduced physi- ly when cleaning air condi- cal, sensory or mental ca- tioner. - Page 8 Safety precautions CAUTION Operation and Maintenance frequently. Do not spill water on the re- Air conditioner gives off mote controller, otherwise burning smell. the remote controller may Indoor unit is leaking. be broken. Do not use fire or hair dry- er to dry the filter to avoid deformation or fire hazard.
-
Page 9: Installation Notice
Installation notice WARNING sure that the unit is running in cooling mode. Then, fully close the valve at high pressure side (liquid valve). About 30-40 seconds later, fully close the valve at low pressure side (gas valve), immediately stop the unit and disconnect power. -
Page 10: Safety Precaution
Selection of installation location Requirements for electric connection Basic requirement 7.If the supply cord is damaged, it must be repla- Installing the unit in the following places may cau- ced by the manufacturer, its service agent or se malfunction. If it is unavoidable, please consu- similarly qualified persons in order to avoid a lt the local dealer: hazard . -
Page 11: Installation Of Indoor Unit
Installation of indoor unit Indoor outdoor Pay attention to dust prevention Step 1: sures when opening the hole. Choose installation location 5-10 Recommend the installation location to the client and then confirm it with the client. Step 2: Step 4: Install wall-mounting frame Outlet pipe 1.Hang the wall-mounting frame on the wall;... -
Page 12: Drain Hose
Tightening torque (N . m) drain hose Hex nut diameter 1/4'' 15~20 3/8'' 30~40 1/2'' 45~55 insulating pipe 5/8'' 60~65 3/4'' 70~75 Add insulating pipe in the indoor drain hose in order to prevent condensation. The plastic expansion particles are not provided. Wrap the indoor pipe and joint of connection pipe with insulating pipe, and then wrap it Step 7:... - Page 13 drain hose connection pipe Remove the wire clip; connect the power conn- band ection wire to the wiring terminal according to the color; tighten the screw and then fix the po- wer connection wire with wire clip. indoor power cord 07K, 09K, 12K: Bind them evenly.
-
Page 14: Clean And Maintenance
Clean and maintenance WARNING ■ The filter should be cleaned every three months . If there is much dust in the operation environme- WARNING nt, clean frequency can be increased. ■ Turn off the air conditioner and disconnect the ■ After removing the filter, do not touch fins to power before cleaning the air conditioner to av- avoid injury. - Page 15 Checked items before maintenance Phenomenon Solution Check items Whether there’s od- General phenomenon analysis Eliminate the odour Odours are our source, such as source. Clean the Please check below items before asking for furniture and cigare- emitted filter. maintenance. If the malfunction still can’t be tte, etc.
-
Page 16: Parts Name
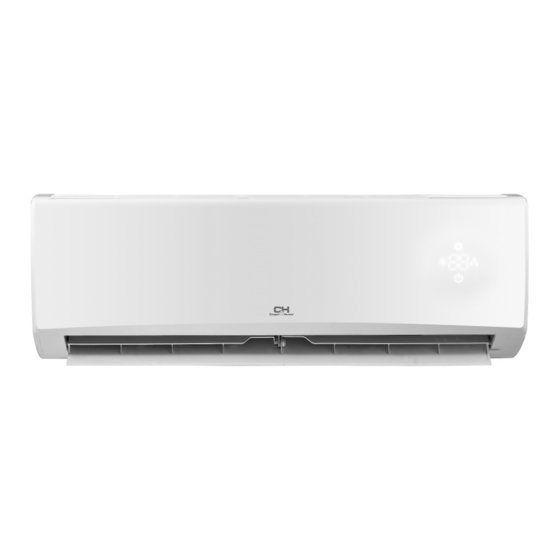
Parts name Indoor Unit air inlet panel filter aux.button horizontal louver air outlet ■ If remote controller is lost or damaged, please use aux. button to turn on or turn off the air conditioner. The operation in details is as below: As shown in the figure, open panel and press aux.button to turn off the air conditioner. -
Page 17: Buttons On Remote Controller
Operation and introduction of remote controller Introduction for icons on display Buttons on remote controller screen Set fan speed Send signal X-FAN button Set temp. Indoor ambient temp. Temp. display type Outdoor ambient temp. Auto mode Cool mode Dry mode Fan mode Heat mode Set temperature... -
Page 18: Introduction For Buttons On Remote Controller
Introduction for buttons on When selecting heating mode, the air condition- remote controller er operates under heat mode. Press or " " button to adjust set temperature. Press "FAN" NOTE button to adjust fan speed. Press " " / " "... - Page 19 button TURBO no display (horizontal louvers stops Under COOL or HEAT mode, press this button to at current position) turn to quick COOL or quick HEAT mode. " " When selecting " ", air conditioner is blowing icon is displayed on remote controller. Press this fan automatically.
- Page 20 "T-OFF" word "OFF" will stop blinking. " " icon SLEEP button resumes displaying. Cancel T-OFF:Under the condition that T-OFF is started up, press Under COOL or HEAT mode, press this button to "T-OFF" button to cancel it. start up sleep function. "...
-
Page 21: Heating Function
LIGHT NOTE button Under energy-saving function, fan speed is defaulted Press this button to turn off display light on indoor at auto speed and it can't be adjusted. unit. " " icon on remote controller disappears. Under energy-saving function, set temperature can't Press this button again to turn on display light. -
Page 22: Replacement Of Batteries In Remote Controller
Replacement of batteries in Double Self Clean function remote controller Under unit off status, hold "MODE" and "FAN" buttons simultaneously for 5s to turn on or turn off the auto clean function. When the auto clean func- tion is turned on, indoor unit displays "CL" . During ①... -
Page 23: Test And Operation
Test and operation Check after installation ● Check according to the following requirement after finishing installation. Items to be checked Possible malfunction Has the unit been The unit may drop, shake or installed firmly? emit noise. It may cause insufficient Have you done the refri- cooling(heating) capacity. - Page 24 Parts name Outdoor Unit air inlet air outlet ● Actual product may be different from above graphics, please refer to actual product.
-
Page 25: Safety Precautions For Installing And Relocating The Unit
Installation notice WARNING sure that the unit is running in cooling mode. Then, fully close the valve at high pressure side (liquid valve). About 30-40 seconds later, fully close the valve at low pressure side (gas valve), immediately stop the unit and disconnect power. -
Page 26: Outdoor Unit
Selection of installation location Requirements for electric connection Basic requirement 8.The temperature of refrigerant circuit will be hi- Installing the unit in the following places may cau- gh, please keep the interconnection cable away se malfunction. If it is unavoidable, please consu- from the copper tube. -
Page 27: Installation Of Outdoor Unit
Installation of outdoor unit Step 1: Fix the support of outdoor unit (select it according to the actual inst- drain vent allation situation) chassis Select installation location according to Drain hose outdoor drain joint the house structure. Step 3: Fix the support of outdoor unit on the sele- cted location with expansion screws. - Page 28 Step 6: Tighten the union nu t with torque wrench Neaten the pipes by referring to the sheet below. The pipes should be placed along the wall, bent Tightening torque(N m) Hex nut diameter reasonably and hidden possibly. Min. semidiam- 1/4'' 15~20 eter of bending the pipe is 10cm.
-
Page 29: Leakage Detection
Test and operation Check after installation ● Check according to the following requirement Use vacuum pump after finishing installation. Remove the valve caps on the liquid valve and Items to be checked Possible malfunction gas valve and the nut of refrigerant charging vent. 2. -
Page 30: Configuration Of Connection Pipe
Configuration of connection pipe Additional refrigerant charging amount for R32 Standard length of connection pipe: 5m, 7.5m, Min. length of connection pipe. For the unit with standard connection pipe of 5m, there is no limitation for the min length of con- nection pipe. - Page 31 smooth surface B: Remove the burrs Remove the burrs with shaper and prevent the burrs from getting into the pipe. improper expanding pipe shaper leaning damaged crack uneven surface thickness downwards the length is equal C: Put on suitable insulating pipe D: Put on the union nut Remove the union nut on the indoor connection pipe and outdoor valve;...
- Page 32 The following checks shall be applied to instal- fire extinguishing equipment shall be available to lations using flammable refrigerants: hand. Have a dry powder or CO fire extinguisher adjacent to the charging area. – the charge size is in accordance with the room size within which the refrigerant containing parts are in- Ventilated area stalled;...
- Page 33 Specialist’s Manual Repair to intrinsically safe components – recovery equipment and cylinders conform to ● the appropriate standards. Do not apply any permanent inductive or capaci- d) Pump down refrigerant system, if possible. tance loads to the circuit without ensuring that this e) If a vacuum is not possible, make a manifold so will not exceed the permissible voltage and current that refrigerant can be removed from various parts...
- Page 34 dition, a set of calibrated weighing scales shall be available and in good working order. Hoses shall be complete with leak-free disconnect couplings and in good condition. Before using the recovery mac- hine, check that it is in satisfactory working order, has been properly maintained and that any associ- ated electrical components are sealed to prevent ignition in the event of a refrigerant release.
- Page 35 C per H nter is c nstantl r in t i pr e t eir pr cts, s t e in r ati n in t is an al is s ect t c an e it t pri r n tice. 600005062917...
-
Page 36: К Ерівництво З Експлуатаці Ї
К ЕРІВНИЦТВО З ЕКСПЛУАТАЦІ Ї UА МОДЕЛ І : CH-S07FTXP2-NG CH-S09FTXP2-NG CH-S12FTXP2-NG CH-S18FTXP2-NG CH-S24FTXP2-NG... - Page 39 14.5 16.8 19.3 24.8 27.8 11.2 34.3 12.4 13.6 16.3 17.8 19.3...
- Page 46 5-10...
- Page 47 15~20 30~40 45~55 70~75...
- Page 48 N(1)
- Page 52 Налаштування швидкості вентилятора Передача сигналу Функція X-FAN Встановлення температури Температура в приміщенні Температура ззовні. Автоматичний режим Режим охолодження Режим осушення Режим вентиляції Режим обігріву Налаштування температури Функція обігріву 8°C Режим здоров’я Функція очищення Функція Wi-Fi Функція I Feel Захист від дітей ідсвітка...
- Page 53 ON/OFF MODE...
- Page 54 TURBO SLEEP X-FAN Натисніть кнопку X-FAN у режимах COOL (Охладження) або DRY (Осушення). На дисплеї з’явиться значок , а кондиціонер продовжить затримувати вентилятор внутрішнього блоку протягом наступних 10 хвилин, навіть якщо вимкнути блок з пульта управління. У режимі енергозбереження ця функція...
- Page 55 I FEEL CLOCK TIMER N. TIMER FF.
- Page 57 Функція Wi-Fi “MODE” та “TURBO” одночасно, щоб включити або вимкнути функцію WIFI. Коли функція WIFI активна, значок «WiFi» відображається на дисплеї пульта управління. Одночасно натисніть кнопки «РЕЖИМ» та «ТУРБО» протягом 10 секунд для скидання налаштувань WIFI. Функція WIFI за замовчуванням активується після подачі живлення...
- Page 60 Ø Ø Ø Ø...
- Page 68 1/4'' 15~20 3/8'' 30~40 1/2'' 45~55 5/8'' 60~65 3/4'' 70~75...
- Page 70 * Cooper Hunter постійно працює над удосконаленням своєї продукції, тому інформація, яка приведена в цьому керівництві, може бути змінена без попереднього повідомлення споживачів.
-
Page 71: Руководство По Эксплуатации
РУКОВОДСТВО ПО ЭКСПЛУАТАЦИИ МОДЕЛИ: CH-S07FTXP2-NG CH-S09FTXP2-NG CH-S12FTXP2-NG CH-S18FTXP2-NG CH-S24FTXP2-NG... - Page 74 14.5 16.8 19.3 24.8 27.8 11.2 34.3 12.4 13.6 16.3 17.8 19.3...
- Page 81 5-10...
- Page 82 15~20 30~40 45~55 70~75...
- Page 83 N(1)
- Page 85 : 16°C ~ °C. »...
- Page 87 Установить скорость вентилятора Передача сигнала Функция X-FAN Установленная температура Температура в помещении Наружная температура Автоматический режим Режим охлаждения Режим осушения Режим вентиляции Режим обогрева Установка температуры Функция обогрева 8°C Режим здоровья Функция очистки Функция Wi-Fi Функция I Feel Защита от детей Подсветка...
- Page 88 ON/OFF MODE...
- Page 89 TURBO 1°C (°F) SLEEP Y (ОСУШКА) нажатием этой кнопки можно запустить спящий режим. На пульте дистанционного управления отобразиться значок « ». Повторное нажатие кнопки отменит функцию спящего режима, и значок « » исчезнет.
- Page 90 I FEEL...
- Page 91 X-FAN Y (Осушение). На дисплее появится значок , и кондиционер продолжит осушать вентилятором внутренний блок в течение следующих 10 минут, даже если вы выключите блок с пульта управления. В режиме энергосбережения эта функция не активна. Также она не доступна в режимах AUTO (Автоматический), FAN (Вентиляция), HEAT (Обогрев).
- Page 92 Функция Wi-Fi Нажмите кнопки “MODE” и “TURBO” одновременно, чтобы включить или выключить функцию WIFI. Когда функция WIFI активна, значок “WiFi” отобразиться на дисплее пульта управления. Удерживайте одновременно кнопки “MODE” и “TURBO” на протяжении 10 секунд, пульт управления отправит WIFI команду сбросить...
- Page 94 Max. length of connection pipe...
- Page 95 Ø Ø Ø Ø...
- Page 103 1/4'' 15~20 3/8'' 30~40 1/2'' 45~55 5/8'' 60~65 3/4'' 70~75 N(1) N(1) L(3) N(1)
- Page 105 per H nter постоянно работает над улучшением своей продукции, поэтому информация приведенная в данном руководстве, может быть изменена без предварительного уведомления потребителей.
Need help?
Do you have a question about the AIR MASTER INVERTER CH-S07FTXP2-NG and is the answer not in the manual?
Questions and answers