Table of Contents
Advertisement
Quick Links
Advertisement
Table of Contents

Related Manuals for aqprox! appLS07DESK


Summary of Contents for aqprox! appLS07DESK
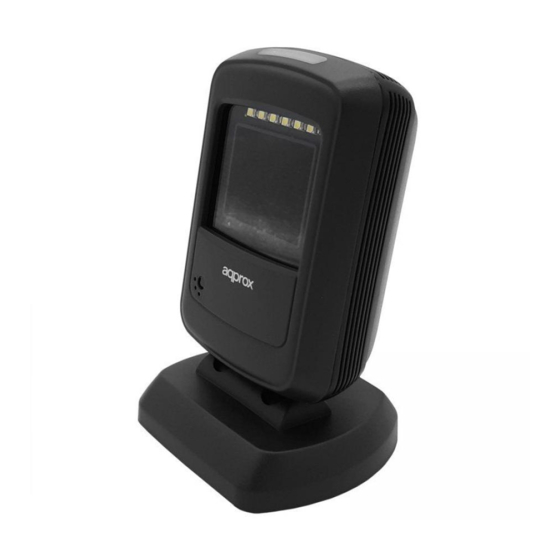
- Page 1 2D Barcode Scanner appLS07DESK www.approxtpv.es...
- Page 3 1D y códigos de barras 2D estándar (varias versiones de PDF417, código QR y matriz de datos). Puede escanear en papel, tarjetas de plástico, LCD y otros medios impresos.
- Page 4 Reiniciar: Si el escáner se cuelga o no responde, Quite y vuelva a colocar el cable de datos. 1.4 Interfaz de comunicación El escáner appLS07DESK se co- necta al Host, (ordenador o dispo- sitivo POS), a través de un puerto...
- Page 5 ESPAÑOL 1.5 Reconocimiento de los códigos de barras En el modo de reconocimiento manual, el procedimiento para escanear los códigos de barras es el siguiente: (1) Asegúrese de que el escáner, el cable de datos, el Host y la fuente de alimentación estén correctamente conectados y en- cendidos.
- Page 6 Restore Factory defaults 2 Interfaz de comunicación El escáner AppLS07DESK utiliza el puerto de comunicación USB para recibir y reconocer los datos, controlar el escáner, enviar comandos, mo- dificar parámetro, etc.. 2.2.1 Teclado virtual HID A traves del interfaz USB, el escáner puede simular un dispositivo HID- KBW que permite envíar datos al Host.
-
Page 7: Modo Automático
ESPAÑOL 3 Modo de reconocimiento 3.1 Modo Manual En el modo manual, la lectura de los códigos de barras se realiza pul- sando el botón de disparo, situado en el lateral del dispositivo. La lectura se enviará al Host. Para realizar la lectura correcta del código, sitúe éste frente al dispositivo y presione el botón de disparo. -
Page 8: Modo Continuo
Sobre el tiempo de reconocimiento En el modo automático de detección, este parámetro indica el tiempo máximo para permitir que el escáner reconozca e identifique el código de barras antes de validarlo. El rango de tiempo de reconocimiento es de 0,1 ~ 9,9 segundos Cuando se establece en 0, el reconocimiento no espera. - Page 9 4 Luz LED El escáner ilumina el área de reconocimiento de código, se puede confi- gurar para que se apague o se encienda. LED ON LED OFF 5 Otras funciones 5.1 Sonido. Después de reconocer con éxito un código, el escáner puede emitir una señal acústica.
-
Page 10: Solución De Problemas
Se pueden desactivar códigos que no desees tener activos, lo que mejo- rará el rendimiento del escáner. Ver los códigos de configuración en las páginas de la 23 a la 37: 6 Solución de problemas Pregunta: Hay algunos códigos de barras que no se pueden escanear. Respuesta: Verifique el tipo de código de barras, abra la función de códi- go de barras;... - Page 11 ESPAÑOL Instrucciones de seguridad, mantenimiento y reciclado 1. Atención: Nunca abra el dispositivo, las partes internas tienen peligro de descarga eléctrica. 2. No instale esta unidad cerca de agua, como, por ejemplo, en un sóta- no húmedo, en un exterior sin protección o en cualquier zona clasificada como húmeda.
-
Page 12: Appearance And Dimension
2D l image products. appLS07DESK can recognition all kinds of 1D barcodes and standard 2D barcodes (various versions of PDF417, QR code, and Data matrix) can easily scan paper, plastic cards, LCD and other barcode printed media. Its fully integrated design makes it easy to embed in a wide range of product applications. -
Page 13: Communication Interface
Power on: plug and play interface, power on automatically when the scanner is connected to the host. Power off: unplug the data cable. Restart: if the appLS07DESK scanner freezes or does not respond, please restart the data cable. 1.5 Communication Interface appLS07DESK must be connected to a host. -
Page 14: Restore Factory Defaults
1.6 Barcode Recognition In manual recognition mode, the procedure for scanning barcodes is as follows: (1) Make sure that the scanner, data cable, data receiving host, and power supply are properly connected and turned on. (2) Hold down the trigger to activate the LED light. (3) Move the scanner and adjust the distance between it and the barcode to find the best recognizing distance. - Page 15 ENGLISH Restore Factory defaults 2 Communication Interface AppLS07DESK Stationary Barcode Scanner provides RS-232 serial interface and USB interface (optional) to connect to the host. Through communication interfaces, it can receive and recognition the data, control the scanner by sending the commands, modify the parameter of scanner, etc.
- Page 16 Finnish (Swedish) French German Italian Swiss (German ) British Danish Norwegian Spanish Dutch...
- Page 17 ENGLISH Hebrew Portuguese Czech_DEC Polish Slovakian_DEC Greek Turkish Hungarian Croatian Swedish * For more configuration options, see our website www.approxtpv.es.
- Page 18 2.1.3 USB Virtual Serial Port When the scanner uses a USB communication interface, but the host application uses serial communication to receive data, you can setup the scanner to a USB virtual serial port. This feature requires that the appropriate driver be installed on the host. USB Virtual Serial Port Setting 3 Recognition Mode 3.1 Manual Mode...
- Page 19 ENGLISH 3.2 Automatic Sensing Mode In automatic sensing mode, the scanner will monitor the images being taken. When the scene changes, it will recognize within the limited time of “once recognition time”. After recognizing the output information successfully or the recognizing times out, it will re-enter the state of monitoring scene changes.
-
Page 20: Continuous Mode
Recognition time Recognition time 3 seconds 0 seconds 3.3 Continuous Mode Continuous mode means that the scanner continuously shoots, recognizes and output the information. In this mode, the same barcode cannot be output Continuous light 4 LED Light There is a fill lighting device on the scanner that is used to light up the recognizing area when recognizing. - Page 21 5 Other Functions 5.1 Recognition Successful Sound After recognizing successfully, the scanner can output the PWM signal to drive the external buzzer circuit to make sounds. The following setup barcode can be set accordingly. Turn ON (Default) Turn OFF 5.2 Barcode Reverse Setting Prohibited reverse Auto Recognize (Default) barcode recognition...
- Page 22 -Aztec Barcode Auto Recognize Only reverse barcode Prohibited reverse barco- (Default) recognition de recognition - Han Xin Barcode Only reverse barcode Disable reverse barcode Auto Recognize recognition recognition (Default) 5.3 Common End Mark Suffix Settings Add end mark suffix LF Add end mark suffix CR Add end mark suffix LF+CR Add end mark suffix TAB...
- Page 23 ENGLISH 6 Barcode Symbol Parameter Each type of barcode has its own unique properties, and the recognition of scanner can be adjusted to adapt to these property changes through the set barcode in this chapter. You can also prevent the recognizing function from recognizing the type of barcode that will not to be used so that it can improve the performance of the recognizing function.
- Page 24 - EAN-13 Enable/disable recognize EAN-13 Enable (Default) Disable Setting whether to read 2/5-bit extra-code 2/5-bit extra-code refers to the 2/5-digit digital barcode appended after a normal barcode. Enable (Default) Disable - ISSN Enable/disable recognize ISSN Enable Disable (Default) - ISBN 13-bit (Default) 10-bit...
- Page 25 ENGLISH - UPC-E Enable/disable recognize UPC-E Enable (Default) Disable Set to determine whether to transfer the check bit. The UPC-E barcode data is fixed to 8 characters and the 8th char- acter is the check bit which is used to verify the correctness of all 8 characters.
- Page 26 Enable Disable (Default) System character transfer settings Transport system characters (Default) Not transmit system characters Transport system characters and country codes (“0” for USA) - UPC-A Enable/disable recognize UPC-A Enable (Default) Disable Setting whether to transmit check-bit UPC-A barcode data is fixed to 13 characters, and the 13th charac- ter is the check bit, which is used to verify the correctness of all 13 characters.
- Page 27 ENGLISH Enable (Default) Disable Set whether to read 2/5-bit extra-codes 2/5-bit extra-code refers to the 2/5-digit digital barcode that is ap- pended after a normal barcode. Enable (Default) Disable System character transfer settings Enable (Default) Disable Transport system characters and country codes (“0”...
- Page 28 - Code 39 Enable/disable recognize Code 39 Enable (Default) Disable Setting whether to check and transmit check-bit Code 39 barcode data can contain no check-bit; if there is a check that is the last 1 character of the data. The check-bit is a value calcu- lated from all the data to verify that the data is correct.
- Page 29 ENGLISH Turn off Full ASCII Recognizing (Default) Turn on Full ASCII Recognizing Code 39 converse Code32 setting Enable conversion Disable conversion (Default) Code32 prefix character setting Enable add the prefix character “A” Disable add the prefix character “A” (default) - Code 93 Enable/disable recognize Code 93 Enable (Default) Disable...
-
Page 30: Check Setting
- Code 11 Enable/disable recognize Code 11 Enable Disable (Default) Check Setting The check characters can not to be contained in Code 11 barcode data. If there is a check bit, it can be the last 1 or 2 characters of the data. The check bit is a value calculated based on all data to check that if the data is correct. - Page 31 ENGLISH - Interleaved 2 of 5 Enable/disable recognize Interleaved 2 of 5 Enable (Default) Disable Setting check and transfer check bit Interleaved 2 of 5 barcode can not to be contained in Code 11 bar- code data. If there is a check bit that is the last 1 or 2 characters of the data.
- Page 32 - I 2 of 5 converse EAN-13 setting Enable conversion Disable conversion (default) - Matrix 2 of 5 Enable/disable recognize Matrix 2 of 5 Enable Disable (Default) Setting check and transfer check bit Interleaved 2 of 5 barcode can not to be contained in Code 11 barcode data.
- Page 33 ENGLISH - Discrete 2 of 5 Enable/disable recognize Discrete 2 of 5 Enable Disable (Default) - MSI Enable/disable recognize MSI Enable Disable (Default) Check Setting MSI barcode can not to be contained in Code 11 barcode data. If there is a check bit that is the last 1 or 2 characters of the data. The check bit is a value calculated based on all data to check that if the data is correct.
- Page 34 Set whether to transmit the check-bit Transmit No Transmit (Default) -Code 128 Enable/disable recognize code 128 Enable Disable (Default) GS1 128 Enable/disable recognize GS1 128 Enable (Default) Disable ISBT 128 Enable/disable recognize ISBT 128 Enable (Default) Disable...
- Page 35 ENGLISH - Codabar Enable/disable recognize Codabar Enable Codabar (Default) Disable Codabar Start and end characters setting Enable CLSI Disable CLSI (Default) Enable this parameter to remove the start and end characters and in- sert space after the first, fifth, and tenth characters of the 14-character Codabar barcode.
- Page 36 GS1 DataBar converse UPC/ENA setting Enable Disable (Default) - GS1 DataBar Limited Enable/disable recognize GS1 DataBar Limited Enable Disable (Default) - GS1 DataBar Expanded Enable/disable recognize GS1 DataBar Expanded Enable (Default) Disable - PDF417 Enable/disable recognize PDF417 Enable (Default) Disable...
- Page 37 ENGLISH - Data Matrix Enable/disable recognize Data Matrix Enable (Default) Disable Codabar Setting whether to identify mirror Data Matrix Auto recognize (Default) Enable Disable - QR Enable/disable recognize QR Enable (Default) Disable Setting enable/disable recognize Micro QR (This setting is only valid when QR is enabled to be recognized).
-
Page 38: Troubleshooting
7 Troubleshooting Q: There are some barcodes cannot be scanned. A: Check the barcode type, open the barcode function; if it is verified, try to turn off. Q: The barcode data is incorrect. A: Check the error display of barcodes (all barcodes errors or specific barcode error) Q: Barcode can be recognized but not displayed. - Page 39 ENGLISH 3. Do not insert objects of any kind into this unit through openings as they may touch voltage points and short out parts that could result in fire or electric shock. 4. Do not spill any liquid on the unit. Danger of explosion! 5.
Need help?
Do you have a question about the appLS07DESK and is the answer not in the manual?
Questions and answers