Table of Contents
Advertisement
Quick Links
Advertisement
Table of Contents

Related Manuals for Segway Trekker PT


Summary of Contents for Segway Trekker PT
- Page 1 Trekker PT User Manual Self Balancing Scooter...
-
Page 3: Table Of Contents
1. About this User Manual ............................... 1 2. Risk of Ride ................................... 1 3. Preparation Before Use ............................1 4. Introduction to the Trekker PT ........................... 2 5. Overview ................................... 3 6. Assembling the Trekker PT ..........................4 6.1 Check the Accessories ............................4 6.2 Locate the Serial Number ............................ - Page 4 7.10 Charging Method ............................13 7.11 Parking Stand ............................... 15 8.0 Connect and Control by Smartphone App ....................16 9.0 Guide for Safe Riding of the Trekker PT ..................... 18 9.1 Regulations and Compliance ........................18 9.2 General Safety Instructions ........................19 9.3 Recommended Rules for Safe Riding ......................
- Page 5 11.6 Changing the Tyres ............................. 36 11.7 Disassembly of tyres and wheels ......................37 11.8 Lifting and moving the Trekker PT ......................37 12.0 Main technical specification of Trekker PT series ....................38 Appendix: FAQ and troubleshooting ........................39 Service Record ................................42...
-
Page 6: About This User Manual
1. About this User Manual To learn to ride the Trekker PT safely, you must read and follow all instructions and warnings in this manual, and watch the safety video (where applicable). It is important that you follow all the safety warnings and cautions that appear throughout this man ual, and that you use good judgement when you ride your Trekker PT. -
Page 7: Introduction To The Trekker Pt
With wheels instead of the feet, it replaces the high precision balance of the human being, is low-cost to run, eco-friendly, quiet and convenient. Having been fully charged, the Trekker PT can run for up to 60Km, depending on weight of rider and the local terrain. -
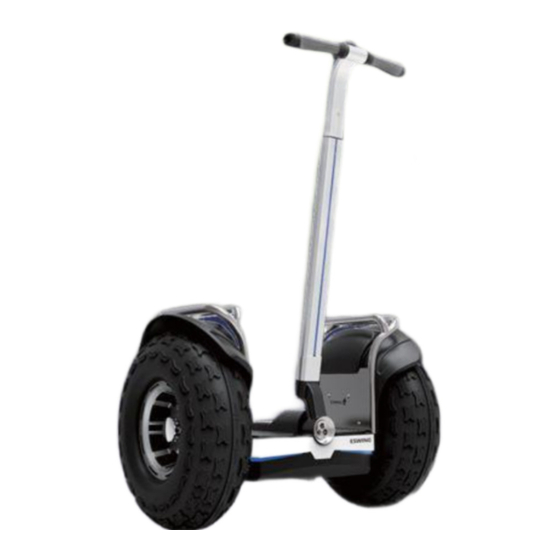
Page 8: Overview
Overview Trekker PT 5. Overview A. White LED headlamp F. Tyre K. Signal indicator B. Blue indicator G. Handgrip L. Red rear indicator C. Steel rack H. Smart fob controller M. Integrated battery pack D. ABS mudguard I. Height adjuster nut E. -
Page 9: Assembling The Trekker Pt
After carefully unpacking, take out the leansteer assembly, the packing parts for the handle bar, and Trekker PT mainframe in order. The Trekker PT contains the following parts, please check after opening the package. If anything is missing, please contact your retailer 1. -
Page 10: Locate The Serial Number
On the warranty sheet of the user manual iii. At the bottom of the mainframe Please note, the serial number, which is unique to every Trekker PT, and the warranty sheet, is the only identification for gaining free warranty and after-sales service. 6.3 Preparation Before Assembly Before the assembling the Trekker PT you should first locate the Phillips screwdriver supplied with the product in the package. -
Page 11: Mount The Handlebar And Leansteer Frame
6.5 Install the Battery Pack Lay the Trekker PT forward on to the ground, protected by a blanket or foam to prevent scratching the mainframe, and take out the M4 x 10 hex screws of... -
Page 12: Function Introduction
Trekker PT key fob is a rechargeable device, with information display and control functions. It can be used to control the operation of the Trekker PT – it's keys are shown in the following figure. There is a dock for the key fob on the handlebar. -
Page 13: Smart Key Fob And Display Interface
Function Introduction Trekker PT On the remote key, there are 3 buttons defined as Power Key, Lock Key and Function key. Each button can be operated in 3 ways, namely: Long press – lasting more than 2 seconds ... -
Page 14: Description Of Smart Key Fob Icons
Icon Function Description See a happy, sad (low battery or cautions), or Battery remaining, total 5 bars neutral face Indicates a system fault on Trekker PT that requires Bluetooth connection with Trekker PT service Locked Current speed, accurate to 0.1km/h Trekker PT starts self-balancing mode, run mode or Distance travelled, accurate to 0.1km/h (odometer) -
Page 15: Smart Key Fob Functions
Function Introduction Trekker PT 7.5 Smart Key Fob Functions Function Icon picture Operation mode Press time Display in signal indicator Fob display Signal indicator lights on, shows On / Off Power key In standby Short press battery remaining, LED ring... -
Page 16: Signal Indicator
The backlight of the key fob will automatically turn off after searching for a pair for 120 seconds. If pairing code does not succeed between key fob and Trekker PT, it will automatically exit pairing mode. 7.6 Signal Indicator The signal indicator is a LED interface located on the centre of the footplate, between the rider's feet, and shows the current Trekker PT working mode. -
Page 17: Signal Indicator Icons Description
There is a built-in speaker, which makes voice prompts according to the different working modes. This can be turned on / off by accessing the setting in the smartphone app. NOTE: The above icons do not show all of the functions of the Trekker PT – refer to the remote key fob functions listed previously. -
Page 18: Power Button, Charge Port And Usb Port
7.9 Power Button, Charge Port and USB Port At the back of the mainframe of the Trekker PT, there is a USB charging port which supports standard USB equipment and provides 5V/1A current. You can charge the key fob or other USB devices with input <150mA charging. - Page 19 Function Introduction Trekker PT When the LED indicator on the charger shows red, this means that the scooter is charging normally; when the indicator turns green, the scooter is fully charged. Unplug the charging cable to save the battery life.
-
Page 20: Parking Stand
7.11 Parking Stand Some models of the Trekker PT are equipped with a parking stand. When there is no rider on the Trekker Pro, you can release the parking stand downwards, and the machine can stand up on its own. -
Page 21: Connect And Control By Smartphone App
Download the app and pair to Trekker PT. The Trekker PT can be controlled by smartphone app using iPhone 4S or above, iPad3 or above, iPod Touch5 or above or Android 4.3 or above. Connection is by bluetooth 4.0 ver sion, built into the Trekker... - Page 22 Smartphone App Trekker PT Connect using the QR code for Android: Pairing Icon Page 17...
-
Page 23: Guide For Safe Riding Of The Trekker Pt
If the information in this chapter 'Guide for safe riding the Trekker PT' is followed, it will maximize the safety of the rider and others, and by doing so, it will not cause major injury to the rider, even if unrecoverable faults happen to the Trekker PT. -
Page 24: General Safety Instructions
9.2 General Safety Instructions Get your initial instructions from an experienced person, who has undergone the correct training and is proficient in the workings of the Trekker PT You should understand all the workings of the smartphone app, and it's settings ... - Page 25 Do not ride the Trekker PT up or down stairs; do not lift the Trekker PT off the ground in any case (such as passing a speed bump), and do not ride the machine with one wheel on the shoulder of the road or stair and with only one wheel on the ground ...
- Page 26 SHOULD NOT ATTEMPT TO RIDE the Trekker PT The Trekker PT should not be ridden when the weather conditions can alter the road surface, such as snow, ice, mud and excessive rain, as the road surface will be too unpredictable to navigate ...
-
Page 27: Recommended Rules For Safe Riding
Trekker PT Make sure that the Trekker PT is switched off completely before carrying it, as injury may be caused by the quick rotation of the wheels. It is suggested that the vehicle be carried by 2 people by holding the frame NOT by holding the mudguard, as this may break and cause personal injury 9.3 Recommended Rules for Safe Riding... -
Page 28: Automatic Safety Warnings / Protection
Make sure that the Trekker PT is switched off completely before carrying it, otherwise injury may be incurred by the fast rotation of the wheels. It is suggested that the Trekker PT is carried by 2 people Do not lift the Trekker Pro using the mudguards ... -
Page 29: Critical Battery Power
Critical battery power. If the rider observes that there are 2 bars or less of battery powe r remaining, they should get off the machine and immediately put the Trekker PT on charge. If the rider is in situation where they are not near a charging station, they should get off the machine and take the machine back to a charging station using assistance mode. - Page 30 Automatic / Intelligent Safety Warnings Trekker PT Going backward at a fast speed, going up steep slopes, or riding a steep incline will drain the battery quickly. An audible warning will be heard. Page 25...
-
Page 31: Internal Fault Description
If the rider is still riding the Trekker PT, he should get off and contact the authorized main dealer for repair. If you hear the alarm sound just after power-on, it may be caused by low battery, so please charge it. In case it fails, please contact your main dealer for help. -
Page 32: Learning To Ride The Trekker Pt
Having fully charged the vehicle, unplug the Trekker PT from the mains Turn on the power switch on the body of the Trekker PT, and you will hear an audible welcome to start using the smart scooter – the light on the Signal Indicator will come on, which means the... - Page 33 Learning to Ride the Trekker PT Trekker PT Lean your body forward very slowly, and feel the Trekker PT move forward Recover your posture slowly to the upright position, and feel the vehicle decelerate and stop Practice items (g) and (h) until you are comfortable with moving and stopping...
-
Page 34: Stopping The Vehicle
Bring your buttocks downward (as though you are going to sit down) • After the Trekker PT stops, distribute your weight evenly on the footplate to achieve balance NOTE: IF YOU CONTINUE TO TILT BACKWARDS, THE VEHICLE WILL MOVE BACKWARDS... -
Page 35: Turning Left And Right
10.3 Turning Left and Right If you turn the steering bar in the left or right direction, the Trekker PT will turn in the corresponding direction. Keep your knees slightly bent and tilted toward the direction in which you want to turn – the angle should be that of the leansteer bar (similar to skiing). -
Page 36: Getting Off The Trekker Pt
Learning to Ride the Trekker PT Trekker PT 10.4 Getting Off the Trekker PT Getting off the Trekker PT is similar to walking down the stairs. For the first few attempts, ask your instructor to hold the leansteer bar. •... -
Page 37: Assistance Mode
Trekker PT 10.5 Assistance Mode Once you are no longer riding on the Trekker PT, and, using your smartphone app, you can turn the vehicle from the standby mode to assistance mode. In this programme, you can manoeuvre the vehicle manually using the leansteer bar. -
Page 38: Locking The Trekker Pt
10.6 Locking the Trekker PT When not using your Trekker PT, open the smartphone app, and lock the vehicle using the padlock icon. After locking the Trekker PT, you will hear a voice prompt 'Locked'. Locking the vehicle itself cannot stop theft by it being carried away. Store your Trekker PT in a safe place. -
Page 39: Maintenance
11.1 Cleaning the Trekker PT To keep your Trekker PT in good condition, clean it after each use. The Trekker PT can be washed with a shower hose or garden hose with water pressure less than 1MPa (or 145Psa) to flush the mudguards. -
Page 40: Battery Maintenance And Transportation
Trekker PT 11.2 Battery Maintenance and Transportation The Trekker PT battery should still perform well after 30,000 – 40,000Km if well maintained. Failure to maintain the battery will reduce the capacity or even damage the battery after only a few months. -
Page 41: Screw Mounting And Removal Technique
11.6 Changing the Tyres Abraised tyres influence the safe riding of the Trekker Pt. We suggest replacing the tyres when tread is les s than 1mm in depth. The tyres will need to be replaced at your main dealer, or a tyre store. -
Page 42: Disassembly Of Tyres And Wheels
2. If putting the scooter into a vehicle, first release the frame 3. If the Trekker PT is too heavy for 1 person, ask another person to help lift 4. For a single person to lift the scooter, the best posture is with one hand holding the front, and the other hand holding the battery pack position 5. -
Page 43: Main Technical Specification Of Trekker Pt Series
Technical Specifications Trekker PT 12.0 Main technical specification of Trekker PT series Main technical specification Product dimension Footplate height 820x490x560 mm Off-ground height Handlebar height 860 - 1150mm Trekker PT Product model Power system 1600Wx2 motors Peak power Climbing degree ≤35°... -
Page 44: Appendix: Faq And Troubleshooting
Generally, you should allow 3 – 10 hours for the vehicle to charge fully. If you the Trekker PT ride the Trekker PT every day, we suggest that you charge it every 1 – 2 days. if you do not use it very often, and to prolong the battery life, we suggest that you charge it at least once every 2 months. - Page 45 Check to see if smart fob has a charge iii. Make sure the smartfob is paired with Trekker PT iv. Check distance between fob and machine is < 5m If none of the above, power off the Trekker PT completely, and re-pair as follows: Page 40...
- Page 46 Hold the controller close to the vehicle, press the power button on the back of the footplate, and pair the code. All icons will display c) Select each of the function keys to check if the Trekker PT is working properly What functions can the Trekker With app controls, the machine will go forward, backward, turn and stop.
-
Page 47: Service Record
Service Record & Warranty Trekker PT Service Record SERVICE RECORD Repair Date Repair Details Remarks Page 42... -
Page 48: Warranty
Service Record & Warranty Trekker PT Warranty WARRANTY RECORD Purchase Date Customer Name Contact Address Invoice Number Product Model Serial Number Distributor Page 43... - Page 49 Greentouch Technologies (UK) Limited Unit 2, Greaves Industrial Estate Leighton Buzzard LU7 4UB Tel: 01525 376916 email: greentecgroup@outlook.com web: www.off-roadelectric.com...
Need help?
Do you have a question about the Trekker PT and is the answer not in the manual?
Questions and answers