Table of Contents
Advertisement
Quick Links
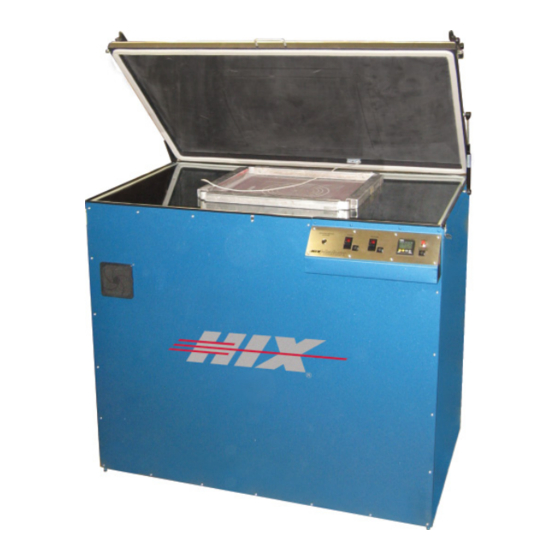
Halux 1200
Digital Hot Restrike Exposure Unit
OWNER'S MANUAL
NOTE:
Due to the unique
hot strike feature, the
Halux-1200D must be
supplied power by a
120V, 20 Amp dedicat-
ed circuit and constnt
voltage between 115-
125V.
For Customer Service, Call 1-800-835-0606
CONTENTS
Installation ........................................................................................................ 2
Initial Start Up ................................................................................................... 3
Exposing Screens............................................................................................. 4
Determining Exposure Time / Chart ..............................................................5-6
Vacuum Switch Adjustment .............................................................................. 7
Glass Cleaning ................................................................................................. 8
Fan Filter Servicing........................................................................................... 8
Lamp Replacement .....................................................................................8-10
Vacuum Pump Filter Replacement ................................................................. 10
Lid Realignment......................................................................................... 11-12
Blanket Replacement ..................................................................................... 12
Troubleshooting Charts .............................................................................13-14
Parts Identifi cation .....................................................................................15-19
Warranty ......................................................................................................... 20
BEFORE warranty repair you MUST get Prior Authorization:
or Visit www.hixcorp.com
70280 RV H_110115
Advertisement
Table of Contents

Subscribe to Our Youtube Channel
Related Manuals for Hix Halux 1200


Summary of Contents for Hix Halux 1200
-
Page 1: Table Of Contents
Halux 1200 Digital Hot Restrike Exposure Unit OWNER’S MANUAL NOTE: Due to the unique hot strike feature, the Halux-1200D must be supplied power by a 120V, 20 Amp dedicat- ed circuit and constnt voltage between 115- 125V. For Customer Service, Call 1-800-835-0606 or Visit www.hixcorp.com... -
Page 2: Installation
RECEIVING & INSTALLATION NOTE: The HIX Halux 1200D is not compatible with the M&R Trilok pin registration system. CAUTION: Before installing or operating this unit be sure to read these instructions thoroughly. Disconnect all electric power before performing maintenance on this unit. Never operate this equipment with the power supply cover re- moved. -
Page 3: Initial Start Up
INITIAL SETUP The “hot Restrike” feature, eliminates warming times between ex- posure, saving electricity and extending bulb life. Due to this unique Hot Strike feature, the Halux-1200D must be supplied electrical power by a 120 volt, 20 amp dedicated circuit and constant voltage between 115-125 volts. - Page 4 OPERATION DIGITAL TIMER 1. Turn Main Power “On”. Timer will illuminate. 2. To change time setting, press the button on the front of the timer face. Timer will display “Minutes” and “Seconds”. 3. To program the desired time (minutes and seconds), press the button;...
-
Page 5: Exposing Screens
EXPOSING EXPOSING A SCREEN Maximum screen sizes: One 24” x 42” or Two 21” x 24” NOTE: Put the screen in the center of the glass. Keep at least 2” from any edge of the glass to prevent damage to the vacuum blanket rubber. - Page 6 EXPOSING DETERMINING YOUR OPTIMUM EXPOSURE TIME BY EXPOSURE CALCULATOR (PREFERRED METHOD) 1. Follow normal operations explained above. 2. Place exposure calculator on screen following calculator’s in- structions. 3. Set timer to double the estimated exposure time. 4. Inspect your newly exposed screen according to calculator’s instructions.
- Page 7 EXPOSURE TIME CHART...
-
Page 8: Vacuum Switch Adjustment
MAINTENANCE VACUUM SWITCH ADJUSTMENT If your machine is new or has been moved recently and your lamp fails to work on fi rst operation, the safety vacuum switch may need some adjustment. After going through the following procedure and your lamp still fails to work, check the Trouble Shooting Charts. 1. -
Page 9: Glass Cleaning
MAINTENANCE GLASS CLEANING In order to maintain short exposure times and minimize pin holes in the emulsion, keep the unit’s exposure glass clean. Dusting is usually suffi cient. If more cleaning is required use a soft cloth moistened with alcohol. A dusty environment will require more cleaning. Vacuum Bleeder Cord Glass Hold-... -
Page 10: Lamp Replacement
MAINTENANCE LAMP REPLACEMENT When you notice your exposure times getting longer or if the lamp fails to operate, check the Troubleshooting Chart on pages 14-15. Follow the instructions below if you determine that you need to re- place the lamp. WARNING: Unplug unit from electrical outlet. -
Page 11: Vacuum Pump Filter Replacement
MAINTENANCE 5. Install the correct replacement bulb. CAUTION: Do not touch the lamp glass with your bare hands. Because of the intense heat, impurities, such as fi nger prints and hand oils, can cause premature failure of the lamp. If you are uncertain if the glass has been touched wipe it off with a soft cloth moistened with alcohol. -
Page 12: Lid Realignment
MAINTENANCE LID REALIGNMENT NOTE: The light and vacuum are sealed under the lid by means of rubber gasket on the underside the lid frame. This rubber gasket may compress over time. If light is seen from the sides of the unit, or if the vacuum does not occur, the rubber gasket may be compressed or the lid is out of alignment. -
Page 13: Blanket Replacement
Chart for possible causes. If you determine that your blanket has begun to leak, it needs to be replaced. New blanket re- placement kit can be ordered from HIX Corporation by call- ing Customer Service at 800-835-0606. Refer to Customer... - Page 14 TROUBLESHOOTING PROBLEM POSSIBLE CAUSE REMEDY 1. Lamp does not ig- 1. a. No line power. 1. a. Check power nite and red light on b. Supply fuse or source. main power switch breaker blown. b. Reset supply is off. c. Unit main breaker breaker or replace is tripped.
- Page 15 TROUBLESHOOTING PROBLEM POSSIBLE CAUSE REMEDY 4. Lamp fails to remain 4. a. Lamp housing 4. a. Replace cooling ignited. cooling fan failure. fan. b. Obstruction of b. Remove obstruc- air input or output tion, allow thermo- causing over heat- stat to cool, it will ing, thus tripping the then reset itself.
-
Page 16: Warranty
Thermatrol and doughXpress products are covered under separate warranty. In the event of a defect, HIX, at its option, will repair, replace or substitute the defective item at no cost during this period subject to the limitations of insurance and shipping costs stated below.
Need help?
Do you have a question about the Halux 1200 and is the answer not in the manual?
Questions and answers