Table of Contents
Advertisement
Available languages
Available languages
Quick Links
Advertisement
Table of Contents

Related Manuals for BUTURE BR800


Summary of Contents for BUTURE BR800
- Page 1 User Manual BR800 Car Jump Starter...
- Page 2 Language 01-08 09-16 17-24 25-32 33-40 41-48...
-
Page 3: Package Content
Package Content BUTURE BR800 Jump Starter Smart Jumper Cables User Manual BR800 Car Jump Starter USB To Type C Cable User Manual... -
Page 4: Know Your Product
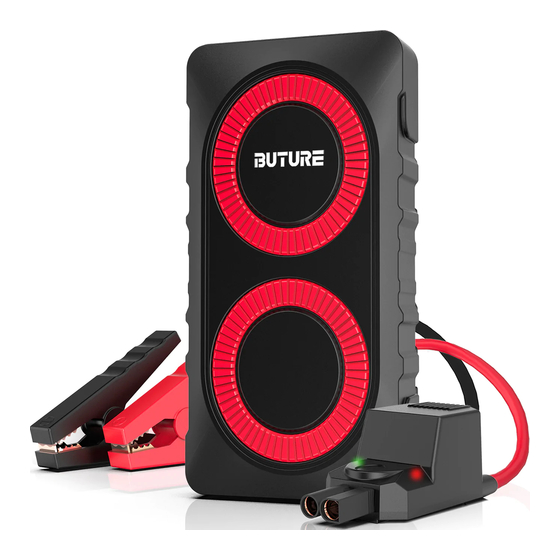
Know Your Product ON/OFF Button Battery Indicator 5V/2.4A USB Output Flashlight USB C Input Jump Starting Port Powerful Circuit Protection System - Smart Clamps Red Jumper Cable (+) Black Jumper Cable (-) Smart Clamp Plug... -
Page 5: Technical Details
Technical Details Model BR800 Capacity 12000mAh Starting Current 400A Peak Current 800A USB C Input 5V/2A USB Output 5V/2.4A Dimensions(L*W*H) 153.5*85.1*27.8mm Overload/Discharge Fuse Working Temperature -20℃~60℃ / -4℉~140℉ Backflow Protection Short circuit fuse protection Reverse polarity protection Operation Power indicator light Press the power button to check the capacity of the Jump starter. - Page 6 Recharge the Jump starter Note: The wall charger or car charger is not included in the package, you can use a universal USB charger to recharge the unit, such as your phone or pad charger ( 5V/2A is suggested ). At Home: 1.Plug the USB cable into any USB wall adaptor (not included).
- Page 7 To Jump Start Your Car To jump start the vehicle battery, put the vehicle in park (neutral if the vehicle has a manual transmission) and engage the emergency brake. Locate the battery for the vehicle and follow the steps listed below. Jump cables are color-coded, RED for POSITIVE(+) and BLACK for NEGATIVE(-) Do not mix up the cables or allow the metal ends to touch together because this may damage the battery charging system and/or electronics on a vehicle.
- Page 8 However, if the red indicator light is on: 1. The battery clamp may be connected in reverse. In this case, you need to disconnect the battery clamp from the vehicle and the jump starter. 2. Adjust the clamps for maximum contact with the battery terminals. Step3: Start Your Car If you failed to start your car, you need to disconnect the battery clamp from the...
- Page 9 In any of the following situations, the smart clamp turns protection on: LED indicator Situations The red/green Ready to work led will flash The green Work status light is always on 1.battery clamp is reversely connected ----check whether the clip is reversely connected The red 2.the clamp is short-circuited light is always on...
-
Page 10: Battery Disposal
3. Do not operate the product in explosive atmospheres, such as in the presence of flammable liquid, gas or dust. 4. Do not modify or disassemble the product. 5. If battery leakage occurs, take it to your local battery recycling center for disposal do not attempt to use it. - Page 11 Lieferumfang Smart Clamps BUTURE BR800 ( Starthilfekabel ) Starthilfe Powerbank User Manual BR800 Car Jump Starter USB TYP C / USB Bedienungsanleitung alles in einem Kabel...
- Page 12 Know Your Product ON/OFF Taster Ladestatus-Anzeige (multifunktional) 5V/2.4A USB Output Taschenlampe USB C Input Auto- Starthilfe - Port Leistungsstarkes Stromkreisschutz System Smart Clamps (Starthilfekabel) Rotes Starthilfekabel (+) Schwarzes Starthilfekabel (-) “Smart Clamp”-Stecker...
- Page 13 Technical Details Modell BR800 Kapazität 12000mAh Anlaufstrom 400A Spitzenstrom 800A USB C Input 5V/2A USB Output 5V/2.4A Abmaße(L*W*H) 153.5*85.1*27.8mm Überlade-/Entlade-Sicherung Temperaturschutz -20℃~60℃ / -4℉~140℉ Rückflusssicherung Kurzschluss-Sicherung Verpolungsschutz Inbetriebnahme Ladestatus-Anzeige Drücken Sie den Netzschalter, um die Kapazität des Starthilfegeräts zu überprüfen...
- Page 14 So laden Sie Ihre Starthilfe-Powerbank HINWEIS: Das Netz- oder Autoladegerät ist nicht im Lieferumfang inkludiert. Sie können ein Universal-USB-Ladegerät verwenden, um das Gerät aufzuladen, z. B. Ihr Telefon oder ein Pad-Ladegerät ( 5V 2A wird empfohlen ). Zu Hause: 1.Schließen Sie das USB-Kabel an einen beliebigen USB-Wandadapter an (5V 2A oben, nicht enthalten).
- Page 15 Starten Sie das Auto Hinweis: » Das Produkt ist nur für 12V Fahrzeuge geeignet. » Stellen Sie sicher, dass 3 bis 4 Anzeigeleuchten leuchten( der Batterieladestand liegt über 50%),bevor Sie damit Ihr Fahrzeug starten. Step1: Stecken Sie den Stecker der Smart Battery Clamp vollstandig in den Starthilfe Wenn die griine und die rote Anzeige der Batterieklemme abwechselnd blinken können Sie mit Sicherheit zum nachsten Schritt Ubergehen.
- Page 16 Step3: Starten Sie das Auto Wenn Sie Ihr Auto nicht starten konnten, mussen Sie die Batterieklemme vom Fahrzeug und vom Starthilfegerat trennen. Warten Sie mindestens 30 Sekunden und versuchen Sie es erneut. Step4: Sobald Ihr Auto gestartet ist, entfernen Sie die Batterieklemme aus der Autobatterie und der Starthilfe innerhalb von 30 Sekunden.
- Page 17 1.Die Starthilfekabel sind verkehrt herum angeschlossen ---- Prüfen Sie, ob die Starthilfekabel an den richtigen Batteriepolen angeschlossen sind Die rote 2.Das Starthilfekabel ist “kurzgeschlossen” LED leuchtet ---- Prüfen Sie, ob die beiden Starthilfekabel einander oder das selbe Stück Metall berühren Die Spannung der Starthilfe ist zu niedrig.
-
Page 18: Entsorgung Der Batterie
8. Überprüfen Sie den Ladestatus des Produktes bitte mindestens alle drei Monate und laden Sie es rechtzeitig auf. Entsorgung der Batterie Die Batterie ist geschlossen und nicht durch den Verbraucher austauschbar. Die Batterie muss gemäß den Richtlinien entsorgt werden, wenn sie keine Ladung mehr hat. - Page 19 Liste de contenu Pinces Intelligentes Booster Batterie BUTURE BR600 User Manual BR800 Car Jump Starter Câble USB vers Type C Manuel utilisateur...
- Page 20 Connaître Votre Produit Bouton ON/OFF Indicateur de batterie Sortie USB 5V / 2.4A Lampe de poche Port de sortie USB Port de sortie EC5 Système de protection de circuit puissant - Pinces intelligentes Pince Rouge(+) Pince Nori(-) Prise "Smart Clamp"...
-
Page 21: Spécifications Techniques
Spécifications techniques Modèle BR800 Capacité de la batterie 12000mAh Courant en pointe 400A Courant de départ 800A Entrée USB C 5V/2A Sortie USB 5V/2.4A Dimensions(L*W*H) 153.5*85.1*27.8mm Fusible de surcharge / décharge Températures d’utilisation -20℃~60℃ / -4℉~140℉ Protection contre le refoulement Protection par fusible contre les courts-circuits Protection contre l'inversion de polarité... - Page 22 Recharger le Démarreur NOTE: Le chargeur mural ou chargeur de voiture n’est pas inclus; vous pouvez utiliser un chargeur USB universel pour recharger l’appareil, comme le chargeur de votre téléphone ou tablette (5V / 2A est suggéré). A la maison: 1.
- Page 23 Pour démarrer votre véhicule Pour relancer la batterie du véhicule, mettez le véhicule en stationnement (point mort si le véhicule a une transmission manuelle) et engagez le frein d'urgence. Localisez la batterie du véhicule et suivez les étapes ci-dessous. Les câbles de saut sont codés par couleur, ROUGE pour POSITIF (+) et NOIR pour NÉGATIF (-).
- Page 24 Cependant, si le voyant rouge est allumé: 1. La pince de batterie peut être connectée à l'envers. Dans ce cas, vous devez déconnecter la pince de batterie du véhicule et le démarreur de secours. 2. Ajustez les pinces pour un contact maximal avec les bornes de la batterie. Etape3: Démarrez le véhicule ISi le véhicule ne démarre pas au premier essai, débranchez le démarreur de la...
- Page 25 Si l’une des situations suivantes se produit le clamp se retrouve en mode protection LED INDICATEUR SITUATION La LED verte Prêt à travailler rouge clignote La LED verte Statut de travailler toujours allumé 1. La pince de la batterie est connectée à l’envers ---- verifiez la pince La LED rouge 2.
-
Page 26: Mise Au Rebut De La Batterie
3. N'utilisez pas le produit dans des atmosphères explosives, par exemple en présence de liquide, gaz ou poussières inflammables. 4. Ne modifiez ni ne démontez le produit. 5. En cas de fuite de batterie, apportez-la à votre centre de recyclage de batterie local pour l'élimination, n'essayez pas de l'utiliser. - Page 27 Elenco degli imballaggi Morsetti smart Avviatore Batteria BUTURE BR800 User Manual BR800 Car Jump Starter Cavo da USB a cavo di tipo C Manuale dell'utente...
- Page 28 Conoscere il vostro prodotto Pulsante ON/OFF Indicatore della batteria Uscita USB 5V / 2.4A Torcia elettrica Ingresso di tipo C Porta di uscita EC5 Potente sistema di protezione dei circuiti: morsetti intelligenti Morsetti rossi(+) Morsetti neri(-) Mandrino intelligente...
-
Page 29: Operazione
Specific tecniche Modello BR800 Capacità della batteria 12000mAh Corrente di picco 400A Corrente di avvio 800A Ingresso USB C 5V/2A Uscita USB 5V/2.4A Dimensioni (L*W*H) 153.5*85.1*27.8mm Fusibile di sovraccarico / scarica Temperatura di funzionamento -20℃~60℃ / -4℉~140℉ Protezione contro il riflusso Protezione da cortocircuito con fusibile Protezione contro l'inversione di polarità... - Page 30 Ricaricare l’avviatore batteria NOTA: Il caricabatterie da muro o da auto non è incluso nella confezione, è possibile utilizzare un caricabatterie universale USB per ricaricare l'unità, come ad esempio il telefono o il caricabatterie per iPad (si consiglia 5V / 2A). A casa: 1.
- Page 31 Carica i tuoi dispositivi dall'uscita USB Utilizzare il cavo USB originale fornito con il dispositivo dal produttore e collegarlo a una delle porte di uscita USB. È possibile caricare il telefono o il tablet tramite l'uscita USB a 5 V / 2,4 A. Premere una volta il pulsante di accensione per iniziare a caricare il dispositivo.
- Page 32 Fase 2: Collegare il morsetto rosso all'elettrodo positivo (+) della batteria dell'auto e il morsetto nero al negativo (-). Se l'indicatore luminoso del morsetto intelligente è verde fisso, è possibile passare alla fase successiva. Tuttavia, se la spia rossa è accesa: 1.
- Page 33 dell'auto e l'avviatore auto entro 30 secondi. In una qualsiasi delle seguenti situazioni, lo smart clamp attiva la protezione: Indicatore a LED Situazioni Il led rosso / verde Pronto a lavorare lampeggerà Il Led verde è Stato del lavoro acceso fisso 1.Il morsetto della batteria è...
-
Page 34: Smaltimento Della Batteria
Avvertenze: 1.quando si avvia un veicolo, assicurarsi che la spina blu sia saldamente inserita nella presa di avviamento di emergenza del dispositivo di avviamento di emergenza. 2. Non lasciare questo prodotto in acqua. 3. Non utilizzare il prodotto in atmosfere esplosive, come in presenza di liquidi, gas o polveri infiammabili. -
Page 35: Contenido Del Paquete
Contenido del Paquete Abrazaderas Inteligentes BUTURE BR800 Arrancador de coche User Manual BR800 Car Jump Starter USB tipo C / USB todo en Manual de usuario un cable... - Page 36 Detalles de producto Botón ON/OFF Luces indicadoras (Multifuncional) de carga Linterna Puerto de Salida USB 5V / 2.4A Entrada USB C Puerto de arrancar Sistema de protección de alta corriente-abrazaderas de arranque Pinza inteligente roja (+) Pinza inteligente negra (-) Conector de las pinzas inteligentes...
-
Page 37: Especificaciones Técnicas
Especificaciones técnicas Modelo BR800 Capacidad 12000mAh Corriente de arranque 400A Corriente pico 800A Entrada USB C 5V/2A Puerto de Salida USB 5V/2.4A Dimensiones(L*W*H) 153.5*85.1*27.8mm Protección contra sobredescarga High-temperature protection -20℃~60℃ / -4℉~140℉ Protección de carga de vuelta Proteccion contra cortocircuitos Protección de conexión inversa... - Page 38 Recargue el arrancador NOTA: El cargador de pared o el cargador de coche no se incluyen en el paquete, puede utilizar un cargador universal USB para recargar la unidad, como el cargador del teléfono o del pad (se sugiere de 2A). En Casa: 1.Enchufe el cable USB en cualquier adaptador de pared USB (no incluido).
- Page 39 Arrancar su vehículo Nota: Este producto es solo para vehículos de 12V Verifique que 3 o 4 luces indicadores estén encendidas (el nivel de la batería esté por encima del 50%) antes de usarlo para arrancar su automóvil. Paso 1: Inserte el enchufe de la abrazadera de bateria inteligente por completo en el arranca dor de coche.
- Page 40 Paso 4: Una vez que haya arrancado su automovil, retire la abrazadera de la bateria del automévil y el arrancador en 30segundos. Bajo cualquiera de las siguientes situaciones, la abrazadera inteligente enciende el modo de protección: Indicador LED Situación El LED rojo y verde Listo para trabajar parpadean La luz verde está...
-
Page 41: Indicaciones De Seguridad
Proteccién de vuelta de carga, el voltaje de la bateria del coche es La luz LED rojo mayor a 12,6v. parpadea lentamente ----No necesita el arrancador de coche, la bateria del coche es suficiente para arrancar su vehículo El voltaje del arrancador de coche es muy bajo La luz LED roja parpadea rapido ----Intente cambiar la fuente de alimentacion o cargarlo... - Page 42 Contáctenos Para cualquier consulta o comentario sobre nuestros productos, envie un correo electrénico ,y le responderemos lo antes posible E-Mail: support@ibuture.com...
- Page 43 ケージ User Manual BR800 Car Jump Starter...
- Page 44 の 電 スイッ バッテリーインジ ケーター ラッ ライ ト 5 /2.4 ート - 入 ート ジャンプスタート ート な 保 ステ ースマートクランプ 赤いスマートクランプのクリ ップ + いスマートクランプのクリ ップ - スマートクランプのプラグ...
- Page 45 品 BR800 12000mAh 400A 800A 5V/2A 5V/2.4A 153.5*85.1*27.8mm -20℃~60℃ / -4℉~140℉ 説明 電 量インジケーターライ ト 電 タンを して、 ジャンプスターターの電 量を確 します。 インジケーターラ イ トは25 の電 量を し、 つのインジケーターライ トは 100 電 量を します。...
- Page 46 の 充電 や車の充電 を まれていま 。 電 などの 用な充電 を使用 してジャンプスターターに充電してください。 ( 5 /2 の充電 を ) の ケー を 充電 に接続します。 ( ッケージに まれていま ) 。 2.ジャンプスターターに ケー ( 属) を接続します。 の の 充電 ( まれていま ) を 用可 な12 ケッ...
- Page 47 をジ ンプスタート 車のバッテリーをジャンプスタートするには、 車が 車の状態で (車に トランス ッ ンがある場 は ートラ の状態) 、 ー をか ます。 車のバッテリーを つ て、 下に されている に ってください。 スマートプラ (+) は赤で、 (-) は で します。 バッテリー ・ 車 の充電 ステ ・ 電 などを する可 性があるた 、 ケー を...
- Page 48 この時、 赤いインジケータライ トが点灯しますと、 下のいく つかの可 性があります。 2.クランプは車のバッテリーによく接続されていなかった。 この場合はクランプを調整 して、 バッテリー端子との接続の部分を最大にしてください。 を 車を します。 車の が した場 は、 車からジャンプスターターを取り外して、 スマートクランプを外してください。 なく と 30秒後に、 1から再 して てください。...
- Page 49 スマートクランプのインジケータから製品の状態を説明 インジケータ状態 説明 赤い/緑のライトが スマートクランプが作業状態に入った 交互に点滅 緑のライトが点灯 ジャンプスターターが作業状態に入った 1.スマートクランプが間違えて接続されている 2.スマートクランプは短絡/内部短絡した ---- つのクランプを接続しない、そして同じ金属に接続しないことを 赤いライトが点灯 確保してください 3.車のバッテリーは内部が短絡した。/車のバッテリーは電圧がゼロ になった ジャンプスターターのバッテリー残量が足りない 赤いライトがゆっくり ----ジャンプスターターに充電下後に使用してください 点滅 スマートクランプの温度が65(+/- 5)度を超えた 赤いライトがはやく ---- 赤いと緑のライトが交互に点滅するまでにクランプを取り外 点滅 してください 90秒長時間接続時、スマートクランプを車のバッテリーから取 緑のライトがゆっくり り外して、再接続してください。 点滅 警告: 1.車をジャンプスタートするまえに、 スマートプラグがジャンプスターターにしっかり挿入 されていることを確保してください。 2.本製品を水中に入れないでください。 3.可燃性の液体 ・ ガス ・ ほこりのある場所など爆発性の環境で本製品を使用しないでくだ さい。...
- Page 50 5.バッテリーの液 れが発 した場 は、 使用しないでください。 りのバッテリーリ イク ンターに で してください。 6.本製品は12 の車での 使用で ます。 ーの 本製品のバッテリーは であり、 し えで ま 。 バッテリーは、 充電で な くなると に する があります。 な充電 は製品の を ます。 は 入 から製品に24 の 保 を します。 製品や保 に い...
Need help?
Do you have a question about the BR800 and is the answer not in the manual?
Questions and answers