Table of Contents
Advertisement
Advertisement
Table of Contents

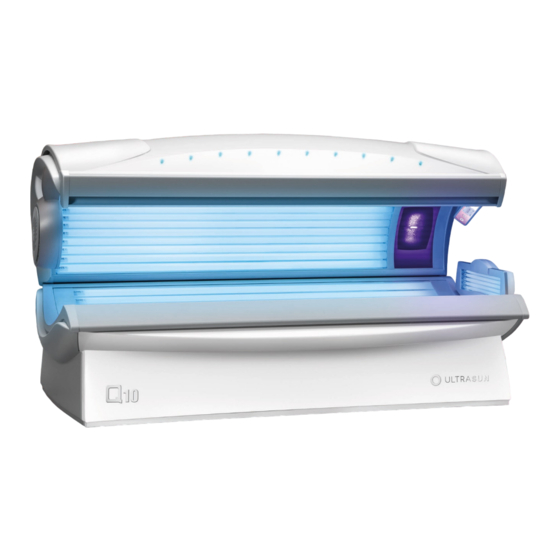
Summary of Contents for ULTRASUN TSU EDITION Q10 MAGNUM POWER
- Page 2 Always use the protective sunglasses provided! • In order to keep your Ultrasun machine in compliance with the standard, you have to make sure to change lamps, components and accessories with original lamps, components and accessories only. Otherwise guarantee will be taken off as well as any responsibility and any liability.
-
Page 3: Table Of Contents
DECLARATION OF CONFORMITY…………………………………………………………………..………………………………..CONTACT INFORMATION AND IDENTIFICATION………………………………………………..…………………………... You have just chosen for a product from the Ultrasun range. You have made an excellent choice. By this purchase you have chosen for a product which has been carefully manufactured from high quality parts which have been tested completely and have been checked fully after manufacturing. -
Page 4: Explaining The Icons
UV light and read the corresponding warning texts. This user manual contains all instructions of your Ultrasun Q10 and contains information about all the possible options which you can have on your Q10. If these options are not relevant to your sunbed, then you can skip the chapters indicated as “option”. -
Page 5: (Dis)Assembly Of The Q10
(Dis)assembly Of The Q10 This sunbed is, once delivered, partially pre-build (Fig. A). For completion of the assembly of the sunbed, the shouldertanner (Fig. F:ST) and the front cover of the bed (Fig. H:11 with 10) need to be assembled. Also the two pipes, which connect the top with the bed, needs to be fixed with the two provided Allen bolts (Fig. - Page 6 Disconnect the power supply cable from the power supply block (PS and Fig. G:X11). Disconnect the plugs (Fig. B: X1, X2) and the network cable from the ballast tray. Unscrew the transit screw on the left side of the ballast tray (Fig. B:4). Now the ballast tray can be removed by pulling it to the front. Remove the 4 screws (Fig.
- Page 7 the 2 pipes of the bed (Fig. D:8). Make sure that the pipes of the top do not slide out of the bed pipes. Attention: You must secure the pipes of the roof/bed with the 2 Allen bolts provided. At the backside of the base, right below each pipe, a little hole is situated where you can secure the Allen bolts in the pipes (Fig.
- Page 8 Colour Function Yellow/green Earth L1 Brown Phase L2 Black Phase L3 Grey Phase Blue Neutral Fig. G Move the ballast trays back into the base of the bed, secure them with 2 screws. Reconnect the plugs X1 and X2 (Fig.B) and the networkcable and reconnect the power supply cable (Fig. G). Fig.
-
Page 9: Connecting The Remote Control
In case larger distances must be bridged or in case disturbances in the pipes arise, the possibility exists to place an Opto-box (Ultrasun article number 3T0480) between the remote control pipes. Attention: Never use this remote control connection for other purposes than... -
Page 10: Audioconnections (Option)
Audioconnections* (Option) At the side panel in the bed compartment the connections for the audiosystem are located. The image on the right displays these connections (Fig. K). During disassembly, all these connections need to be uncoupled. The bass speaker is located on backside of your Q10. In case you want your Q10 to have external audiosignal, connect this to the audio RCA “tulip”... -
Page 11: Voice Guide (Option)
Voice Guide, Wellness Sound And Bluetooth* (Option) In case your Ultrasun Q10 is equipped with the Music Pro audio option, the possibility exists to extend this option and include Voice Guide, Wellness Sound or Bluetooth. In case this option is installed, this is automatically recognized by the IQ Touch Control timer and visible in the control display. - Page 12 RGB Led Controller With IR Distance Control* Your tanning device is equipped with a RGB led controller and a remote control with which you can control the colour settings of the Rainbow-led strip. With the led controller (Fig.1:A) you can set the colour changing, colour jumping, etc.
-
Page 13: Exposure Schedule And Instructions
Exposure Schedule And Instructions Q10 : UV4 MAXIMUM EXPOSURE TIMES (IN RECOMMENDED EXPOSURE SCHEDULE MINUTES) CLASS SKIN TYPES week 1 week 2 week 3 week 4 Sensitive skin Tanning not advised Burns easily and severely, and does not tan. Light skin Burns easily and severely, and tans minimally. - Page 14 • Remove cosmetics well in advance of exposure and do not apply any sunscreens. According to basic standards your Ultrasun tanning equipment needs to be equipped with • original parts and lamps. In every other case the guarantee is taken off as well as any...
-
Page 15: Changing Lamps And Facial Bulbs
ATTENTION: Make sure that the new lamps and facial bulbs are of the same type as the previous ones. In order to keep your Ultrasun Q10 machine in compliance with the standard, you have to make sure to change lamps, components and accessories with original lamps, components and accessories only. -
Page 16: Troubleshooting
• Clean the filters of the facials; Always: • Pay attention to strange noises in the sunbed; • Clean the acrylics after every tanning session; • Consult an authorised service agent in the event your Ultrasun machine has a failure;... -
Page 17: Service Parts And Registration
225 Kg Service Parts And Registration Besides that this Ultrasun Q10 is equipped with high quality parts, there is a possibility that parts get exposed to mechanical erosion. When this happens these parts need to be replaced. In the table “Technical product information”... - Page 18 180. Enter all information as completely as possible in the table on the next page, so that you keep a good overview of the history of your Ultrasun Q10. Failure...
- Page 22 DISCLAIMER Ultrasun pays close attention to the quality of its products. This also applies to the information in this user manual. Ultrasun reserves the right to change the content of this manual at any time. Though Ultrasun strives to always display the correct texts and images in her manuals, errors can occur. We cannot be held responsible for any errors in writing or printing.
-
Page 23: Declaration Of Conformity
DECLARATION OF CONFORMITY Directive 2014/35/EU and 2014/30/EU Ultrasun International BV Granaatstraat 6 7554 TR HENGELO, Holland declare that this Ultrasun Q10 Magnum is in conformity with the actual version of the following normative documents: Applied harmonized Standards: Safety: EN 60335-1...
Need help?
Do you have a question about the TSU EDITION Q10 MAGNUM POWER and is the answer not in the manual?
Questions and answers