Harman Kardon DVD 5 Owner's Manual
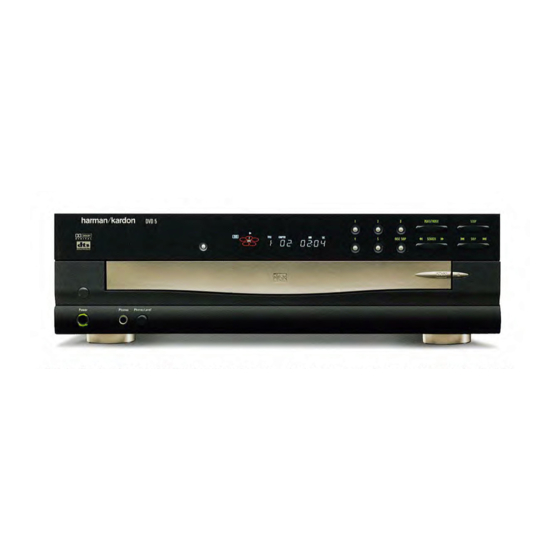
5-disc dvd changer
Hide thumbs
Also See for DVD 5:
- Service manual (108 pages) ,
- Owner's manual (36 pages) ,
- Specifications (2 pages)

Related Manuals for Harman Kardon DVD 5


Summary of Contents for Harman Kardon DVD 5
- Page 1 DVD 5 5-Disc DVD Changer OWNER’S MANUAL RESUME RANDOM REPEAT 1ALL DISC A – B PROG. TITLE CHAPTER TRACK HOUR INTRO DISC ® Power for the digital revolution. ™...
-
Page 2: Table Of Contents
DVD 5 5-Disc DVD Changer 3 Introduction 4 Safety Information 5 DVD Compatibility & Terminology 6 Front Panel Controls 7 Front Panel Information Display 8 Rear Panel Connections 9 Remote Control Functions 11 Installation and Connections 15 Setup Menu Remote Control Operation... -
Page 3: Introduction
To ensure that you are able to take advan- tage of all the power and flexibility the DVD 5 has to offer, we encourage you to review this manual. That small investment in your time will pay major dividends in the enjoyment you will get from proper use of the DVD 5. -
Page 4: Safety Information
DVD 5, which may not be covered by the war- ranty, be certain that all discs are removed from the unit before it is moved. Once the DVD 5 is installed, discs may be left in the unit when it is... -
Page 5: Dvd Compatibility & Terminology
DVD Compatibility & Terminology The DVD 5 is more than a DVD player; it will play the following disc formats: Both 5-inch (12cm) and 3-inch (8cm) discs CD audio discs DTS audio discs CD-RW audio discs DVD movie discs However, it will NOT play the following: DVD discs with a Region Code other than the one the player is set for. -
Page 6: Front Panel Controls
Disc Skip Headphone Jack Search Forward/Reverse Master Power Switch: Press this switch to apply power to the DVD 5. When the unit is first turned on, the Status Indicator will turn green. Once the unit has been turned on with this switch, it may be operated from either the front panel or remote control. -
Page 7: Front Panel Information Display
Disc-Number Indicators: When the DVD 5 has sensed that a disc is loaded in one or more of the tray positions, the number inside the corresponding disc icon will illuminate. The disc position that is currently playing will flash. -
Page 8: Rear Panel Connections
(IR) input jack of another compatible Harman Kardon remote controlled product to have the built-in Remote Sensor on the DVD 5 provide IR signals to other compatible products. • Remote Control Input: Connect the out- put of a remote infrared sensor, or the remote control output of another compatible Harman Kardon product, to this jack. -
Page 9: Remote Control Functions
Power-On Button: Press this button to turn the DVD 5 on. Note that in order for this control to function, the Front Panel Main Power Switch must first be pressed in, so that the unit is in the Standby mode. - Page 10 Remote Control Functions Navigation Buttons: Press these buttons to change or select an item from the DVD 5’s Status Banner or in the on-screen menu displayed by a DVD disc. Return Button: When viewing the menu display from a DVD disc, press this button to return to the previous menu screen.
-
Page 11: Installation And Connections
In addition to the safety considerations outlined on page 4, it is also recommended that the DVD 5 not be placed in a location that is sub- ject to direct sunlight or extreme heat or cold, as these conditions may damage the discs used in the player, or the player itself. - Page 12 Do not connect any of the video outputs of the DVD 5 through a VCR. Due to the use of Macrovision encoding on most DVD discs, connections through the circuitry of a VCR will distort the picture so that it will become unwatchable.
- Page 13 This installation starts with step Connect the Composite Video Output ¢ on the DVD 5 to a video input on your tele- vision. Note that composite video connections typically have a yellow center ring for easy identification.
- Page 14 A/V receiver or surround processor. Connect the Composite Video Output ¢ on the DVD 5 to a video input on your receiver or processor. Note that composite video connections typically have a yellow center ring for easy identification.
-
Page 15: Setup Menu
Before using the DVD 5 for the first time, make certain that the unit is properly connected to any audio/video components it will be used with, as described on the previous pages. -
Page 16: Audio Language Selection
Setup Menu Figure 1 To navigate through the settings on the screen, use the Navigation Buttons scroll up or down through the list of settings or the list of options. Press the / Navigation Buttons to move back and forth between the list of settings and the list of options for those settings. -
Page 17: Menu Language Selection
Ratings Selection and Password Control The DVD 5 enables you to control the discs that are viewed by setting a ratings level. When a disc that’s ready to play has a rating level greater than the default, it will not play. To fur-... - Page 18 When all four numbers have been repeated, press the Enter Button to set the password in the DVD 5’s memory. If the two passwords do not agree, an “Incorrect Password” message will appear to ask you to try entering the number again.
-
Page 19: Aspect Ratio
The DVD 5 will play either type of disc, and you may select a default that tells which way to present the image when there is a choice. -
Page 20: Dynamic Range Setting
Although the DVD 5 will play all of these disc types, this set- ting creates a default that tells which way to present the soundtracks when there is a choice. -
Page 21: Playback Basics
Playback Basics Loading Discs To load discs in the DVD 5, first make certain that the unit is turned on by pressing the Standby Switch so that the Status Indicator turns green. Next, press the Open/Close Button until the Disc Tray opens. - Page 22 Playback Basics Basic playback with the DVD 5 involves func- tions similar to those you may be familiar with for conventional CD players or changers: Turn the unit on by pressing in the Master Power Switch , if it has not already been engaged.
-
Page 23: Dvd Playback
This feature is out of the control of the DVD 5, as it is set by the disc’s internal programming. IMPORTANT NOTES ON DVD PLAYBACK The DVD 5 is capable of all the features and options covered by the DVD standards. -
Page 24: Using The On-Screen Menu Bar For Dvd Playback
DVD Playback Using the On-Screen Menu Bar for DVD Playback The DVD 5 is equipped with a powerful on- screen display system that serves the dual pur- pose of showing you the current status of the DVD 5 while enabling quick and easy changes to settings and functions. -
Page 25: Changing Camera Angles
Note that these functions are controlled by information programmed within the disc, and are outside of the control of the DVD 5. Changing the Subtitle Language DVD discs may contain a variety of subtitles. In... -
Page 26: Cd Playback
CD Playback Using the On-Screen Menu Bar for CD Playback The DVD 5 allows you to take advantage of the on-screen Menu Bar even when playing CDs. The use of this graphical display makes it easy to select CD Functions. -
Page 27: Programmed Play
Programmed Play The DVD 5 is equipped with a wide range of programmed play functions that enable you to have the unit select or repeat tracks for you, or you may program a specific order for discs and tracks to play. - Page 28 To program the discs in the DVD 5 for playback, follow these steps: 1. Press the Program Button on the remote.
-
Page 29: Bookmarks
Programmed Play Bookmarks Bookmarks are a feature of the DVD 5 that allows you to mark up to nine different points on a disc and to quickly return to those points later. The Bookmarks feature works on both DVD and CD discs. -
Page 30: Dvd Language Codes
DVD Language Codes The availability of specific languages for the main audio track or subtitles is dependent on the choices made by a disc’s producer. You should always consult the disc’s jacket for information on languages for any disc. In the case of some languages, you may be required to enter a code from the list below to access that language. -
Page 31: Troubleshooting Guide
Troubleshooting Guide TROUBLESHOOTING GUIDE SYMPTOM POSSIBLE CAUSE Unit does not turn on • Main Power Switch turned Off • No AC power Disc does not play • Disc loaded improperly • Incorrect disc type • Invalid Region Code • Rating is above parental preset No picture •... -
Page 32: Technical Specifications
All specifications subject to change without notice. Harman Kardon is a registered trademark, and Power for the digital revolution is a trademark, of Harman Kardon, Inc. Manufactured under license from Dolby Laboratories. “Dolby,” “Pro Logic,” “AC-3” and the Double-D symbol are trademarks of Dolby Laboratories. Confidential Unpublished Works. © 1992-2000 Dolby Laboratories, Inc.
Need help?
Do you have a question about the DVD 5 and is the answer not in the manual?
Questions and answers