Table of Contents
Advertisement
Advertisement
Table of Contents

Related Manuals for Harman Kardon DVD 38


Summary of Contents for Harman Kardon DVD 38
- Page 1 DVD 38 DV D AUDIO/VIDEO PLAYER WITH HDMI ™...
-
Page 2: Safety Information
SAFETY INFORMATION 1. Read Instructions. All the safety and operating instruc- tions should be read before the product is operated. 2. Retain Instructions. The safety and operating instruc- tions should be retained for future reference. 3. Heed Warnings. All warnings on the product and in the operating instructions should be adhered to. -
Page 3: Important Safety Information
AC outlet. NOTE: To avoid damage to the DVD 38 that may not be covered by the warranty, be certain that the disc is removed from the unit before it is moved. Once the DVD 38 is installed, a disc may be left in the unit when it is turned off, but the unit should NEVER be moved with a disc left in the disc tray. - Page 4 STAPLE INVOICE HERE...
-
Page 5: Table Of Contents
Analog Video Remote IR Input and Output INSTALLATION Step One – Connect the DVD 38 to Other Components Connecting the DVD 38 Directly to a Television Connecting the DVD 38 to an Audio/Video Receiver Step Two – Plug In AC Power Step Three –... -
Page 6: Introduction
This player is designed only for playback of discs with Region Code 1, or for discs that do not contain Region Code information. If there is any other Region Code on a disc, that disc will not play in the DVD 38. -
Page 7: Disc Compatibility
Due to differences in the authoring of certain discs, it is possible that some discs may include features that are not compatible with the DVD 38. Similarly, although the DVD 38 is capable of a wide range of features, not all discs include every capability of the DVD system. -
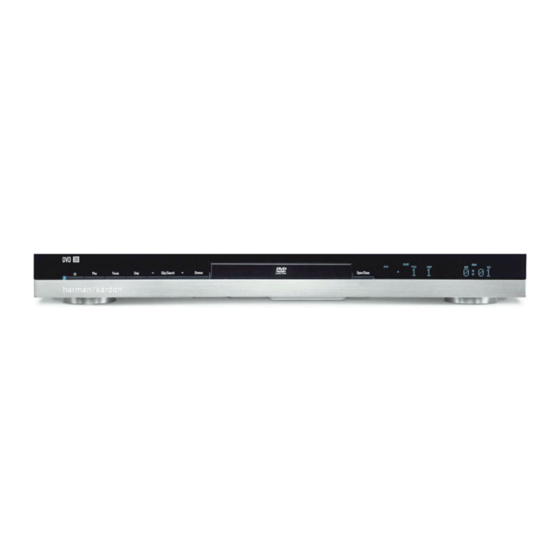
Page 8: Front-Panel Controls
DVD 38 is plugged into AC power, the LED turns amber to indicate that the DVD 38 is in Standby mode (ready to be turned on). When the DVD 38 is turned on (by pressing the Standby/On Switch), the LED turns blue. - Page 9 FRONT-PANEL CONTROLS...
-
Page 10: Front-Panel Information Display
(1/2x, 1/4x, 1/8x or 1/16x). ›› When the DVD 38 is in the Fast Search Play mode, two of these indicators will light to show that the unit is in a Fast Play mode. The on-screen banner display indicates the selected speed (2x, 4x, 8x, 20x or 100x). -
Page 11: Rear-Panel Connections
DVD 38 as a source device for a multiroom system or if you wish to make analog recordings, as it is not possible to make digital recordings of most DVDs. - Page 12 REAR-PANEL CONNECTIONS...
-
Page 13: Numeric Keys
Standby mode. Open/Close: Press this button to open or close the disc drawer. If the DVD 38 is in Standby mode, pressing this button will turn it on. Audio: Press this button while a DVD is playing to display the current audio track information and to select another audio format. - Page 14 REMOTE CONTROL FUNCTIONS IR Transmitter Lens Power On Open/Close Audio Clear Playlist Repeat A-B Repeat Random Info System Setup Previous Step/Skip Search/Slow Reverse Play Angle Pause /‹/ › Navigation ⁄ ⁄ Backlight Video Off Audio Mode Power Off Subtitle Title Numeric Keys Status Disc Menu...
-
Page 15: Audio Mode
HD Mode: Each time the DVD 38 is turned on while connected via HDMI to a video display or other device, the DVD 38 and the other device exchange information about the other device’s video resolution capabilities. The DVD 38 sets the resolution of the HDMI Output to match the video display. -
Page 16: Introduction To Home Theater
“surround sound,” immersing you in the musical or film presentation for increased realism. The receiver used with the DVD 38 may have up to seven speakers connected to it (plus a subwoofer). When more than two speakers are used, it is called a multichannel system •... -
Page 17: Connections
2. In a multiroom system. Many receivers and processors require sources used in multiroom systems to output analog audio signals. 3. When connecting the DVD 38 directly to a TV. The TV may not have digital audio inputs. 4. When playing high-resolution 96kHz PCM audio discs. If your receiver is not capable of processing 96kHz audio, you may need to use the analog audio connection. -
Page 18: Video Connections
The DVD 38 is capable of outputting up to 720p or 1080i video and 2-channel PCM or up to 5.1-channel Dolby Digital or DTS audio through its HDMI connection. The DVD 38 is in compliance with HDCP (High-Definition Copy Protection) and the video display must also be HDCP-compliant to be used with the DVD 38’s HDMI output. -
Page 19: Remote Ir Input And Output
When the DVD 38 is placed in such a way that aiming the remote at the front-panel IR sensor is difficult, such as inside a cabinet or facing away from the listener, you may connect an external IR receiver, such as the optional Harman Kardon HE 1000, to the Remote IR Input jack. -
Page 20: Installation
DVD 38. Therefore, it is best to place the DVD 38 on its own shelf instead of stacking it directly on top of another component. -
Page 21: Step Two - Plug In Ac Power
If your receiver is equipped with digital audio inputs, then select either a coaxial or optical digital audio input, and connect it to the corresponding output on the DVD 38. See Figure 12. This step also applies to a receiver that is only capable of HDMI switching and cannot process the audio portion of the HDMI signal. -
Page 22: Step Four - Turn On The Dvd 38
NOTE: When HDMI connections are used, turn on your television or video display before turning on the receiver and DVD 38. There are several ways in which the DVD 38 may be turned on from Standby mode. a) Press the Standby/On Switch on the front panel or remote. -
Page 23: Initial Setup
S-video and component video signals simultaneously. If you have used either of these connections and have no picture, the likely problem is that the DVD 38 is set to output only the other type of video. Temporarily connect the DVD 38’s Composite Video Output to the corresponding input on your TV. -
Page 24: Step One - System Setup
Parental Control setting. A set of underscore lines will be shown (_ _ _ _). Use the Numeric Keys on the remote to enter the code, and the DVD 38 will automatically proceed to the next setting line. When you have made all desired adjustments to the current submenu, use the Navigation buttons to highlight the icon for the next submenu, and press the Enter Button to switch to that submenu. -
Page 25: Step Two - Audio Setup
“burned” into some display devices. This is particularly important for plasma displays and some CRT devices. Set Screen Saver to ON so that the DVD 38 will run the screen saver when no action has been detected for either one or five minutes. Press a desired command key on the front panel or remote to “wake”... - Page 26 Dolby Digital or DTS format. • PCM: At this setting the DVD 38 outputs a standard PCM signal for decoding by receivers or processors that are not capable of decoding a Dolby Digital or DTS bitstream.
-
Page 27: Step Three - Audio Adjustments
• Stereo: If your receiver or processor is not equipped with 6-channel inputs at all, or if you wish to use the DVD 38 as the source for a multiroom system, to connect it directly to your TV or for recording,... -
Page 28: Step Four - Video Setup
Although ideally you placed all of your speakers in a circle equidistant from the listening position, we recognize that it isn’t always practical to do so. This setting enables the DVD 38 to delay the signal from some speakers by up to 15 mS to compensate. -
Page 29: Step Five - Video Adjustments
Changes made here remain active until the DVD 38 or the display is turned off. When either is turned off, and then on again, the DVD 38 will revert to the default setting transmitted by the display. -
Page 30: Contrast Adjustment
Edges, setting backed off from the maximum setting. Reduce the sharpness setting on your television, and the Edges setting on the DVD 38 video adjustments menu if necessary, to minimize the appearance of any white lines between the bars in the gray scale portion of the test screen. - Page 31 If a DVD is loaded, the splash screen will appear. If any other type of disc is loaded, the Player Information menu will appear. You are now ready to begin enjoying the finest in home entertainment with your DVD 38 DVD player!
-
Page 32: Operation
Although you may previously have owned a CD or DVD player, we recommend you take a few minutes to learn the specifics of operating the DVD 38. You also may want to take a moment now to review the glossary terms in the back of the manual to familiarize yourself with the terminology used to describe DVD players. - Page 33 • The DVD 38 will only play discs that are coded for Region 1 or discs that are open to being played in all regions (Region Code “0”). Discs that contain a Region Code of 2, 3, 4, 5 or 6 (as noted by a number inside a world map logo on the disc’s jacket) will not play.
-
Page 34: Playback Control
Video Off Button. Press the button again to restore the video output. The V-Off Indicator will light in red to remind you that the video displays have been turned off. The video output will automatically be restored each time the DVD 38 is turned on. -
Page 35: Dvd Playback
This feature is out of the control of the DVD 38, as it is set by the disc’s internal programming. -
Page 36: On-Screen Status Display
• Video Standard: The disc’s format is shown here. For Region 1 players, this will normally be NTSC, although some DVDs that are open region (playable in all regions) may be in the PAL format. The DVD 38 will convert the video to the NTSC format used by your television. - Page 37 This is a function of how the disc was authored, and does not reflect a problem with the DVD 38. Chapters and Tracks To select a chapter for DVD-Video discs or a track for DVD-Audio discs, first press the Status Button so that the Status Display appears.
-
Page 38: A-B Repeat Play
Repeat Play The DVD 38 offers several repeat functions that allow you to take advantage of the capacity of the unit for unattended playback. Press the Repeat button once to display the Repeat Message on-screen. See Figure 43. -
Page 39: Cd Playback
CD Playback Many functions of the DVD 38 operate the same way for CD playback as for DVD play; however, there are some important differences. When a CD is loaded, the DVD 38 will automatically display the Player Information menu. See Figure 46. Status banners are not available dur- ing CD play. -
Page 40: Random Play
Repeat Play The DVD 38 offers several repeat functions for CDs that allow you to take advantage of the capacity of the unit for unattended playback: • Repeat Program: Repeats the current playlist if Programmed Order has been selected at the Playlist setting. -
Page 41: Mp3, Windows Media And Jpeg Playback
CD format. MP3 is also used to download audio files to computers for home use. In order to play an MP3 file on the DVD 38, the disc may not contain any encryption or coding that prevents playback. Always be certain that you have, or have purchased, the proper rights or authorization before creating a CD-ROM with MP3 or any other codec format. -
Page 42: Jpeg Playback
• When a multisession disc with both standard CD audio and MP3 or WMA content is in use, the DVD 38 will play only the CD audio sections of the disc. Track numbers will be visible in the display, but the files will not be decoded. -
Page 43: Vcd Playback
CD technology, the playback functions for a VCD disc are similar to CD. To play a VCD disc, place it in the DVD 38 as you would do with any other CD or DVD disc. The unit takes a few seconds to read the disc’s contents;... -
Page 44: Programming A Playlist
OPERATION Programming a Playlist Programmed play allows you to select tracks on a CD for playback in a specific order, skipping tracks you don’t wish to hear and reordering other tracks to suit your tastes. To program a disc for playback, follow these steps: 1. -
Page 45: Troubleshooting Guide
• Use Region 1 or Open Region (0) disc only. • Check all audio connections. • Check digital audio settings on DVD 38 and on receiver. • There is no audio playback on DVD discs during fast • Change PCM Limit setting in Audio Setup menu to 48kHz. - Page 46 Cannot program playlist In addition to the items shown above, additional information on troubleshooting possible problems with your DVD 38, or installation-related issues, may be found in the list of "Frequently Asked Questions" which is located in the Product Support section of our Web site at www.harmankardon.com.
-
Page 47: Technical Specifications
Pr: 0.7V p-p/75 ohms Pb: 0.7V p-p/75 ohms Analog Audio Output: 2V RMS (1kHz, 0dB) The DVD 38 is Simplay HD ™ -verified for compatibility via the HDMI connection with other Simplay HD-verified products. Depth measurement includes knobs, buttons and terminal connections. Height measurement includes feet and chassis. -
Page 48: Glossary
HDCP-compliant. Virtually all displays with HDMI inputs are HDCP-compliant, but not all DVI-equipped displays are. If you are using the DVD 38 with an optional HDMI-to-DVI cable or adapter, check the owner’s manual for your display to determine whether it is HDCP-compliant. - Page 49 The resume function is not available for WMA files. For DVDs, CDs, MP3 files, JPEG files, and VCDs with PBC (Playback Control) only, the resume function will be retained even after the DVD 38 has been placed in Standby mode by pressing the Standby/On Switch, but not after the unit has been unplugged from AC power.
-
Page 50: Appendix
APPENDIX Appendix – Default settings and worksheets Table A1 – System Setup Menu Settings Setting Display Language Preferred Subtitle Language Panel Time-Out Status Bar Time-Out Parental Control Disc Recognition PBC Support Screen Saver Show Angle Icon Closed Caption Table A2 – Audio Setup Menu Settings Setting Preferred Audio Language Digital Output... - Page 51 Table A4 – Video Setup Menu Settings Setting Aspect Ratio Video Output Scan Type Video Adjustments HDMI Settings Table A5 – Video Adjustments Menu Settings All settings default to “0”, showing bar ending at midpoint of the graph, except Black Level, which defaults to Full. Setting Brightness Edges...
- Page 52 ® 250 Crossways Park Drive, Woodbury, New York 11797 www.harmankardon.com © 2007 Harman International Industries, Incorporated. All rights reserved. Part No. CQX1A1188Z...
Need help?
Do you have a question about the DVD 38 and is the answer not in the manual?
Questions and answers