Table of Contents

Related Manuals for Kenmore BC3002


Summary of Contents for Kenmore BC3002
- Page 1 Use & Care Guide Manual de Uso y Cuidado Kenmore ® Canister Vacuum Cleaner Aspiradora con tanque Model/Modelo: BC3002 Vacuum Cleaner Help Line: 1-877-531-7321 8:00am-5:00pm EST, M-F www.kenmorefloorcare.com ®...
-
Page 2: Table Of Contents
Help Line at 1-877-531-7321. You will need the complete model and serial numbers when requesting information. Your vacuum cleaner’s model and serial numbers are located on the Model and Serial Number Plate. Use the space below to record the model number and serial number of your new Kenmore vacuum cleaner. Model No.____________________________________________ Serial No. -
Page 3: Vacuum Cleaner Warranty
WITH PROOF OF SALE a defective product will be replaced free of charge. The Kenmore brand is used under license. Direct all claims for warranty service to: 1-877-531-7321. This warranty does not cover filters or belts, which are expendable parts that can wear out from normal use within the warranty period. -
Page 4: Important Safety Instructions
Use your vacuum cleaner only as described Do not use vacuum cleaner to pick up in this guide. Use only with Kenmore flammable or combustible liquids (gasoline, recommended attachments. cleaning fluid, perfumes, etc.), or use in areas where they may be present. -
Page 5: Parts And Features
PARTS AND FEATURES It is important to know your vacuum cleaner’s parts and features to ensure its proper and safe use. Review these before using your vacuum cleaner. REPLACEMENT PARTS t l e 20-53013 Dust Bag (2-pack) 20-53291 Dust Bag (6-pack) 20-53292 t l i 20-86880... - Page 6 CANISTER ON/OFF Button ATTACHMENTS Floor Brush (Stored in Canister) 3-in-1 Combination Tool - 6 -...
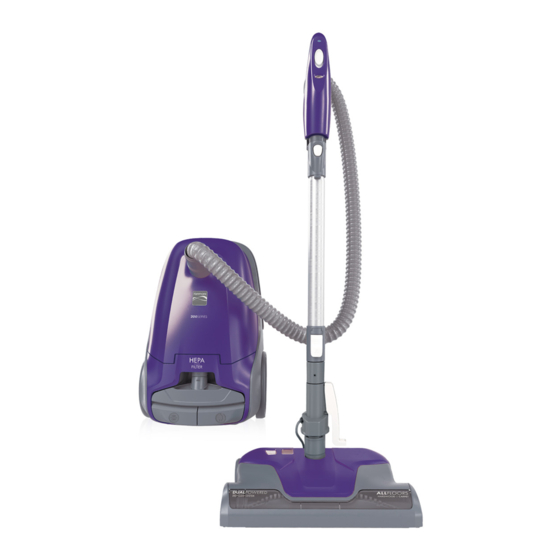
- Page 7 HANDLE & HOSE ASSEMBLY TELESCOPING WAND Wand Release Switch Button Indicator Handle POWERMATE ® Height Adjustment Pedal Height Adjustment Indicator Brushroll Status Indicator - 7 -...
-
Page 8: Assembly Instructions
ASSEMBLY INSTRUCTIONS Before assembling vacuum cleaner, check the PACKING LIST (page 2). Use this list to verify that you have received and identified all the components of your new Kenmore vacuum cleaner. TELESCOPING WAND... -
Page 9: Operating Instructions
CANISTER (page 17) for instructions. 3. Check to see that the motor safety filter is 1. Open the canister hood. properly installed. See MOTOR SAFETY 2. Check to see that the dust bag isproperly FILTER CLEANING (page 18) for instructions. installed. - Page 10 1. Pull cord out of canister to desired length. 4. Select a pile height setting by pressing The cord will not rewind until the cord rewind the height adjustment pedal on the rear of button is pushed. the PowerMate ® .
- Page 11 SUGGESTED PILE HEIGHT SETTINGS CAUTION Attention: Refer to your carpet DO NOT leave the PowerMate running in ® manufacturers cleaning recommendations. one spot for any length of time. Damage to carpet may occur. Some more delicate carpets may require that they be vacuumed with the PowerMate ®...
- Page 12 EDGE CLEANER The PowerMate must be in the flat position ® for storage attachment. Use the handle Active brush edge release pedal to place it in this position. cleaners are on both The wand will slip out of the slot as it is sides of the lifted up for use and will slide into the slot PowerMate .
- Page 13 Use in dusting brush mode for cleaning loose 2. Slide attachments onto handle as needed. surfaces such as drapes. See ATTACHMENT The floor brush will click into place. USE TABLE (page 14). See ATTACHMENT USE TABLE (page 14). Dusting Brush Release Button Press the release button to remove the brush...
- Page 14 ATTACHMENT USE TABLE CLEANING AREA ATTACHMENT Furniture 1 Cushions 1 Drapes 1 Stairs Floors Floors/Rugs Walls Floor Brush PowerMate ® Crevice Tool Dusting Brush Upholstery Brush 1 . Always clean attachments before using on fabrics. 2. The 2-way On/Off switch should be in the FLOOR position. - 14 -...
-
Page 15: Performance/Safety Features
Also check and clean or If the problem persists, have the vacuum replace any clogged filters. Wait cleaner serviced by a Kenmore or other approximately fifty (50) minutes and plug qualified service agent. the vacuum cleaner in and turn back on to see if the motor protector has reset. -
Page 16: Canister Care
CANISTER CARE REMOVING CLOGS The vacuum cleaner creates suction that picks up dirt. Rapidly moving air carries the dirt to the dust bag through the airflow passages. The dust bag lets the air pass through, while it traps the dirt. For best cleaning results, keep the airflow passage open. - Page 17 DUST BAG CHANGING For best cleaning results, the dust bag should NOTE: DO NOT bend or crease the middle of the cardboard when installing the bag be changed when the suction is weak or the into the bag mount slots. airflow is blocked.
- Page 18 MOTOR SAFETY FILTER CLEANING 2. Lift the plastic retainer and pull out the WARNING motor safety filter as shown. Electrical Shock Hazard Plastic Turn off and unplug vacuum cleaner from Retainer electrical outlet. Do not operate the vacuum cleaner without the motor safety filter.
- Page 19 EXHAUST FILTER CHANGING 4. Insert the new exhaust filter cartridge WARNING into the filter cover with the rubber seal upward. Fire and/or Electrical Shock Hazard Do not operate with a clogged exhaust filter or without the exhaust filter installed. Do not operate without filter cover installed.
-
Page 20: Powermate ® Care
POWERMATE CARE ® Always follow all safety precautions when performing maintenance to the PowerMate ® WARNING Electrical Shock Or Personal Injury Hazard Always turn off and unplug vacuum cleaner before performing maintenance to the vacuum cleaner. Failure to do so could result in electrical shock or personal injury from vacuum cleaner suddenly starting. - Page 21 TO REPLACE BELT TO CLEAN BRUSHROLL: NOTE: In order to keep cleaning efficiency 1. Install new belt over motor shaft, then high and to prevent damage to your vacu- over belt path. um cleaner, the brushroll must be cleaned NOTE: See REPLACEMENT PARTS for part every time the belt is changed.
- Page 22 BRUSHROLL SERVICING TO REPLACE BRUSHROLL ASSEMBLY WARNING 1. Remove the floor brush from the Electrical Shock Or Personal Injury PowerMate . ® Hazard 2. Remove PowerMate cover, belt and ® Always turn off and unplug vacuum brushroll assembly. See “To Remove Belt” in cleaner before performing maintenance BELT CHANGING AND BRUSHROLL to the vacuum cleaner.
-
Page 23: Troubleshooting
TROUBLESHOOTING Review this table to find do-it-yourself solutions for minor performance problems. Any other service needed should be performed by a Kenmore or other qualified service agent. WARNING Always turn off and unplug vacuum cleaner before performing maintenance to the vacuum cleaner. - Page 24 PROBLEM POSSIBLE CAUSE POSSIBLE SOLUTION Remove any items that may be caught or Tripped overload protector in jammed, then re-start. If vacuum cleaner PowerMate ® . See OVERLOAD starts and stops again, clean brushroll and PROTECTOR (page 15). end caps, then re-start. Handle switch set to FLOOR Slide handle switch to CARPET position to position.
- Page 25 TABLA DE CONTENIDOS ANTES DE USAR SU NUEVA ASPIRADORA Lea esta guía. Le ayudará a ensamblar y utilizar su nueva aspiradora Kenmore de la manera más efectiva y segura posible. Para obtener más información sobre el cuidado y uso de la aspiradora, llame a la línea de ayuda al 1-877-531-7321.
- Page 26 PRUEBA DE VENTA. Si el producto no puede repararse, se reemplazará porotro sin costo. La marca Kenmore se utiliza bajo licencia. Dirija sus reclamaciones de garantía a: 1-877-531-7321. Esta garantía no cubre los filtros ni las correas, ya que son piezas desechables que pueden desgastarse con el uso normal dentro del periodo de la garantía.
- Page 27 No utilice la aspiradora sin el filtro de escape a un centro de servicio de Kenmore o puerta del filtro en su lugar. autorizado.
- Page 28 PIEZAS Y CARACTERÍSTICAS Es importante conocer las piezas y características de su aspiradora para así garantizar su uso adecuado y seguro. Revise estas indicaciones antes de usar su aspiradora. Manilla y conjunto de piezas de la manguera Contenedor PIEZAS DE REPUESTO Pieza N°...
- Page 29 CONTENEDOR Cable De Corriente Botón De ON/OFF Filtro De Seguridad Del Motor Puerto De La Manguera Bolsa Para Tapa Del Contenedor Polvo (Bolsa Para Polvo Y Seguro De Filtro De Seguridad La Tapa Del Motor Dentro) ACCESORIOS CEPILLO PARA PISO HERRAMIENTA (ALMACENADO EN COMBINADA 3 EN 1...
- Page 30 VARA MANILLA Y CONJUNTO DE PIEZAS DE LA MANGUERA Interruptor De Encendido Control De Y Apagado De 2 Vías Succión Electrónico Indicador Manilla Botón De Ajuste Del Largo De La Vara Gancho De Vara Almacenamiento Telescópica Parte Giratoria De La Manguera POWERMATE ®...
- Page 31 INSTRUCCIONES DE ARMADO Antes de ensamblar su aspiradora, revise la LISTA DE PIEZAS (página 2). Utilice esta lista para verificar haber recibido e identificado todos los componentes de su nueva aspiradora Kenmore. VARA (TELESCÓPICA) ADVERTENCIA El largo de la vara se Riesgo de descarga eléctrica...
- Page 32 INSTRUCCIONES DE USO PRECAUCIÓN ¡Piezas móviles! Para reducir el riesgo de lesiones personales, NO toque el Rodillo de cepillo mientras la aspiradora esté encendida. Tocar el Rodillo de cepillo mientras está girando puede cortar, golpear o provocar otras lesiones. Siempre apague y desconecte del tomacorriente antes de realizar reparaciones.
- Page 33 3. Baje la vara presionando el pedal de Para encender el motor del equipo PowerMate , deslice el interruptor de la ® LIBERACIÓN DE LA MANILLA. manilla hacia la posición CARPET. El rodillo de cepillo PowerMate comenzará a ® girar. Para usar sólo el motor del contenedor, deslice la manilla hacia la posición FLOOR.
- Page 34 PRECAUCIÓN PRECAUCIÓN NO deje el equipo PowerMate ® funcionando Peligro de daños al producto. en un solo lugar durante ningún periodo Tenga cuidado si el equipo PowerMate ® de tiempo. Podría dañar la alfombra. la vara están en la posición vertical, ya que podrían voltearse fácilmente.
- Page 35 ACCESORIOS PRECAUCIÓN NO fije ni extraiga la manilla o varas mientras la aspiradora esté encendida. Esto podría provocar chispas y dañar los contactos o controles eléctricos. ALMACENAMIENTO DE LOS Use en modo cepillo para limpiar polvo para limpiar superficies holgadas, como cortinas. ACCESORIOS Consulte la TABLA DE USO DE ACCESORIOS (página 14).
- Page 36 2. Deslice los accesorios hacia la manilla según sea necesario. El cepillo de suelo hará clic al encajar. Consulte la TABLA Pedal De DE USO DE ACCESORIOS (página 13). Liberación De La Vara 3. Deslice los accesorios hacia la vara según sea necesario.
- Page 37 El control de succión ubicado en la base de la manilla le permite cambiar el flujo funcionar tras el procedimiento de reinicio de aire que se aspira. descrito, lleve la unidad a reparación en un centro de servicio Kenmore u otro centro calificado. - 14 -...
- Page 38 CUIDADO DEL CONTENEDOR ELIMINACIÓN DE TAPONES La aspiradora crea succión para recoger suciedad. El aire en rápido movimiento transporta la suciedad hacia la bolsa de polvo mediante los pasajes de aire. La bolsa de polvo permite al aire pasar a través de ella y atrapa la suciedad. Para obtener los mejores resultados de limpieza, mantenga el pasaje de aire despejado.
- Page 39 CAMBIO DE LA BOLSA PARA POLVO Para obtener los mejores resultados de NO doble ni pliegue la mitad del cartón al limpieza posibles, la bolsa para polvo debe instalar la bolsa en las ranuras de montaje. cambiarse cuando la succión sea débil o cuando el flujo de aire esté...
- Page 40 LIMPIEZA DEL FILTRO DE SEGURIDAD DEL MOTOR 2. Extraiga el filtro de seguridad del motor ADVERTENCIA como se indica. Riesgo de descarga eléctrica Apague y desconecte la aspiradora del tomacorriente. No utilice la aspiradora sin Pieza De el filtro de seguridad del motor instalado. Retención De Goma Asegúrese de que el filtro esté...
- Page 41 CAMBIO DEL FILTRO DE ESCAPE 4. Inserte el nuevo cartucho en la tapa del ADVERTENCIA filtro con el sello de goma hacia arriba. Riesgo de incendio o descarga eléctrica No utilice el producto con un filtro de escape tapado o sin el filtro de escape instalado.
- Page 42 CUIDADO DEL EQUIPO POWERMATE ® Siga siempre todas las precauciones de seguridad al realizar mantenimiento al equipo PowerMate ® ADVERTENCIA Riesgo de descarga eléctrica o lesiones personales Apague siempre y desconecte la aspiradora antes de realizarle mantenimiento. No hacer esto podría provocar descargas eléctricas o lesiones personales provocadas por un encendido súbito de la aspiradora.
- Page 43 LIMPIEZA DEL RODILLO DE CEPILLO: REINSTALACIÓN DE LA CORREA NOTA: 1. Instale una nueva correa sobre el eje del Para mantener la eficiencia de motor y luego sobre la ruta de la correa. limpieza y evitar daños a su aspiradora, el rodillo de cepillo se debe limpiar cada vez NOTA: Consulte PIEZAS DE REPUESTO para que se cambie la correa.
- Page 44 REPARACIÓN DEL RODILLO DE CEPILLO REEMPLAZO DEL CONJUNTO DE ADVERTENCIA PIEZAS DEL RODILLO DE CEPILLO Riesgo de descarga eléctrica o lesiones 1. Extraiga el cepillo para piso desde el personales equipo PowerMate ® Apague siempre y desconecte la aspiradora 2. Extraiga la tapa del equipo PowerMate ®...
- Page 45 RESOLUCIÓN DE PROBLEMAS Revise esta tabla para encontrar soluciones que pueda aplicar usted mismo a problemas de rendimiento menores. Cualquier otra reparación necesaria deberá ser realizada por Kenmore u otro agente de servicio calificado. ADVERTENCIA Apague siempre y desconecte la aspiradora antes de realizarle mantenimiento. El no seguir estas indicaciones puede provocar lesiones personales o descargas eléctricas.
- Page 46 PROBLEMA POSIBLE CAUSA POSIBLE SOLUCIÓN La aspiradora recoge 1. Ajuste de altura de grosor 1. Ajuste la configuración. equivocado. alfombras movibles o 2. Reduzca la succión girando el 2. La succión es demasiado el equipo PowerMate ® control de succión en la base del potente.
Need help?
Do you have a question about the BC3002 and is the answer not in the manual?
Questions and answers
Missing Floor brush . I need to buy it ….MODEL NO. BC3002. SERIAL NO. 472020 Kenmore