Advertisement
Table of Contents
- 1 Table of Contents
- 2 Before Using Your New Vacuum Cleaner
- 3 Kenmore Vacuum Cleaner Warranty
- 4 Important Safety Instructions
- 5 Parts and Features
- 6 Assembly Instructions
- 7 Operating Instructions
- 8 Performance/Safety Features
- 9 Canister Care
- 10 Powermate ® Care
- 11 Troubleshooting
- Download this manual
Use & Care Guide
Manual de Uso y Cuidado
Kenmore
®
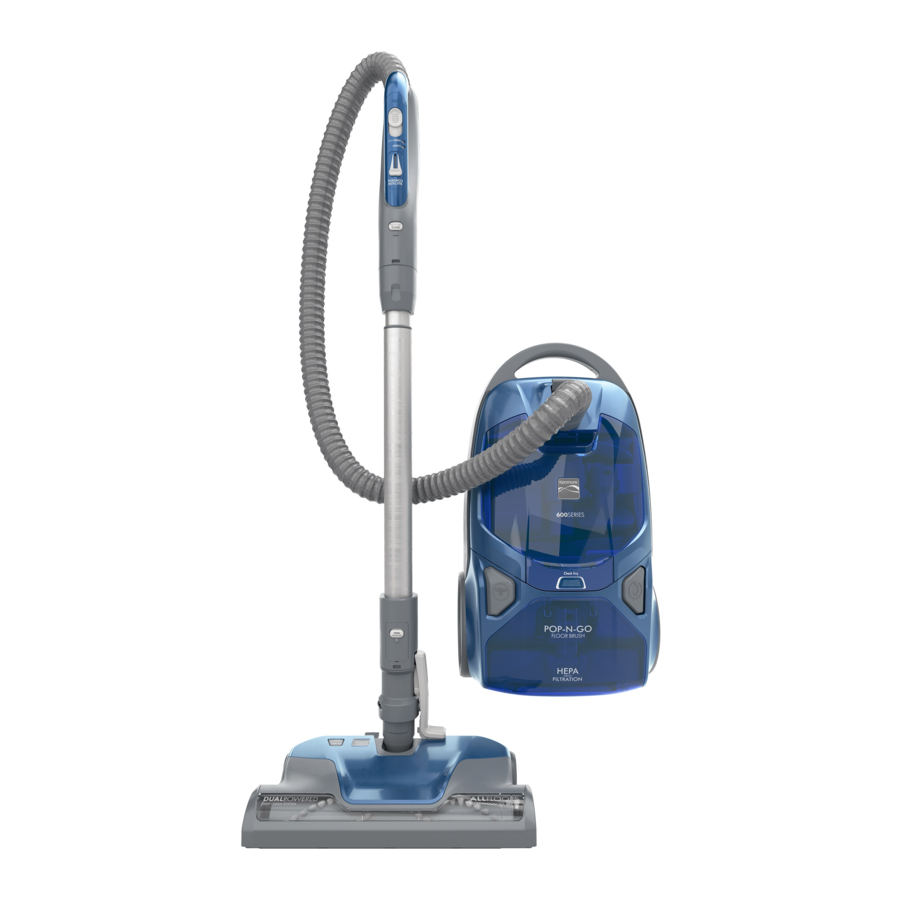
Canister Vacuum Cleaner
Aspiradora con tanque
Model/Modelo: BC4026
Vacuum Cleaner Help Line:
1-877-531-7321
8:00am-5:00pm EST, M-F
www.kenmore.com
Kenmore and the Kenmore logo are registered
trademarks of KCD IP, LLC and/or Transform SR
Brands LLC and are used under license by Cleva
North America, Inc.
All Rights Reserved.
®
Advertisement
Table of Contents

Related Manuals for Kenmore BC4026


Summary of Contents for Kenmore BC4026
- Page 1 Model/Modelo: BC4026 Vacuum Cleaner Help Line: 1-877-531-7321 8:00am-5:00pm EST, M-F www.kenmore.com Kenmore and the Kenmore logo are registered trademarks of KCD IP, LLC and/or Transform SR Brands LLC and are used under license by Cleva North America, Inc. All Rights Reserved.
-
Page 2: Table Of Contents
Kenmore Vacuum Cleaner Warranty ........ -
Page 3: Kenmore Vacuum Cleaner Warranty
WITH PROOF OF SALE a defective product will be replaced free of charge. The Kenmore brand is used under license. Direct all claims for warranty replacement to: Cleva North America, Inc., 1-877-531-7321 This warranty covers ONLY defects in material and workmanship, and will NOT pay for: 1. -
Page 4: Important Safety Instructions
Use your vacuum cleaner only as described Do not put on chairs, tables, etc. Keep on in this guide. Use only with Kenmore floor. recommended attachments. Do not use vacuum cleaner to pick up Disconnect electrical supply before servicing flammable or combustible liquids (gasoline,... -
Page 5: Parts And Features
PARTS AND FEATURES It is important to know your vacuum cleaner’s parts and features to ensure its proper and safe use. Review these before using your vacuum cleaner. Use only AAFA approved replacement dust bags and exhaust filters to maintain AAFA certification. REPLACEMENT PARTS t l e 53013... - Page 6 CANISTER ATTACHMENTS PowerMate™ - 6 -...
- Page 7 HANDLE & HOSE ASSEMBLY TELESCOPING WAND POWERMATE Brushroll Status Indicator - 7 -...
-
Page 8: Assembly Instructions
ASSEMBLY INSTRUCTIONS Before assembling vacuum cleaner, check the PACKING LIST (page 2). Use this list to verify that you have received and identified all the components of your new Kenmore vacuum cleaner. WAND (TELESCOPING) -
Page 9: Operating Instructions
OPERATING INSTRUCTIONS CAUTION Moving parts! To reduce the risk of personal injury, DO NOT touch the brushroll when vacuum cleaner is on. Contacting the brushroll while it is rotating can cut, bruise or cause other injuries. Always turn off and unplug from electrical outlet before servicing. - Page 10 SUGGESTED PILE HEIGHT 3. Lower wand from upright position by SETTINGS pressing on the HANDLE RELEASE pedal. Attention: Refer to your carpet manufacturers cleaning recommendations. Some more delicate carpets may require that they be vacuumed with the PowerMate ® brushroll turned off to prevent carpet damage.
- Page 11 VACUUMING TIPS FOR BEST CLEANING RESULTS SUGGESTED SWEEPING PATTERN SUCTION For best cleaning action, the PowerMate ® CONTROL • Use high power on the should be pushed straight away from you suction control and pulled straight back. At the end of located on the handle.
- Page 12 ATTACHMENTS CAUTION DO NOT attach or remove handle or wands while vacuum cleaner is ON. This could cause sparking and damage the electrical contacts or electronic controls. ATTACHMENT STORAGE This canister is equipped with an on-board storage area for attachments. POP-N-GO FLOOR BRUSH TO REINSTALL: 1.
- Page 13 DUSTING BRUSH, CREVICE TOOL, ATTACHMENTS ON HANDLE & PET POWERMATE NOTE: If the PowerMate is attached, turn ® vacuum cleaner off before removing handle 1. Lift the tool storage cover to open. from wand. 1. Press wand release button and pull up on handle.
- Page 14 ATTACHMENTS ON WAND 3. Slide attachments into wand as needed. All except crevice tool will click into place. See ATTACHMENT USE TABLE (page 14). 1. To remove wand from PowerMate , lock ® wand in upright position. 2. Press wand release pedal with foot and pull the wand straight up and out of PowerMate ®...
-
Page 15: Performance/Safety Features
If the problem persists, have the vacuum protect the vacuum cleaner from cleaner serviced by a Kenmore or other overheating. If a clog prevents the normal qualified service agent. flow of air to the motor, the thermal protector turns the motor off... -
Page 16: Canister Care
CANISTER CARE REMOVING CLOGS The vacuum cleaner creates suction that picks up dirt. Rapidly moving air carries the dirt to the dust bag through the airflow passages. The dust bag lets the air pass through, while it traps the dirt. For best cleaning results, keep the airflow passage open. - Page 17 DUST BAG CHANGING For best cleaning results, the dust bag NOTE: DO NOT bend or crease the middle should be changed often. The CHECK BAG of the cardboard when installing the bag indicator will come on when the bag needs into the bag mount slots.
- Page 18 MOTOR SAFETY FILTER CLEANING 2. Lift the rubber retainer and pull out motor WARNING safety filter as shown. Electrical Shock Hazard Turn off and unplug vacuum cleaner from electrical outlet. Do not operate the vacuum cleaner without the motor safety filter.
- Page 19 EXHAUST FILTER CHANGING 4. Insert the new exhaust filter cartridge into the canister with the rubber seal WARNING towards the canister. The arrow on the top Fire and/or Electrical Shock Hazard ridge of the filter indicates the direction of Do not operate with a clogged exhaust air flow.
-
Page 20: Powermate ® Care
POWERMATE CARE ® Always follow all safety precautions when performing maintenance to the PowerMate ® WARNING Electrical Shock Or Personal Injury Hazard Always turn off and unplug vacuum cleaner before performing maintenance to the vacuum cleaner. Failure to do so could result in electrical shock or personal injury from vacuum cleaner suddenly starting. - Page 21 TO CLEAN BRUSHROLL: TO REPLACE BELT NOTE: In order to keep cleaning efficiency 1. Install new belt over motor drive, then high and to prevent damage to your vacu- over belt path. um cleaner, the brushroll must be cleaned NOTE: See REPLACEMENT PARTS for part every time the belt is changed.
- Page 22 BRUSHROLL SERVICING TO REPLACE BRUSHROLL ASSEMBLY WARNING 1. Remove the floor brush from the Electrical Shock Or Personal Injury PowerMate ® Hazard 2. Remove PowerMate cover, belt and ® Always turn off and unplug vacuum brushroll assembly. See “To Remove Belt” in cleaner before performing maintenance BELT CHANGING AND BRUSHROLL to the vacuum cleaner.
-
Page 23: Troubleshooting
TROUBLESHOOTING Review this table to find do-it-yourself solutions for minor performance problems. Any other service needed should be performed by a Kenmore or other qualified service agent. WARNING Always turn off and unplug vacuum cleaner before performing maintenance to the vacuum cleaner. - Page 24 PROBLEM POSSIBLE CAUSE POSSIBLE SOLUTION CHECK BAG Indicator 1. Full or clogged dust bag. 1. Change bag. activates. 2. Dirty filters. 2. Clean/change filters. 3. Blocked airflow passage. 3. Clear blockage from airflow passage. 4. Certain attachment tools. 4. This is normal. Light should go off when tool is removed.
Need help?
Do you have a question about the BC4026 and is the answer not in the manual?
Questions and answers