Table of Contents
Advertisement
1.
Camera Introduction ....................................................................................................................... 2
Device Overview .................................................................................................................................... 2
Status Indicator ...................................................................................................................................... 3
Charge camera....................................................................................................................................... 3
2.
Setup and Installation ..................................................................................................................... 3
Set up the Camera ................................................................................................................................ 3
Install the camera .................................................................................................................................. 7
3.
View Your camera ............................................................................................................................ 9
Adjust Device list ................................................................................................................................... 9
Multiple Views ...................................................................................................................................... 10
Live video ............................................................................................................................................... 11
Manually Capture ................................................................................................................................ 12
Manually Record ................................................................................................................................. 13
Full Screen ............................................................................................................................................. 13
2-Way Audio ........................................................................................................................................ 14
4.
Alarm and Detection ..................................................................................................................... 14
Set up Motion detection ................................................................................................................... 15
Alarm Interval ....................................................................................................................................... 15
Human shape detection. .................................................................................................................. 16
Alert Plan ............................................................................................................................................... 16
Set up Detection Area ....................................................................................................................... 17
Set up Push notifications .................................................................................................................. 18
5.
Recording and Playback ............................................................................................................... 19
Micro SD card Recording ................................................................................................................. 19
Cloud storage service ........................................................................................................................ 21
Playback ................................................................................................................................................. 23
Album ..................................................................................................................................................... 25
6.
Camera settings .............................................................................................................................. 26
Camera Name ...................................................................................................................................... 26
Share Arenti Devices with others ................................................................................................... 27
Device information ............................................................................................................................. 29
Installation Guide ................................................................................................................................ 30
Advertisement
Table of Contents
Troubleshooting

Related Manuals for Arenti GO1 W1


Summary of Contents for Arenti GO1 W1
-
Page 1: Table Of Contents
Micro SD card Recording ......................... 19 Cloud storage service ........................21 Playback ..............................23 Album ..............................25 Camera settings ..........................26 Camera Name ............................26 Share Arenti Devices with others ....................27 Device information ..........................29 Installation Guide ..........................30... -
Page 2: Camera Introduction
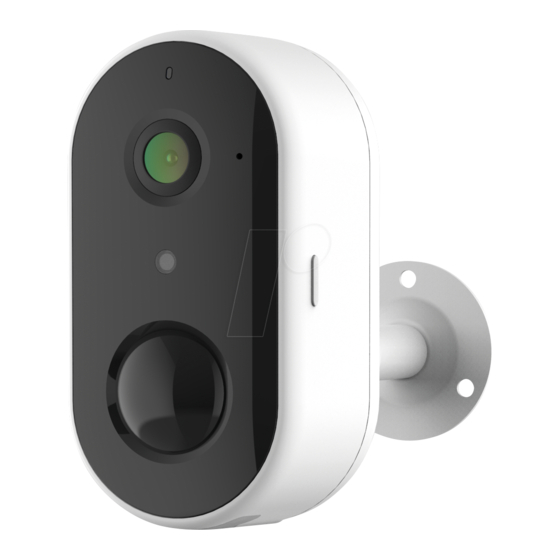
1. Camera Introduction Device Overview GO1 W1 are Outdoor wireless battery cameras that are compact and can be seamlessly integrated into your home. Loaded with smart features, they can do many things like check the live video wherever you are. Or send you customized motion alerts. With unbeatable... -
Page 3: Status Indicator
Status Indicator Front Status Indicator Camera status No light on Not power /stand by Constant blue/slow flashing Working properly/ WiFi Connection succeeded Blue fast flashing Upgrading Red flashing slowly Waiting to connect/ WiFi is not configured Red flashing fast Network abnormal/ WiFi connection failed Charge camera Take off the rubber, plug in the Micro-USB charge the camera. - Page 4 Tip: Do not move the lens of the camera to force it to rotate after turning it on. Connect Arenti APP Scan QR code to download and install the Arenti APP. Also, you can search ‘Arenti on App Store (IOS); Play Store(Android). Download and install Arenti APP. Register and log in.
- Page 5 2. Waiting for camera to boot up around 10s. Make sure the network indicator red flashing slowly and enable it . If not, please reset the camera(move thecamera head and u top find the reset bottom), then wait the network indicator red flashing slowly. Then tap ‘Next’.
- Page 6 4. APP will generate the QR code for camera to scan. Keep your phone 5-8 inches(15- 25cm) from the lens . Please scan the QR code when indicator in red flashing slowly. 5. A tone will be heard when successfully scanned. Then tap ‘Notification tone heard’ After reading QR code, camera get the WiFi information(name/password) from APP QR code, and start to connect the WiFi.
-
Page 7: Install The Camera
connect the WiFi. And APP will find the device and add it to APP. Tap ‘Done’ to finish the process. Note: When adding the camera, ensure the WIFI network is good, the camera is normally turned on, and the indicator light flashes red slowly. After the connection is successful, the indicator light is blue. - Page 8 Mount on the wall: Installation Precautions: 1. The installation wall needs to be able to bear at least 3 times the total weight of the camera. 2. To prevent injury, the unit must be securely fastened to the ceiling or wall by the installation instructions...
-
Page 9: View Your Camera
3. View Your camera Home page privacy Multiple views Play Camera Live video Play camera history video Get technical support Add new device Video audio ON/OFF Manually capture, the image will save to the album Full screen mode Manually record, the recording will save to the album Device Wi-Fi signal Sub-stream mode... -
Page 10: Multiple Views
Press and hold to move the camera to the sequence you need. Then tap Done ,back to the device list. Multiple Views If you have 2 or more cameras added in your Arenti App, you can view multiple streams at the same time. -
Page 11: Live Video
icon , the first 4 cameras will show in one screen. You can slide the screen to check next 4 camera. You can choose camera to 2-way audio, Manual capture, record. Live video Icon to view the camera Live video. Tap the SD to choose SD/HD different resolution. -
Page 12: Manually Capture
Manually Capture icon to capture the image. Image will save in Album. -
Page 13: Manually Record
Manually Record icon to start record the video, tap to stop the record, the record will save in Album. Full Screen icon to check the video in full screen. -
Page 14: 2-Way Audio
2-Way Audio Tap/Press the icon to talk. 4. Alarm and Detection About Motion Detection... -
Page 15: Set Up Motion Detection
Battery camera equipped PIR sensor , It will detect the body heat from 2~10 meters. And you can customize the detection range to meet your needs. Set from Arenti APP-Device (tap device to live video page)-Settings-Alert settings- Motion Detection-Sensitivity Sensitivity... -
Page 16: Human Shape Detection
consume less camera battery. Support to set off/2/5/10 minutes interval according to the actual usage scenario. Human shape detection. To reduce the false alarms.Camera support set the day/night human detection. If enabled, it will alert only when detected the human shape . Note: The arithmetic is not 100% accurate;... -
Page 17: Set Up Detection Area
Set up Detection Area Go to camera live video page- Settings-Alert Settings-Motion Detection-Alarm Area Tap the icon to choose the area you want to detect. Tap the icon to erase to yellow area that you don’t want to detect. Tap ‘Save’ to save the Detection area settings. Note: Camera will only detect the motion in yellow area. -
Page 18: Set Up Push Notifications
Your mobile phone will receive the Alarm notification when camera detect the motion. 2. Set your phone to allow Arenti App to send push notifications. Go to your phone Settings, find Notifications and among the App list find the Arenti App. Make sure the mobile phone allow the Arenti App send notifications. -
Page 19: Recording And Playback
5. Recording and Playback Micro SD card Recording With an Micro SD card inserted the camera can save motion alarm recordings or continuous recordings to the Micro SD card. Choose a suitable SD card 1. Recommend SD card spec: Class 10 and above, Format FAT32, 2G-128G, brand Micro SD Card 2. - Page 20 Set Recording(Micro SD card) 1. Event recording: Arenti APP-Device(tap device to live video page)-Settings-Recording Management- Event recording-Choose the Recording time-10/20/30 sseconds Note: It will only record the motion alarm recordings to the SD card. Each event recordings 10/20/30 seconds SD Card Capacity After you insert the properly SD card, You can check the SD card Capacity/Remaining Capacity information.
-
Page 21: Cloud Storage Service
Cloud storage service Arenti will give away 3 months free event cloud storage service for each camera. Each device needs its own plan, Cloud Storage Service Fee will be charged per device. Note: the rules may change in the future Activate Cloud storage service 1. - Page 22 3. Buy/renew the event cloud storage service plan Tap Buy/Renew Plan icon to order the cloud storage service for your device. Set recording-Cloud storage 1. Event recording: You can use the free trial or buy/renew the event cloud storage service plan to save the motion alarm recordings to the cloud storage 2.
-
Page 23: Playback
Playback 1. Tap the icon to check the history video. According your own plan choose SD card or Cloud to playback. 2. Tap icon to select a date to search the recordings. Tap the icon to scale timeline and slide to find the... - Page 24 recordings you want to replay, waiting for loading and it’ll automatically start to play. 3. Tap ‘Alert’ to search and play alarm recordings. 4. Playback from the Alarm messages.
-
Page 25: Album
Go to Messages-Alarm messages-Device, choose the messages, tap icon to play the recording. Album You can browser all picture/video that captured manually in album. Also you can share the video/picture in album. -
Page 26: Camera Settings
6. Camera settings Camera Name You can rename the camera Arenti APP-Device(Tap device to live video page)-Settings-Device name,after you input the new name,tap OK to save. -
Page 27: Share Arenti Devices With Others
Share Arenti Devices with others 1. Arenti APP-Device (Tap device to live video page)-Settings-Device Share-Add- Share the Qrcode... - Page 28 2. Launch the Arenti APP in another mobile phone and tap Me-Qrcode. Scan the Qrcode to share the device. Also you can manually input the user account to share the device.And accept the shared device on another mobile phone.
-
Page 29: Device Information
Your friends account could access the Live video, recordings in SD card(not allowed via cloud storage) Device information You can check the camera information from: Arenti APP-Device (Tap device to live video page)-Settings-Device information: Network Name, Signal Strength, Virtual ID,IP, Mac Address, Time zone. -
Page 30: Installation Guide
Installation Guide Check from: Arenti APP-Device (Tap device to live video page)-Settings-Device information APP will guide you to install the camera in a good wifi position, to keep camera working properly. -
Page 31: Basic Function
Basic function Network indicator You can turn off the blue network indicator by: Arenti APP-Device(tap device to live video page)-Settings-Basic Function-Network Indicator: Disable... -
Page 32: Speaker Volume
Speaker volume Basic function>Speaker volume Support user adjust camera speaker volume Time setting Support to change the time format switch to 12h/24h... -
Page 33: Screen Flip
Screen Flip If you mount camera on the wall,and the image needs to be flip. You can enable: Screen Flip to flip the image. Night Vision Set the camera’s color mode during different times of the day and night. When night vision is on, the infrared light will turn on also--to get clear Black&White image in the night. -
Page 34: Power Management
modes according to the light conditions. OFF: The camera will capture color images that usually appear during the day. On: The camera will capture black-and-white images that usually appear during the night with the IR LEDs on. Power Management Check the camera Power Supply Mode/Remaining Battery (%) from Power Management. Amazon Echo Show &... -
Page 35: Device Version
After bind, you can check the camera Live video on Amazon Device and Google Home device. Note: User name is the account name (email address/phone number) in Arenti APP and it is case sensitive. Need use lower case. Please do not use the auto-filling, input the information manually. -
Page 36: Delete The Device
If have new firmware to be upgraded, you can tap ‘upgrade’ to upgrade the camera firmware. Note: Whole upgrading process may take 5min, Please do not power off the camera when upgrading, camera will download the firmware from server and upgrade the firmware. Suggest keep camera near the wifi router for the better network to download. -
Page 37: Use Arenti App
7. Use Arenti APP Messages Tap the Messages at the bottom. -
Page 38: Sharing History
Sharing History Tap Sharing History to check the sharing messages Alarm Message Tap Alarm Messages-Device-check the Alarm message sent from camera System Messages Tap System Messages to check the battery low messages. -
Page 39: Scene
Scene No device support now. Coming soon. Account Register (Sign up) 1. Open the Arenti App, click "Sign Up, Choose the country and input email address; enable the "User agreement and Privacy Policy" ,tap ‘Next... - Page 40 2. Set the Nickname and Password, tap ‘Done’. Reset Password 1. Tap the ‘Forget password’ 2. Input the correct Email address/Phone number, tap ‘Next’ 3. Input the verification code you received, and input the new password you want to set. Done...
-
Page 41: App Settings
APP Settings Launch APP tap Me-Settings:You can adjust the APP settings. 1. Pop up when receiving a message After enable and APP is opened, a pop-up page will be displayed when an alarm message is received. - Page 42 Turn on Hardware decoding 3. Call Ringtone 4. Play video in small window. The window will possible always top, when you using other APP on mobile phone. You can keep watch the camera Live video. 5. Message Service resident Enable the ‘Message Service resident ‘, APP will run in the background to facilitete receiving visitor calls and Alarm messages.
- Page 43 6. Clear Cache Tap ‘Clear Cache’- delete Alarm pictures/Temporary Files 7. Deactivate Account Tap to Deactivate Account...
-
Page 44: Faq And Troubleshooting
2. Please ensure the Message service resident (Arenti APP-Me-Settings) is enabled. The APP will Automatically run in the background to facilitate receiving visitor calls and alarm messages. 3. Please ensure notification for Arenti app has been enabled in phone setting. enter the phone system settings-notifications-find "Arenti" and enable notification permissions. -
Page 45: Troubleshooting
3. My camera not working, after powering on/plug in ,there is no indicator light Please try to use the other adapter/cable and check again, if keep no light on, please send the camera SN and order number to support@arenti.com 4. Why does the video always with the circle/buffering? The circle means that the video is loading, and the buffer and delay means that the network is not smooth.
Need help?
Do you have a question about the GO1 W1 and is the answer not in the manual?
Questions and answers